使用 OpenCV-Python 进行特征检测和匹配
在本文中,我们将了解在Python中使用 OpenCV 进行计算机视觉中的特征检测。特征检测是检查图像的重要特征的过程,在这种情况下,图像的特征可以是图像中的边缘、角、脊和斑点。

在 OpenCV 中,有许多方法可以检测图像的特征,每种技术都有自己的优点和缺陷。
注意:我们提供给这些算法的图像应该是黑白的。这有助于算法更多地关注特征。
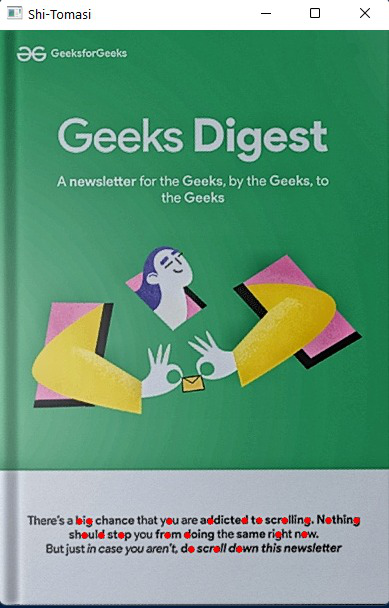
使用中的图像:

方法一:Haris角点检测
Haris 角点检测是一种方法,我们可以通过在图像上滑动滑块来检测图像的角点,通过找到角点,它会应用一个阈值,然后在图像中标记角点。该算法主要用于检测图像的角点。
Syntax:
cv2.cornerHarris(image, dest, blockSize, kSize, freeParameter, borderType)
Parameters:
- Image – The source image to detect the features
- Dest – Variable to store the output image
- Block size – Neighborhood size
- Ksize – Aperture parameter
- Border type: The pixel revealing type.
示例:使用 OpenCV 进行特征检测和匹配
Python3
# Importing the libraries
import cv2
import numpy as np

# Reading the image and converting the image to B/W
image = cv2.imread('book.png')
gray_image = cv2.cvtColor(image, cv2.COLOR_BGR2GRAY)
gray_image = np.float32(gray_image)

# Applying the function
dst = cv2.cornerHarris(gray_image, blockSize=2, ksize=3, k=0.04)

# dilate to mark the corners
dst = cv2.dilate(dst, None)
image[dst > 0.01 * dst.max()] = [0, 255, 0]

cv2.imshow('haris_corner', image)
cv2.waitKey()
Python3
# Importing the libraries
import cv2
import numpy as np

# Reading the image and converting into B?W
image = cv2.imread("book.png")
gray_image = cv2.cvtColor(image, cv2.COLOR_BGR2GRAY)

# Applying the function
corners = cv2.goodFeaturesToTrack(
    gray_image, maxCorners=50, qualityLevel=0.02, minDistance=20)
corners = np.float32(corners)

for item in corners:
    x, y = item[0]
    x = int(x)
    y = int(y)
    cv2.circle(image, (x, y), 6, (0, 255, 0), -1)

# Showing the image
cv2.imshow('good_features', image)
cv2.waitKey()
Python3
# Importing the libraries
import cv2

# Reading the image and converting into B/W
image = cv2.imread('book.jpg')
gray_image = cv2.cvtColor(image, cv2.COLOR_BGR2GRAY)

# Applying the function
sift = cv2.xfeatures2d.SIFT_create()
kp, des = sift.detectAndCompute(gray_image, None)


# Applying the function
kp_image = cv2.drawKeypoints(image, kp, None, color=(
    0, 255, 0), flags=cv2.DRAW_MATCHES_FLAGS_DRAW_RICH_KEYPOINTS)
cv2.imshow('SIFT', kp_image)
cv2.waitKey()
Python3
# Importing the libraries
import cv2

# Reading the image and converting into B/W
image = cv2.imread('book.png')
gray_image = cv2.cvtColor(image, cv2.COLOR_BGR2GRAY)


# Applying the function
fast = cv2.FastFeatureDetector_create()
fast.setNonmaxSuppression(False)


# Drawing the keypoints
kp = fast.detect(gray_image, None)
kp_image = cv2.drawKeypoints(image, kp, None, color=(0, 255, 0))

cv2.imshow('FAST', kp_image)
cv2.waitKey()
Python3
# Importing the libraries
import cv2

# Reading the image and converting into B/W
image = cv2.imread('book.png')
gray_image = cv2.cvtColor(image, cv2.COLOR_BGR2GRAY)

# Applying the function
orb = cv2.ORB_create(nfeatures=2000)
kp, des = orb.detectAndCompute(gray_image, None)

# Drawing the keypoints
kp_image = cv2.drawKeypoints(image, kp, None, color=(0, 255, 0), flags=0)

cv2.imshow('ORB', kp_image)
cv2.waitKey()
输出:

方法2:Shi-Tomasi角点检测
Shi 和 Tomasi 提出了一种不同的角点检测算法,该算法与 Haris 角点检测算法最相似,唯一的区别是我们只能找到图像的 n 个最强角点的核值。当我们只需要图像的有限且非常重要的特征时,这可以提供很大帮助。
Syntax:
cv2.goodFeaturesToTrack(image, maxc, Quality, maxD)
Parameters:
- image – The source image we need to extract the features.
- maxc – Maximum number of corners we want [Negative values gives all the corners]
- Quality – Quality level parameter (preferred value=0.01)
- maxD – Maximum distance (preferred value=10)
示例:使用 OpenCV 进行特征检测和匹配
Python3
# Importing the libraries
import cv2
import numpy as np

# Reading the image and converting into B?W
image = cv2.imread("book.png")
gray_image = cv2.cvtColor(image, cv2.COLOR_BGR2GRAY)

# Applying the function
corners = cv2.goodFeaturesToTrack(
    gray_image, maxCorners=50, qualityLevel=0.02, minDistance=20)
corners = np.float32(corners)

for item in corners:
    x, y = item[0]
    x = int(x)
    y = int(y)
    cv2.circle(image, (x, y), 6, (0, 255, 0), -1)

# Showing the image
cv2.imshow('good_features', image)
cv2.waitKey()
输出:
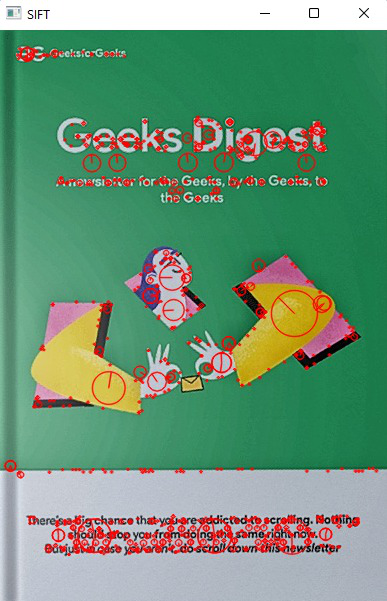
方法三:SIFT(尺度不变特征变换)
而 Haris 和 shi-Tomasi 是检测图像边角的算法。 SIFT是检测与图像和参考的比例和旋转无关的物体的重要算法之一。当我们将现实世界的对象与图像进行比较时,这很有帮助,尽管它与图像的角度和比例无关。该方法将返回我们需要在图像中标记的图像的关键点。
句法:
sift = cv2.xfeatures2d.SIFT_create()
kp, des = sift.detectAndCompute(gray_img, None)
这个函数返回关键点,我们稍后使用 drawkeypoints() 方法来绘制关键点。
注意:图中的圆圈代表关键点,圆圈的大小直接代表关键点的强度。
示例:使用 OpenCV 进行特征检测和匹配
Python3
# Importing the libraries
import cv2

# Reading the image and converting into B/W
image = cv2.imread('book.jpg')
gray_image = cv2.cvtColor(image, cv2.COLOR_BGR2GRAY)

# Applying the function
sift = cv2.xfeatures2d.SIFT_create()
kp, des = sift.detectAndCompute(gray_image, None)


# Applying the function
kp_image = cv2.drawKeypoints(image, kp, None, color=(
    0, 255, 0), flags=cv2.DRAW_MATCHES_FLAGS_DRAW_RICH_KEYPOINTS)
cv2.imshow('SIFT', kp_image)
cv2.waitKey()
输出:
方法4:角点检测的FAST算法
与 SIFT 相比,SURF 速度快,但与移动电话和监控摄像头等实时设备一起使用时速度不快。因此引入了 FAST 算法,计算时间非常快。然而,FAST 只给了我们关键点,我们可能需要使用其他算法(如 SIFT 和 SURF)来计算描述符。使用快速算法,我们可以检测角点和斑点。
Syntax:
fast = cv2.FastFeatureDetector_create()
fast.setNonmaxSuppression(False)
kp = fast.detect(gray_img, None)
示例:使用 OpenCV 进行特征检测和匹配
Python3
# Importing the libraries
import cv2

# Reading the image and converting into B/W
image = cv2.imread('book.png')
gray_image = cv2.cvtColor(image, cv2.COLOR_BGR2GRAY)


# Applying the function
fast = cv2.FastFeatureDetector_create()
fast.setNonmaxSuppression(False)


# Drawing the keypoints
kp = fast.detect(gray_image, None)
kp_image = cv2.drawKeypoints(image, kp, None, color=(0, 255, 0))

cv2.imshow('FAST', kp_image)
cv2.waitKey()
输出:

方法 5:ORB(面向 FAST 和 Rotated Brief)
与 SIFT 和 SURF 相比,ORB 是一种非常有效的图像特征检测方法。与 SIFT 和 SURF 算法相比,ORB 被编程为在图像中找到更少的特征,因为它在比它们更短的时间内检测到非常重要的特征,但与其他检测算法相比,该算法被认为是一种非常有效的算法。
句法:
orb = cv2.ORB_create(nfeatures=2000)
kp, des = orb.detectAndCompute(gray_img, None)
示例:使用 OpenCV 进行特征检测和匹配
Python3
# Importing the libraries
import cv2

# Reading the image and converting into B/W
image = cv2.imread('book.png')
gray_image = cv2.cvtColor(image, cv2.COLOR_BGR2GRAY)

# Applying the function
orb = cv2.ORB_create(nfeatures=2000)
kp, des = orb.detectAndCompute(gray_image, None)

# Drawing the keypoints
kp_image = cv2.drawKeypoints(image, kp, None, color=(0, 255, 0), flags=0)

cv2.imshow('ORB', kp_image)
cv2.waitKey()
输出:
