OpenCV - 反转掩码
在本文中,我们将学习如何在 OpenCV 中反转在图像上创建的蒙版。掩蔽是一种用于从图像中突出显示特定对象的技术。它可以定义为将图像的某些像素设置为某个空值,例如 0(黑色),以便仅突出显示像素值不为 0 的图像部分。
反转掩码基本上就是反转整个过程,即高亮部分的像素变为0,所有其他像素保持非零。为此,我们不按位对每个像素执行转置(反转)其值。
例如,如果我们考虑一个掩码:
[ 0 1 0
  0 0 0
  0 1 0 ]
现在要反转这个掩码,我们对每个值执行按位非操作,即 0 变为 1,反之亦然:
[ 1 0 1
  1 1 1
  1 0 1 ]
为了在 OpenCV 中反转掩码,我们使用cv2.bitwise_not()函数,它对单个像素执行按位非操作。
Syntax: cv2.bitwise_not(masked_image)
Parameters:
- masked_image: It is the image that is to be inverted.
- Return Value: It returns the inverted masked image.
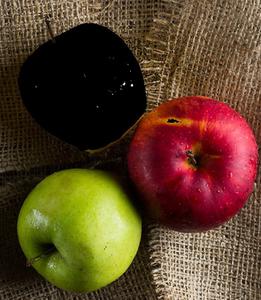
使用的图像:
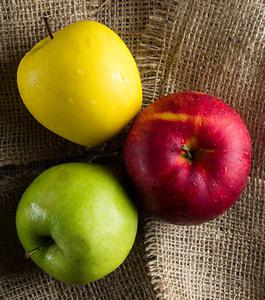
原图
示例 1:在此程序中,我们从读取图像开始。然后我们创建一个“int”数据类型的单位矩阵(5 X 5)的内核。现在,我们将图像转换为 HSV 格式,因为所有操作都只能以 HSV 格式执行。然后我们对图像执行侵蚀、变形和膨胀技术来创建蒙版。现在,为了反转掩码,我们使用 bitwise_not cv2 库的方法来翻转像素值(0 -> 1 和 1 -> 0)。最后,我们显示这个反转的蒙版图像。
Python3
# Python program to explain
# mask inversion on a b/w image.

# importing cv2 and numpy library
import cv2
import numpy as np

# Reading an image
img = cv2.imread('rgy.jpg')

# The kernel to be used for dilation purpose
kernel = np.ones((5, 5), np.uint8)

# converting the image to HSV format
hsv = cv2.cvtColor(img, cv2.COLOR_BGR2HSV)

# defining the lower and upper values of HSV,
# this will detect yellow colour
Lower_hsv = np.array([20, 70, 100])
Upper_hsv = np.array([30, 255, 255])

# creating the mask by eroding,morphing,
# dilating process
Mask = cv2.inRange(hsv, Lower_hsv, Upper_hsv)
Mask = cv2.erode(Mask, kernel, iterations=1)
Mask = cv2.morphologyEx(Mask, cv2.MORPH_OPEN, kernel)
Mask = cv2.dilate(Mask, kernel, iterations=1)

# Inverting the mask by
# performing bitwise-not operation
Mask = cv2.bitwise_not(Mask)

# Displaying the image
cv2.imshow('Mask', Mask)

# waits for user to press any key
# (this is necessary to avoid Python
# kernel form crashing)
cv2.waitKey(0)

# closing all open windows
cv2.destroyAllWindows()
Python3
# Python program to explain
# mask inversion on a RGB image.

# importing cv2 and numpy library
import cv2
import numpy as np

# Reading an image
img = cv2.imread('rgy.jpg')

# The kernel to be used for dilation
# purpose
kernel = np.ones((5, 5), np.uint8)

# converting the image to HSV format
hsv = cv2.cvtColor(img, cv2.COLOR_BGR2HSV)

# defining the lower and upper values
# of HSV, this will detect yellow colour
Lower_hsv = np.array([20, 70, 100])
Upper_hsv = np.array([30, 255, 255])

# creating the mask
Mask = cv2.inRange(hsv, Lower_hsv, Upper_hsv)

# Inverting the mask
mask_yellow = cv2.bitwise_not(Mask)
Mask = cv2.bitwise_and(img, img, mask = mask_yellow)

# Displaying the image
cv2.imshow('Mask', Mask)

# waits for user to press any key
cv2.waitKey(0)

# closing all open windows
cv2.destroyAllWindows()
输出:
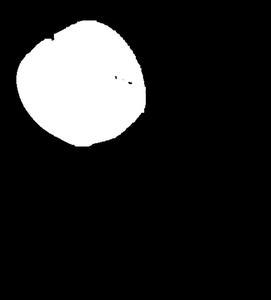
不反转掩码
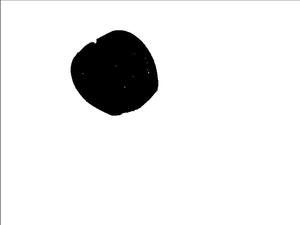
反面罩
示例 2:此程序与上面解释的程序类似。唯一的区别是,我们没有将图像转换为黑白,而是直接将黄色苹果进行遮罩,然后使用 bitwise_not 操作反转创建的遮罩。
蟒蛇3
# Python program to explain
# mask inversion on a RGB image.

# importing cv2 and numpy library
import cv2
import numpy as np

# Reading an image
img = cv2.imread('rgy.jpg')

# The kernel to be used for dilation
# purpose
kernel = np.ones((5, 5), np.uint8)

# converting the image to HSV format
hsv = cv2.cvtColor(img, cv2.COLOR_BGR2HSV)

# defining the lower and upper values
# of HSV, this will detect yellow colour
Lower_hsv = np.array([20, 70, 100])
Upper_hsv = np.array([30, 255, 255])

# creating the mask
Mask = cv2.inRange(hsv, Lower_hsv, Upper_hsv)

# Inverting the mask
mask_yellow = cv2.bitwise_not(Mask)
Mask = cv2.bitwise_and(img, img, mask = mask_yellow)

# Displaying the image
cv2.imshow('Mask', Mask)

# waits for user to press any key
cv2.waitKey(0)

# closing all open windows
cv2.destroyAllWindows()
输出:
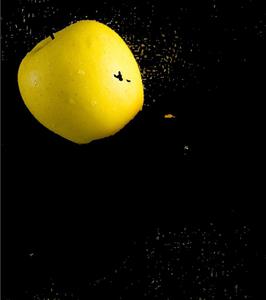
无需反转遮罩
反面罩