Python – 使用 Gradio 创建用于原型机器学习模型的 UI
Gradio是一个开源Python库,它允许您只需几行代码即可为您的 ML 模型、任何 API 或任何任意函数快速创建易于使用、可自定义的 UI 组件。您可以将 GUI 直接集成到Python笔记本中,也可以将链接共享给任何人。
要求 :
例子 :
我们可以使用 Gradio.Interface()函数创建与 Gradio 的接口。
gradio.Interface(self, fn, 输入, 输出, 例子=None, live=False,
capture_session=False,title=None,description=None)
参数 :
- fn:(可调用)包装接口的函数。
- 输入: (Union[str, List[Union[str, AbstractInput]]]) 单个 Gradio 输入组件,或 Gradio 输入组件列表。
- 输出: (Union[str, List[Union[str, AbstractOutput]]]) 单个 Gradio 输出组件,或 Gradio 输出组件列表。
- live: (bool) 界面是否应在更改时自动重新加载。
- capture_session: (bool) 如果为真,则捕获默认图形和会话(Tensorflow 1.x 需要)
- title: (str) 接口的标题;如果提供,则显示在输入和输出组件上方。
- description: (str) 接口的描述;如果提供,则显示在输入和输出组件上方。
- 示例: (List[List[Any]])函数的示例输入;如果提供,则显示在 UI 组件下方,可用于填充界面。应该是嵌套列表,其中外部列表由样本组成,每个内部列表由与每个输入组件对应的输入组成。
界面的 UI 可以通过 gradio.Interface、launch()函数生成。
gradio.Interface.launch(self, share=False)
参数 :
share: (bool) - whether to create a publicly shareable link from your computer for the interface. gradio.Interface() 的输入和输出参数有几个输入和输出组件。Input Components Output Components Microphone Textbox Slider Checkbox CheckboxGroup Radio Dropdown Image Sketchdown Webcam Textbox Label Image Image KeyValues
代码:返回数字阶乘的函数。
Python3
def factorial(integer):
    """ Returns factorial of the given integer"""
    n = int(integer)
    if n<=1:
        return 1
    fact=1
    for i in range(1, n+1):
        fact*=i
    return fact
Python3
import gradio
gradio.Interface(factorial, inputs="text", outputs="text").launch(share=True)
Python3
# imported necessary libraries
import gradio as gr
import tensorflow as tf
import numpy as np
import requests

# loading the model
inception_net = tf.keras.applications.InceptionV3()

# Download human-readable labels.
response = requests.get("https://git.io/JJkYN")
labels = response.text.split("\n")

def classify_image(image):
    """ Returns a dictionary with key as label and values
    as the predicted confidence for that label"""
    # reshaping the image
    image = image.reshape((-1, 299, 299, 3))
    # preprocessing the image for inception_v3
    image = tf.keras.applications.inception_v3.preprocess_input(image)
    # predicting the output
    prediction = inception_net.predict(image).flatten()
    return {labels[i]: float(prediction[i]) for i in range(1000)}

# initializing the input component
image = gr.inputs.Image(shape = (299, 299, 3))
# initializing the output component
label = gr.outputs.Label(num_top_classes = 3)

# launching the interface
gr.Interface(fn = classify_image, inputs = image,
             outputs = label, capture_session = True).launch()
现在,要用渐变接口包装这个函数,在同一个文件中编写以下代码。
Python3
import gradio
gradio.Interface(factorial, inputs="text", outputs="text").launch(share=True)
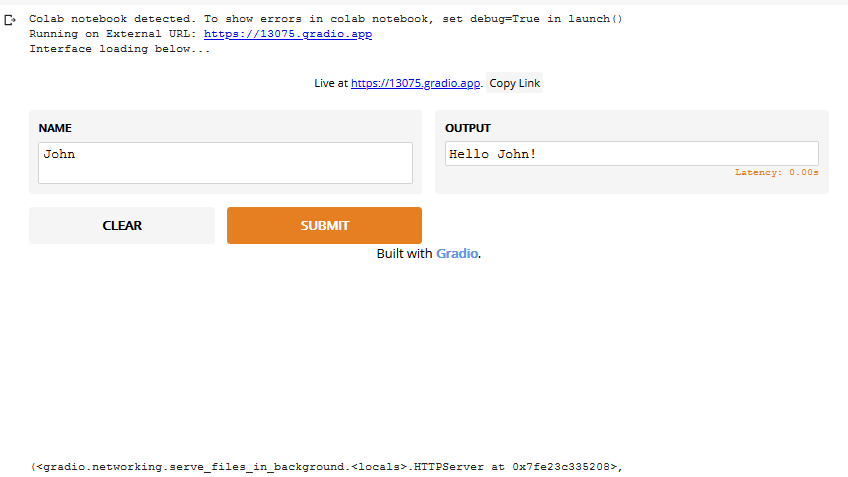
当您在 jupyter notebook 中运行上述代码单元时。它将生成这样的 UI:
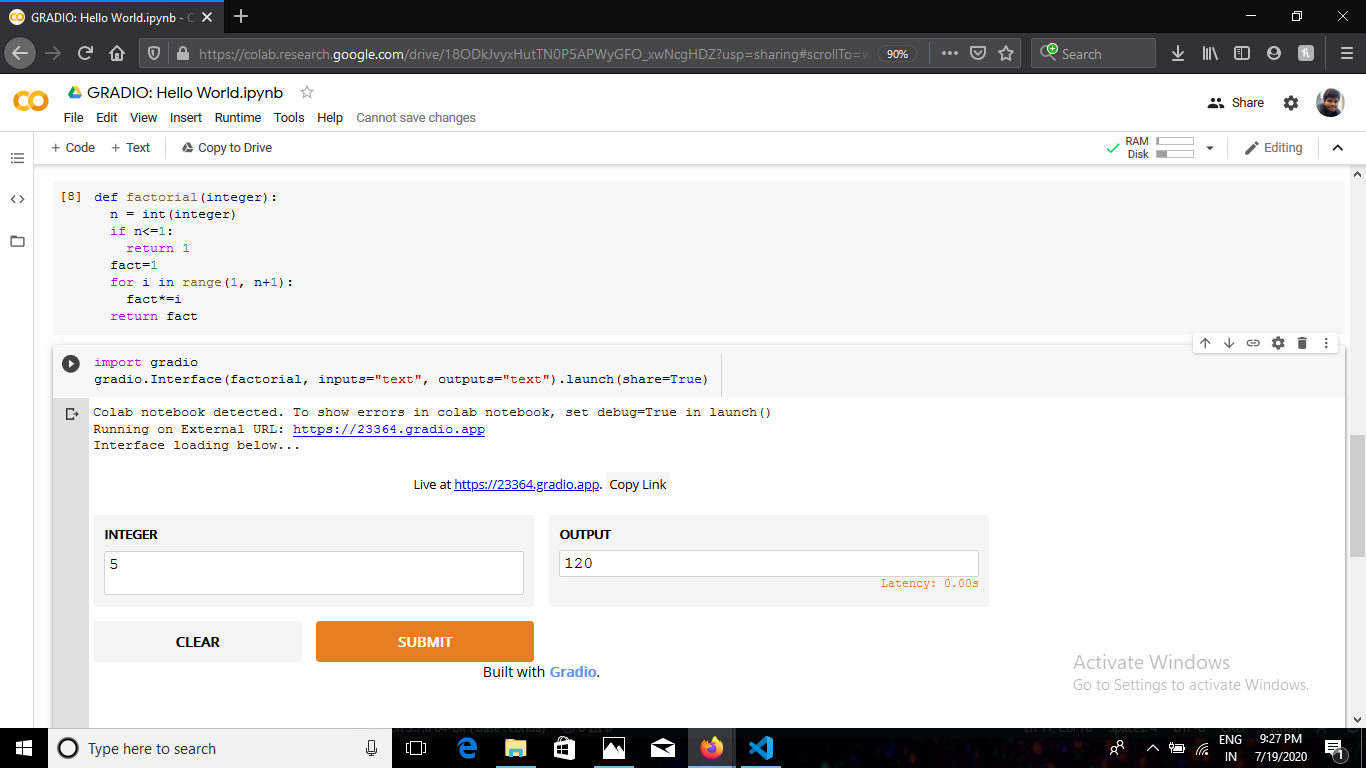
您还可以复制链接并将其分享给任何人,它将在浏览器中打开相同的 UI。现在,我们将向您展示如何为机器学习模型制作界面。
对于演示,我们将使用 tensorflow 加载预训练的 Inception 网络图像分类模型。由于这是一个图像分类模型,我们将使用图像输入接口。我们将使用标签输出接口输出标签字典及其相应的置信度分数。
代码:
Python3
# imported necessary libraries
import gradio as gr
import tensorflow as tf
import numpy as np
import requests

# loading the model
inception_net = tf.keras.applications.InceptionV3()

# Download human-readable labels.
response = requests.get("https://git.io/JJkYN")
labels = response.text.split("\n")

def classify_image(image):
    """ Returns a dictionary with key as label and values
    as the predicted confidence for that label"""
    # reshaping the image
    image = image.reshape((-1, 299, 299, 3))
    # preprocessing the image for inception_v3
    image = tf.keras.applications.inception_v3.preprocess_input(image)
    # predicting the output
    prediction = inception_net.predict(image).flatten()
    return {labels[i]: float(prediction[i]) for i in range(1000)}

# initializing the input component
image = gr.inputs.Image(shape = (299, 299, 3))
# initializing the output component
label = gr.outputs.Label(num_top_classes = 3)

# launching the interface
gr.Interface(fn = classify_image, inputs = image,
             outputs = label, capture_session = True).launch()
当您运行上述代码单元时,它将生成如下 UI:
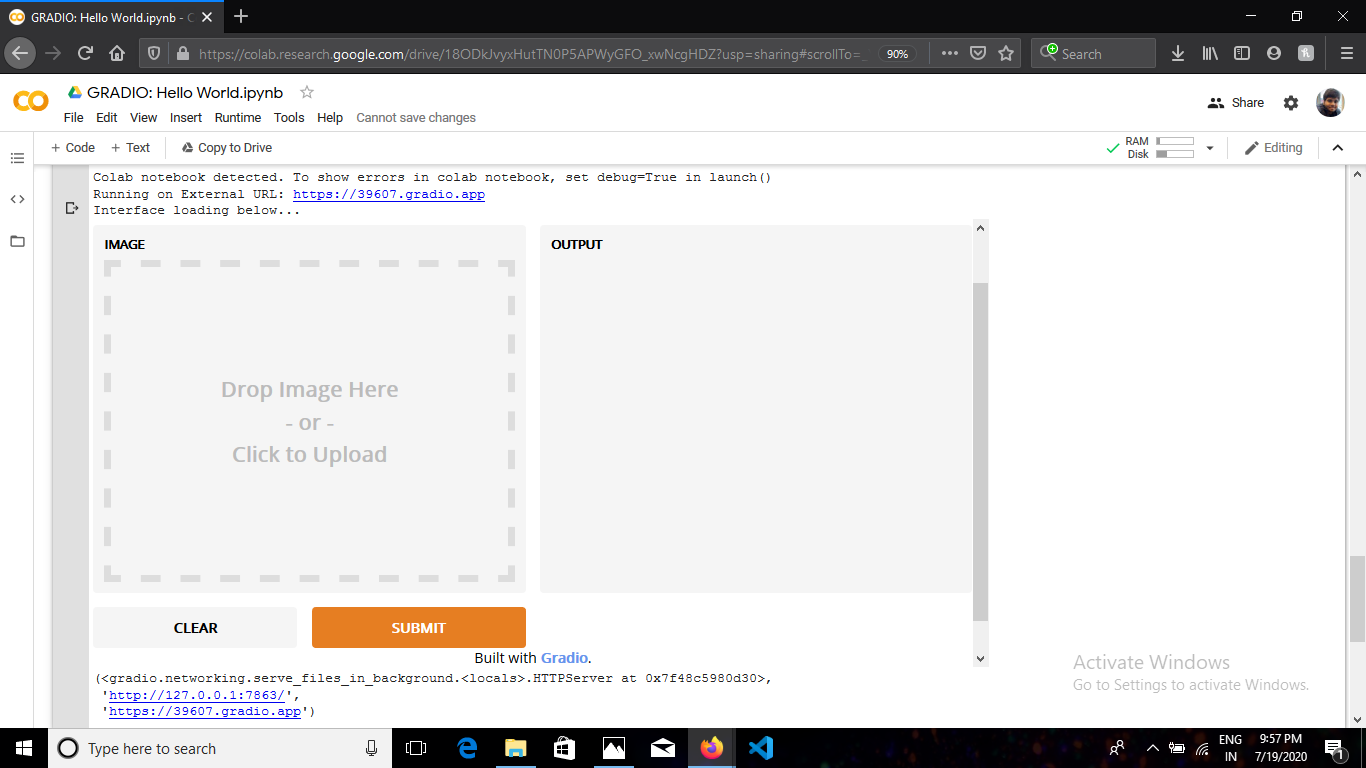
在这里,您可以将图像拖放到 UI 的左侧部分,然后单击提交,您将得到如下结果:

此外,如果您复制链接并将其粘贴到浏览器中,您的界面将如下所示:
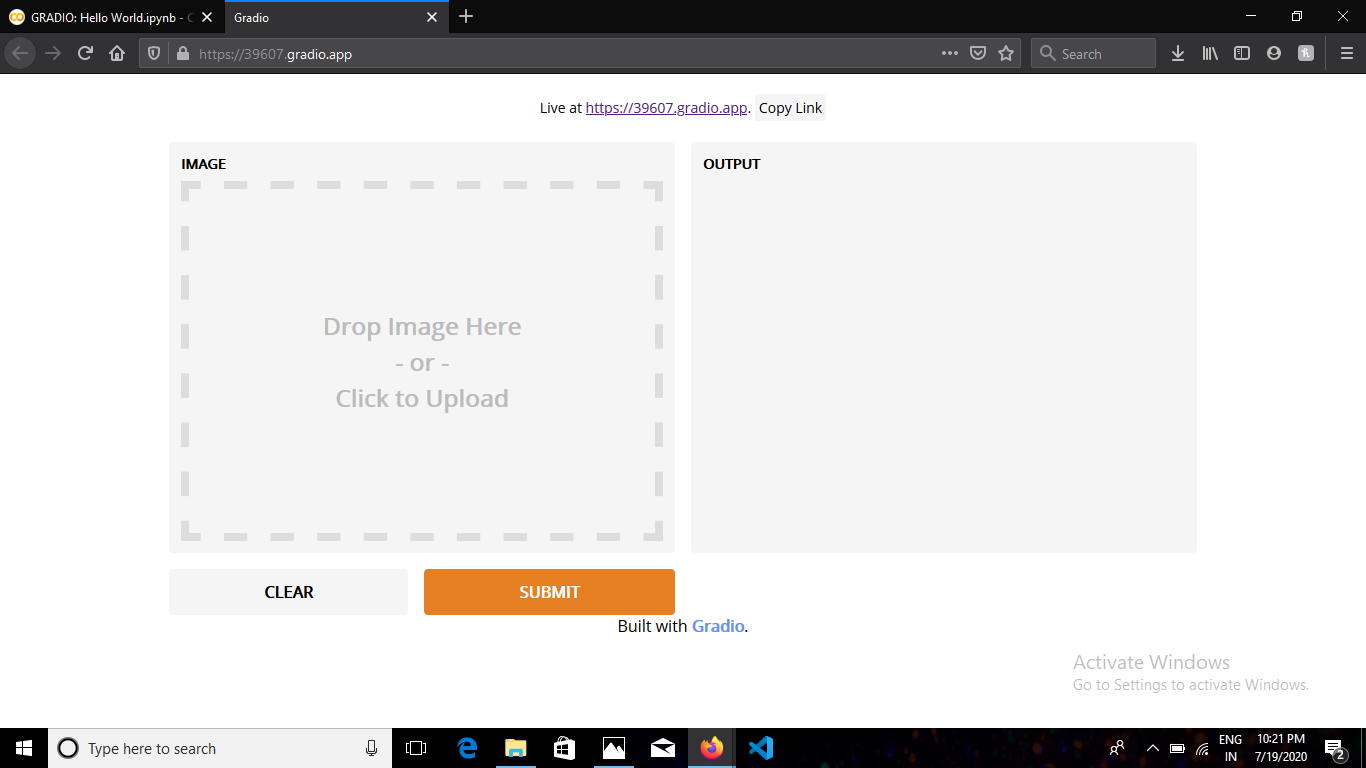
它不是 localhost,因此您可以在任何设备上打开相同的链接。
有关输入和输出组件的更多信息,请查看 Gradio 的文档。
资源: Gradio 的文档