Python Pillow – 在图像上书写文字
在本文中,我们将看到如何使用Python Pillow 模块在图像上编写文本。
安装
此模块未预装Python。因此,要安装它,请在命令行中执行以下命令:
pip install pillow分步实施:
第一步:导入 Pillow 库
要完成此任务,Pillow 库所需的函数是:Image、ImageDraw、ImageFont。所有这些函数都导入为:
from PIL import Image, ImageDraw, ImageFont
第 2 步:打开图像
在这一步中,我们将使用“Image.open('Image_name')”导入并打开我们要添加文本的图像。在给定的情况下,gfg 徽标用于在其上添加文本。图像名称是 gfg_logo.jpeg。所以,写成:
img = Image.open(‘gfg_logo.jpeg’)
第 3 步:图像转换
在这一步中,我们使用“ImageDraw.Draw('用于存储上述步骤中的图像的变量')”将我们的图像转换为可编辑的格式。在给定的情况下,这写为:
d1 = ImageDraw.Draw(img)
第四步:字体样式。
此步骤是可选的。它适用于那些希望他们的文本看起来很酷或时尚的人,因为有人不会选择任何字体样式,然后系统采用默认字体样式。首先从 https://ttfonts.net/font/1004_Mistral.htm 下载字体样式文件。下载文件后使用函数ImageFont.truetype('adddress_of_font_style', font_style)。在给定的情况下,这写为:
myFont = ImageFont.truetype(‘/home/raghav/PycharmProjects/gfg/Mistral.ttf’, 20)
第 5 步:渲染文本
这是决定字体整个属性的主要步骤。这写成:
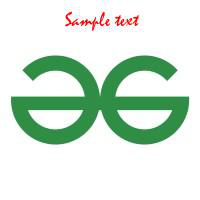
d1.text((65, 10), “Sample text”, fill =(255, 0, 0),font=myFont)
- 起始坐标: Pillow 库使用笛卡尔像素坐标系,左上角为 (0,0)。
- 文本:单引号或双引号之间的字符串
- RGB 格式的文本颜色:对于颜色,您可以向 Google 查询其 RGB 颜色代码并使用。
- 字体样式:从谷歌下载字体并使用它。
第 6 步:显示并保存结果。
最后一步是使用 img.show()函数在屏幕上显示修改后的图像,并使用 img.save(“results.jpeg”) 存储图像。
下面是实现:

输入图像
Python3
# Import Image for basic functionalities like open, save, show
# Import ImageDraw to convert image into editable format
# Import ImageFont to choose the font style
from PIL import Image, ImageDraw, ImageFont

# gfg_logo.jpeg image opened using open
# function and assigned to variable named img
img = Image.open('gfg_logo.jpeg')

# Image is converted into editable form using
# Draw function and assigned to d1
d1 = ImageDraw.Draw(img)

# Font selection from the downloaded file
myFont = ImageFont.truetype('/home/raghav/PycharmProjects/gfg/Mistral.ttf', 20)

# Decide the text location, color and font
d1.text((65, 10), "Sample text", fill =(255, 0, 0),font=myFont)

# show and save the image
img.show()
img.save("results.jpeg")
Python3
# Import Image for basic functionalities like open, save, show
# Import ImageDraw to convert image into editable format
# Import ImageFont to choose the font style
from PIL import Image, ImageDraw, ImageFont

# gfg_logo.jpeg image opened using
# open function and assigned to variable named img
img = Image.open('gfg_logo.jpeg')

# Image is converted into editable form using
# Draw function and assigned to d1
d1 = ImageDraw.Draw(img)

# Font selection from the downloaded file
myFont = ImageFont.truetype('/home/raghav/PycharmProjects/gfg/Mistral.ttf', 20)

# Decide the text location, color and font
d1.text((65, 170), "Sample text", fill =(255, 0, 0),font=myFont)

# show and save the image
img.show()
img.save("results.jpeg")
Python3
# Import Image for basic functionalities like open, save, show
# Import ImageDraw to convert image into editable format
# Import ImageFont to choose the font style
from PIL import Image, ImageDraw, ImageFont

# gfg_logo.jpeg image opened using
# open function and assigned to variable named img
img = Image.open('gfg_logo.jpeg')

# Image is converted into editable form using Draw function
# and assigned to d1
d1 = ImageDraw.Draw(img)

# Font selection from the downloaded file
myFont = ImageFont.truetype('/home/raghav/PycharmProjects/gfg/Mistral.ttf', 20)

# Decide the text location, color and font
d1.text((65, 170), "Sample text", fill =(0, 255, 0),font=myFont)

# show and save the image
img.show()
img.save("results.jpeg")
Python3
# Import Image for basic functionalities like open, save, show
# Import ImageDraw to convert image into editable format
# Import ImageFont to choose the font style
from PIL import Image, ImageDraw, ImageFont

# gfg_logo.jpeg image opened using open function
# and assigned to variable named img
img = Image.open('gfg_logo.jpeg')

# Image is converted into editable form using Draw
# function and assigned to d1
d1 = ImageDraw.Draw(img)

# Font selection from the downloaded file
myFont = ImageFont.truetype('/home/raghav/PycharmProjects/gfg/Mistral.ttf', 20)

# Decide the text location, color and font
d1.text((65, 170), "Sample text 2", fill=(0, 255, 0), font=myFont)

# show and save the image
img.show()
img.save("results.jpeg")
Python3
# Import Image for basic functionalities like open, save, show
# Import ImageDraw to convert image into editable format
# Import ImageFont to choose the font style
from PIL import Image, ImageDraw, ImageFont

# gfg_logo.jpeg image opened using
# open function and assigned to variable named img
img = Image.open('gfg_logo.jpeg')

# Image is converted into editable form using
# Draw function and assigned to d1
d1 = ImageDraw.Draw(img)

# Font selection from the downloaded file
myFont = ImageFont.truetype('/home/raghav/PycharmProjects/gfg/Mistral.ttf', 30)

# Decide the text location, color and font
d1.text((65, 170), "Sample text", fill = (0, 255, 0),font=myFont)

# show and save the image
img.show()
img.save("results.jpeg")
Python3
# Import Image for basic functionalities like open, save, show
# Import ImageDraw to convert image into editable format
# Import ImageFont to choose the font style
from PIL import Image, ImageDraw, ImageFont

# gfg_logo.jpeg image opened using open function and
# assigned to variable named img
img = Image.open('gfg_logo.jpeg')

# Image is converted into editable form using Draw
# function and assigned to d1
d1 = ImageDraw.Draw(img)

# Font selection from the downloaded file
myFont = ImageFont.truetype('/home/raghav/PycharmProjects/gfg/00006_44s.ttf', 30)

# Decide the text location, color and font
d1.text((0, 170), "Sample text", fill =(0, 255, 0),font=myFont)

# show and save the image
img.show()
img.save("results.jpeg")
输出:
修改后的图片
示例 1:要更改文本的位置,请在步骤 5 中更改坐标。
维度从 (65,100) 更改为 (65,170)。因此,文本的位置会下降,因为从 (x,y) 坐标开始,y 坐标的值会增加,如输出所示。
蟒蛇3
# Import Image for basic functionalities like open, save, show
# Import ImageDraw to convert image into editable format
# Import ImageFont to choose the font style
from PIL import Image, ImageDraw, ImageFont

# gfg_logo.jpeg image opened using
# open function and assigned to variable named img
img = Image.open('gfg_logo.jpeg')

# Image is converted into editable form using
# Draw function and assigned to d1
d1 = ImageDraw.Draw(img)

# Font selection from the downloaded file
myFont = ImageFont.truetype('/home/raghav/PycharmProjects/gfg/Mistral.ttf', 20)

# Decide the text location, color and font
d1.text((65, 170), "Sample text", fill =(255, 0, 0),font=myFont)

# show and save the image
img.show()
img.save("results.jpeg")
输出:

更改坐标后的图像
示例 2:要在步骤 5 中再次更改文本的颜色。
枕头上有 RGB 颜色代码 (R,G,B) R 代表红色,G 代表绿色,B 代表蓝色。在上述情况下,R 和 B 值为 0,G 值为 255,即最大值。因此,文本的颜色变为绿色,如输出所示。
蟒蛇3
# Import Image for basic functionalities like open, save, show
# Import ImageDraw to convert image into editable format
# Import ImageFont to choose the font style
from PIL import Image, ImageDraw, ImageFont

# gfg_logo.jpeg image opened using
# open function and assigned to variable named img
img = Image.open('gfg_logo.jpeg')

# Image is converted into editable form using Draw function
# and assigned to d1
d1 = ImageDraw.Draw(img)

# Font selection from the downloaded file
myFont = ImageFont.truetype('/home/raghav/PycharmProjects/gfg/Mistral.ttf', 20)

# Decide the text location, color and font
d1.text((65, 170), "Sample text", fill =(0, 255, 0),font=myFont)

# show and save the image
img.show()
img.save("results.jpeg")
输出:
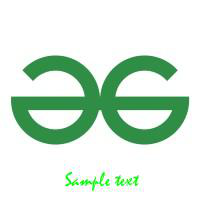
更改文本颜色后的图像
示例 3:要更改文本,请在步骤 5 中更改文本字段。
蟒蛇3
# Import Image for basic functionalities like open, save, show
# Import ImageDraw to convert image into editable format
# Import ImageFont to choose the font style
from PIL import Image, ImageDraw, ImageFont

# gfg_logo.jpeg image opened using open function
# and assigned to variable named img
img = Image.open('gfg_logo.jpeg')

# Image is converted into editable form using Draw
# function and assigned to d1
d1 = ImageDraw.Draw(img)

# Font selection from the downloaded file
myFont = ImageFont.truetype('/home/raghav/PycharmProjects/gfg/Mistral.ttf', 20)

# Decide the text location, color and font
d1.text((65, 170), "Sample text 2", fill=(0, 255, 0), font=myFont)

# show and save the image
img.show()
img.save("results.jpeg")
输出:
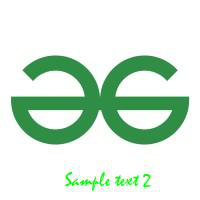
更改文本字段后的图像
示例 4:要更改文本大小,请转到步骤 4 并更改大小。
蟒蛇3
# Import Image for basic functionalities like open, save, show
# Import ImageDraw to convert image into editable format
# Import ImageFont to choose the font style
from PIL import Image, ImageDraw, ImageFont

# gfg_logo.jpeg image opened using
# open function and assigned to variable named img
img = Image.open('gfg_logo.jpeg')

# Image is converted into editable form using
# Draw function and assigned to d1
d1 = ImageDraw.Draw(img)

# Font selection from the downloaded file
myFont = ImageFont.truetype('/home/raghav/PycharmProjects/gfg/Mistral.ttf', 30)

# Decide the text location, color and font
d1.text((65, 170), "Sample text", fill = (0, 255, 0),font=myFont)

# show and save the image
img.show()
img.save("results.jpeg")
输出:
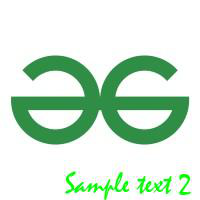
更改文字大小后的图像
示例 5:要更改文本字体,请转到步骤 4。
蟒蛇3
# Import Image for basic functionalities like open, save, show
# Import ImageDraw to convert image into editable format
# Import ImageFont to choose the font style
from PIL import Image, ImageDraw, ImageFont

# gfg_logo.jpeg image opened using open function and
# assigned to variable named img
img = Image.open('gfg_logo.jpeg')

# Image is converted into editable form using Draw
# function and assigned to d1
d1 = ImageDraw.Draw(img)

# Font selection from the downloaded file
myFont = ImageFont.truetype('/home/raghav/PycharmProjects/gfg/00006_44s.ttf', 30)

# Decide the text location, color and font
d1.text((0, 170), "Sample text", fill =(0, 255, 0),font=myFont)

# show and save the image
img.show()
img.save("results.jpeg")
输出:
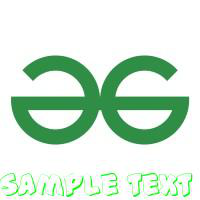
更改字体样式后的图像