- GWT-国际化(1)
- GWT国际化
- 国际化 - 任何代码示例
- 国际化测试(1)
- 国际化测试
- Flutter – 国际化(1)
- Flutter – 国际化(1)
- Flutter – 国际化
- Flutter-国际化
- Flutter-国际化(1)
- Flutter – 国际化
- AngularJS-国际化
- AngularJS-国际化(1)
- Java国际化教程(1)
- Java国际化教程
- CodeIgniter-国际化(1)
- CodeIgniter-国际化
- GWT安装(1)
- GWT安装
- Drupal-国际化
- Drupal-国际化(1)
- Flex-国际化(1)
- Flex-国际化
- Servlet-国际化(1)
- Servlet-国际化
- Symfony-国际化
- Symfony-国际化(1)
- GWT与React(1)
- GWT与React
📅 最后修改于: 2020-10-25 04:45:34 🧑 作者: Mango
GWT提供了三种国际化GWT应用程序的方式,我们将演示在项目中最常用的静态字符串国际化的使用。
| Sr.No. | Technique & Description |
|---|---|
| 1 |
Static String Internationalization This technique is most prevalent and requires very little overhead at runtime; is a very efficient technique for translating both constant and parameterized strings;simplest to implement. Static string internationalization uses standard Java properties files to store translated strings and parameterized messages, and strongly-typed Java interfaces are created to retrieve their values. |
| 2 |
Dynamic String Internationalization This technique is very flexible but slower than static string internationalization. Host page contains the localized strings therefore, applications are not required to be recompiled when we add a new locale. If GWT application is to be integrated with an existing server-side localization system, then this technique is to be used. |
| 3 |
Localizable Interface This technique is the most powerful among the three techniques. Implementing Localizable allows us to create localized versions of custom types. It’s an advanced internationalization technique. |
GWT应用程序国际化的工作流程
第1步-创建属性文件
创建包含要在应用程序中使用的消息的属性文件。在示例中,我们创建了一个HelloWorldMessages.properties文件。
enterName = Enter your name
clickMe = Click Me
applicationTitle = Application Internationalization Demonstration
greeting = Hello {0}
创建包含特定于语言环境的转换值的属性文件。在示例中,我们创建了一个HelloWorldMessages_de.properties文件。该文件包含德语翻译。 _de指定德语语言环境,我们将在应用程序中支持德语。
如果要使用Eclipse创建属性文件,则将文件的编码更改为UTF-8 。选择文件,然后右键单击以打开其属性窗口。选择Text file encoding as Other UTF-8 。应用并保存更改。
enterName = Geben Sie Ihren Namen
clickMe = Klick mich
applicationTitle = Anwendung Internationalisierung Demonstration
greeting = Hallo {0}
第2步-将i18n模块添加到模块描述符XML文件
更新模块文件HelloWorld.gwt.xml以包括对德语语言环境的支持
...
步骤3-创建等效于属性文件的接口
通过扩展GWT的Messages接口来创建HelloWorldMessages.java接口,以包括对内部化的支持。它应包含与属性文件中的键相同的方法名称。占位符将替换为String参数。
public interface HelloWorldMessages extends Messages {

   @DefaultMessage("Enter your name")
   String enterName();

   @DefaultMessage("Click Me")
   String clickMe();

   @DefaultMessage("Application Internalization Demonstration")
   String applicationTitle();

   @DefaultMessage("Hello {0}")
   String greeting(String name);
}
步骤4-在UI组件中使用消息界面。
使用HelloWorld中的HelloWorldMessages对象获取消息。
public class HelloWorld implements EntryPoint {

   /* create an object of HelloWorldMessages interface
      using GWT.create() method */
   private HelloWorldMessages messages =
   GWT.create(HelloWorldMessages.class);

   public void onModuleLoad() {
   ...
      Label titleLabel = new Label(messages.applicationTitle());
      //Add title to the application
      RootPanel.get("gwtAppTitle").add(titleLabel);
   ...
   }
}
国际化-完整示例
本示例将带您通过简单的步骤演示GWT应用程序的国际化功能。
请按照以下步骤更新我们在GWT-创建应用程序一章中创建的GWT应用程序–
| Step | Description |
|---|---|
| 1 | Create a project with a name HelloWorld under a package com.tutorialspoint as explained in the GWT – Create Application chapter. |
| 2 | Modify HelloWorld.gwt.xml, HelloWorld.css, HelloWorld.html and HelloWorld.java as explained below. Keep rest of the files unchanged. |
| 3 | Compile and run the application to verify the result of the implemented logic. |
以下是修改后的模块描述符src / com.tutorialspoint / HelloWorld.gwt.xml的内容。
以下是修改后的样式表文件war / HelloWorld.css的内容。
body {
   text-align: center;
   font-family: verdana, sans-serif;
}

h1 {
   font-size: 2em;
   font-weight: bold;
   color: #777777;
   margin: 40px 0px 70px;
   text-align: center;
}
以下是修改后的HTML主机文件war / HelloWorld.html的内容。
Hello World
现在,在src / com.tutorialspoint / client包中创建HelloWorldMessages.properties文件,并将以下内容放入其中
enterName = Enter your name
clickMe = Click Me
applicationTitle = Application Internationalization Demonstration
greeting = Hello {0}
现在,在src / com.tutorialspoint / client包中创建HelloWorldMessages_de.properties文件,并将以下内容放入其中
enterName = Geben Sie Ihren Namen
clickMe = Klick mich
applicationTitle = Anwendung Internationalisierung Demonstration
greeting = Hallo {0}
现在,在src / com.tutorialspoint / client包中创建HelloWorldMessages.java类,并将以下内容放入其中
package com.tutorialspoint.client;
import com.google.gwt.i18n.client.Messages;

public interface HelloWorldMessages extends Messages {
   @DefaultMessage("Enter your name")
   String enterName();

   @DefaultMessage("Click Me")
   String clickMe();

   @DefaultMessage("Application Internationalization Demonstration")
   String applicationTitle();

   @DefaultMessage("Hello {0}")
   String greeting(String name);
}
让我们拥有Java文件src / com.tutorialspoint / HelloWorld.java的以下内容,我们将使用这些内容演示GWT代码的国际化功能。
package com.tutorialspoint.client;

import com.google.gwt.core.client.EntryPoint;
import com.google.gwt.core.client.GWT;

import com.google.gwt.event.dom.client.ClickEvent;
import com.google.gwt.event.dom.client.ClickHandler;
import com.google.gwt.event.dom.client.KeyCodes;
import com.google.gwt.event.dom.client.KeyUpEvent;
import com.google.gwt.event.dom.client.KeyUpHandler;

import com.google.gwt.user.client.Window;
import com.google.gwt.user.client.ui.Button;
import com.google.gwt.user.client.ui.DecoratorPanel;
import com.google.gwt.user.client.ui.HasHorizontalAlignment;
import com.google.gwt.user.client.ui.HorizontalPanel;
import com.google.gwt.user.client.ui.Label;
import com.google.gwt.user.client.ui.RootPanel;
import com.google.gwt.user.client.ui.TextBox;
import com.google.gwt.user.client.ui.VerticalPanel;

public class HelloWorld implements EntryPoint {

   /* create an object of HelloWorldMessages interface
      using GWT.create() method */
   private HelloWorldMessages messages =
   GWT.create(HelloWorldMessages.class);

   public void onModuleLoad() {
      /*create UI */
      final TextBox txtName = new TextBox();
      txtName.setWidth("200");
      txtName.addKeyUpHandler(new KeyUpHandler() {
         @Override
         public void onKeyUp(KeyUpEvent event) {
            if(event.getNativeKeyCode() == KeyCodes.KEY_ENTER){
               Window.alert(getGreeting(txtName.getValue()));
            }
         }
      });
      Label lblName = new Label(messages.enterName() + ": ");

      Button buttonMessage = new Button(messages.clickMe() + "!");

      buttonMessage.addClickHandler(new ClickHandler() {
         @Override
         public void onClick(ClickEvent event) {
            Window.alert(getGreeting(txtName.getValue()));
         }
      });

      HorizontalPanel hPanel = new HorizontalPanel();
      hPanel.add(lblName);
      hPanel.add(txtName);

      VerticalPanel vPanel = new VerticalPanel();
      vPanel.setSpacing(10);
      vPanel.add(hPanel);
      vPanel.add(buttonMessage);
      vPanel.setCellHorizontalAlignment(buttonMessage,
      HasHorizontalAlignment.ALIGN_RIGHT);

      DecoratorPanel panel = new DecoratorPanel();
      panel.add(vPanel);
      Label titleLabel = new Label(messages.applicationTitle());
      //Add title to the application
      RootPanel.get("gwtAppTitle").add(titleLabel);
      // Add widgets to the root panel.
      RootPanel.get("gwtContainer").add(panel);
   }

   public String getGreeting(String name){
      return messages.greeting(name + "!");
   }
}
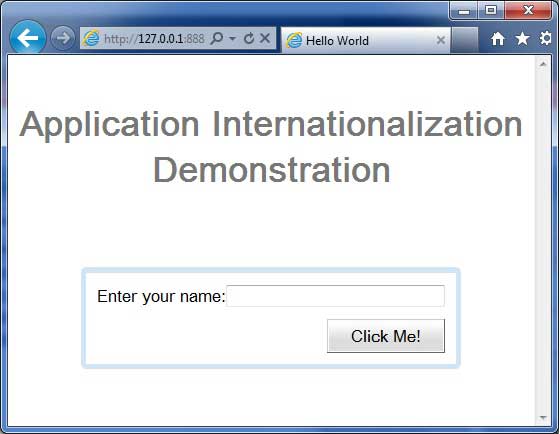
准备好所有更改后,让我们像在GWT-创建应用程序一章中那样,以开发模式编译和运行应用程序。如果您的应用程序一切正常,这将产生以下结果-
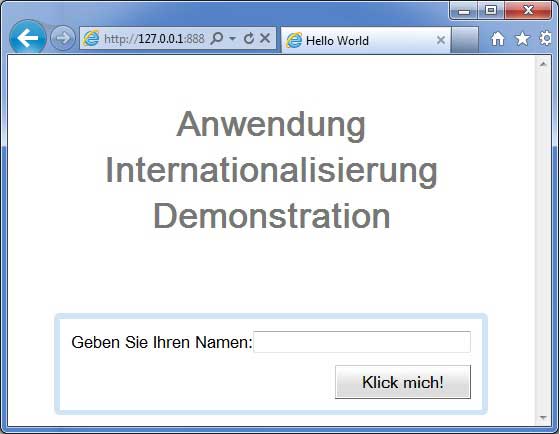
现在更新URL以包含locale = de 。设置URL- http://127.0.0.1 : 8888/HelloWorld.html?gwt.codesvr=127.0.0.1:9997 &locale = de 。如果您的应用程序一切正常,这将产生以下结果-