📌 相关文章
- JSF-JDBC集成
- JSF-JDBC集成(1)
- 讨论JSF
- JSF-概述
- JSF-概述(1)
- Spring和Struts 2集成
- Struts 2和Spring集成(1)
- Spring和Struts 2集成(1)
- Struts 2和Spring集成
- JSF-Ajax(1)
- JSF-Ajax
- JSF-数据表
- JSF-数据表(1)
- Spring和RMI集成
- Spring和RMI集成(1)
- JSF-生命周期(1)
- JSF-生命周期
- JSF-环境设置
- JSF-环境设置(1)
- JSF-体系结构(1)
- JSF-体系结构
- JSF-验证器标签
- JSF-验证器标签(1)
- cookie jsf - Java (1)
- JSF-第一个应用程序
- JSF-第一个应用程序(1)
- GWT与JSF
- GWT与JSF(1)
- Hibernate和Spring集成示例教程
📜 JSF-Spring集成
📅 最后修改于: 2020-10-23 06:48:41 🧑 作者: Mango
Spring提供了特殊的DelegatingVariableResolver类,以无缝方式将JSF和Spring集成在一起。
在JSF中集成Spring Dependency Injection(IOC)功能需要执行以下步骤。
步骤1:添加DelegatingVariableResolver
在faces-config.xml中添加一个变量解析器条目,以指向弹簧类DelegatingVariableResolver 。
      org.springframework.web.jsf.DelegatingVariableResolver

   ...
步骤2:添加上下文侦听器
在web.xml中添加spring框架提供的ContextLoaderListener和RequestContextListener侦听器。
   ...


         org.springframework.web.context.ContextLoaderListener


         org.springframework.web.context.request.RequestContextListener


   ...
步骤3:定义依赖关系
在applicationContext.xml中定义将用作托管bean中的依赖项的bean。
步骤4:添加依赖关系
DelegatingVariableResolver首先将值查找委托给JSF的默认解析器,然后委托给Spring的WebApplicationContext。这使人们可以轻松地将基于spring的依赖项注入到自己的JSF管理的bean中。
我们在这里将messageService作为基于spring的依赖项注入。
   ...

      userData
      com.tutorialspoint.test.UserData
      request


         messageService
         #{messageService}
步骤5:使用依赖
//jsf managed bean
public class UserData {

   //spring managed dependency
   private MessageService messageService;

   public void setMessageService(MessageService messageService) {
      this.messageService = messageService;
   }

   public String getGreetingMessage() {
      return messageService.getGreetingMessage();
   }
}
应用范例
让我们创建一个测试JSF应用程序以测试spring集成。
| Step | Description |
|---|---|
| 1 | Create a project with a name helloworld under a package com.tutorialspoint.test as explained in the JSF – First Application chapter. |
| 2 | Modify pom.xml as explained below. |
| 3 | Create faces-config.xml in WEB-INF folder as explained below. |
| 4 | Modify web.xml as explained below. |
| 5 | Create applicationContext.xml in WEB-INF folder as explained below. |
| 6 | Create MessageService.java under package com.tutorialspoint.test as explained below. |
| 7 | Create MessageServiceImpl.java under package com.tutorialspoint.test as explained below. |
| 8 | Create UserData.java under package com.tutorialspoint.test as explained below. |
| 9 | Modify home.xhtml as explained below. Keep the rest of the files unchanged. |
| 10 | Compile and run the application to make sure the business logic is working as per the requirements. |
| 11 | Finally, build the application in the form of war file and deploy it in Apache Tomcat Webserver. |
| 12 | Launch your web application using appropriate URL as explained below in the last step. |
pom.xml
   4.0.0
   com.tutorialspoint.test
   helloworld
   war
   1.0-SNAPSHOT
   helloworld Maven Webapp
   http://maven.apache.org


         junit
         junit
         3.8.1
         test


         com.sun.faces
         jsf-api
         2.1.7


         com.sun.faces
         jsf-impl
         2.1.7


         javax.servlet
         jstl
         1.2


         org.springframework
         spring-core
         3.1.2.RELEASE


         org.springframework
         spring-web
         3.1.2.RELEASE


      helloworld


            org.apache.maven.plugins
            maven-compiler-plugin
            2.3.1

               1.6
               1.6


            maven-resources-plugin
            2.6


                  copy-resources
                  validate

                     copy-resources


                     ${basedir}/target/helloworld/resources


                           src/main/resources
                           true
faces-config.xml
         org.springframework.web.jsf.DelegatingVariableResolver


      userData
      com.tutorialspoint.test.UserData
      request

         messageService
         #{messageService}
web.xml
   Archetype Created Web Application


      javax.faces.PROJECT_STAGE
      Development


         org.springframework.web.context.ContextLoaderListener


         org.springframework.web.context.request.RequestContextListener


      Faces Servlet
      javax.faces.webapp.FacesServlet


      Faces Servlet
      *.jsf
applicationContext.xml
MessageService.java
package com.tutorialspoint.test;

public interface MessageService {
   String getGreetingMessage();
}
MessageServiceImpl.java
package com.tutorialspoint.test;

public class MessageServiceImpl implements MessageService {
   private String message;

   public String getGreetingMessage() {
      return message;
   }

   public String getMessage() {
      return message;
   }
   public void setMessage(String message) {
      this.message = message;
   }
}
UserData.java
package com.tutorialspoint.test;

import java.io.Serializable;

public class UserData implements Serializable {

   private static final long serialVersionUID = 1L;
    private MessageService messageService;

   public MessageService getMessageService() {
      return messageService;
   }

   public void setMessageService(MessageService messageService) {
      this.messageService = messageService;
   }

   public String getGreetingMessage() {
      return messageService.getGreetingMessage();
   }
}
home.xhtml
JSF Tutorial!
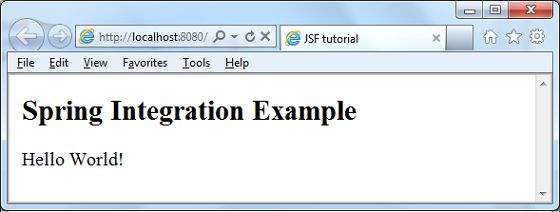
Spring Integration Example
#{userData.greetingMessage}
准备好所有更改后,让我们像在JSF-First Application一章中那样编译并运行该应用程序。如果您的应用程序一切正常,将产生以下结果。