📜  JSF-JDBC集成

📅  最后修改于: 2020-10-23 06:47:51             🧑  作者: Mango


在本文中,我们将演示如何使用JDBC在JSF中集成数据库。

以下是运行此示例的数据库要求。

S.No Software & Description
1 PostgreSQL 9.1

Open Source and lightweight database

2 PostgreSQL JDBC4 Driver

JDBC driver for PostgreSQL 9.1 and JDK 1.5 or above

将PostgreSQL JDBC4驱动程序jar放置在tomcat Web服务器的lib目录中。

数据库SQL命令

create user user1;
create database testdb with owner = user1;

CREATE TABLE IF NOT EXISTS authors (
    id int PRIMARY KEY, 
    name VARCHAR(25)
);

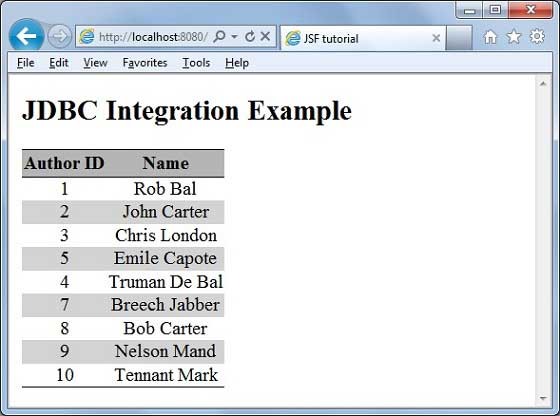
INSERT INTO authors(id, name) VALUES(1, 'Rob Bal');
INSERT INTO authors(id, name) VALUES(2, 'John Carter');
INSERT INTO authors(id, name) VALUES(3, 'Chris London');
INSERT INTO authors(id, name) VALUES(4, 'Truman De Bal');
INSERT INTO authors(id, name) VALUES(5, 'Emile Capote');
INSERT INTO authors(id, name) VALUES(7, 'Breech Jabber');
INSERT INTO authors(id, name) VALUES(8, 'Bob Carter');
INSERT INTO authors(id, name) VALUES(9, 'Nelson Mand');
INSERT INTO authors(id, name) VALUES(10, 'Tennant Mark');

alter user user1 with password 'user1';

grant all on authors to user1;

应用范例

让我们创建一个测试JSF应用程序以测试JDBC集成。

Step Description
1 Create a project with a name helloworld under a package com.tutorialspoint.test as explained in the JSF – First Application chapter.
2 Create resources folder under src → main folder.
3 Create css folder under src → main → resources folder.
4 Create styles.css file under src → main → resources → css folder.
5 Modify styles.css file as explained below.
6 Modify pom.xml as explained below.
7 Create Author.java under package com.tutorialspoint.test as explained below.
8 Create UserData.java under package com.tutorialspoint.test as explained below.
9 Modify home.xhtml as explained below. Keep the rest of the files unchanged.
10 Compile and run the application to make sure the business logic is working as per the requirements.
11 Finally, build the application in the form of war file and deploy it in Apache Tomcat Webserver.
12 Launch your web application using appropriate URL as explained below in the last step.

styles.css

.authorTable {   
   border-collapse:collapse;
   border-bottom:1px solid #000000;
}

.authorTableHeader {
   text-align:center;
   background:none repeat scroll 0 0 #B5B5B5;
   border-bottom:1px solid #000000;
   border-top:1px solid #000000;
   padding:2px;
}

.authorTableOddRow {
   text-align:center;
   background:none repeat scroll 0 0 #FFFFFFF;    
}

.authorTableEvenRow {
   text-align:center;
   background:none repeat scroll 0 0 #D3D3D3;
}

pom.xml


   4.0.0
   com.tutorialspoint.test
   helloworld
   war
   1.0-SNAPSHOT
   helloworld Maven Webapp
   http://maven.apache.org


         junit
         junit
         3.8.1
         test


         com.sun.faces
         jsf-api
         2.1.7


         com.sun.faces
         jsf-impl
         2.1.7


         javax.servlet
         jstl
         1.2


        postgresql
        postgresql
        9.1-901.jdbc4


      helloworld
      
         
            org.apache.maven.plugins
            maven-compiler-plugin
            2.3.1
            
               1.6
               1.6


            maven-resources-plugin
            2.6
            
               
                  copy-resources
                  validate
                  
                     copy-resources


                     ${basedir}/target/helloworld/resources


                           src/main/resources
                           true


作者.java

package com.tutorialspoint.test;

public class Author {
   int id;
   String name;
   
   public String getName() {
      return name;
   }
   
   public void setName(String name) {
      this.name = name;
   }
   
   public int getId() {
      return id;
   }
   
   public void setId(int id) {
      this.id = id;
   }
}

UserData.java

package com.tutorialspoint.test;

import java.io.Serializable;

import java.sql.Connection;
import java.sql.DriverManager;
import java.sql.PreparedStatement;
import java.sql.ResultSet;
import java.sql.SQLException;

import java.util.ArrayList;
import java.util.List;

import javax.faces.bean.ManagedBean;
import javax.faces.bean.SessionScoped;
import javax.faces.event.ComponentSystemEvent;

@ManagedBean(name = "userData", eager = true)
@SessionScoped
public class UserData implements Serializable {
   private static final long serialVersionUID = 1L;

   public List getAuthors() {
      ResultSet rs = null;
      PreparedStatement pst = null;
      Connection con = getConnection();
      String stm = "Select * from authors";
      List records = new ArrayList();
      
      try {   
         pst = con.prepareStatement(stm);
         pst.execute();
         rs = pst.getResultSet();

         while(rs.next()) {
            Author author = new Author();
            author.setId(rs.getInt(1));
            author.setName(rs.getString(2));
            records.add(author);                
         }
      } catch (SQLException e) {
         e.printStackTrace();
      }
      return records;
   }

   public Connection getConnection() {
      Connection con = null;
      String url = "jdbc:postgresql://localhost/testdb";
      String user = "user1";
      String password = "user1";
      
      try {
         con = DriverManager.getConnection(url, user, password);
         System.out.println("Connection completed.");
      } catch (SQLException ex) {
         System.out.println(ex.getMessage());
      }
      
      finally {
      }
      return con;
   }
}

home.xhtml


      JSF Tutorial!


JDBC Integration Example

Author ID #{c.id} Name #{c.name}

准备好所有更改后,让我们像在JSF-First Application一章中那样编译并运行该应用程序。如果您的应用程序一切正常,将产生以下结果。

JSF JDBC结果