默认情况下, Flutter从一个 Screen 导航到另一个 Screen 时没有动画。但在本教程中,我们将学习如何为屏幕过渡设置动画。
项目设置
在直接应用到你现有的项目之前,先在一些示例项目中练习代码。对于本教程,我们将命名我们的项目 screen_animation_tutorial。在 VSCode 或 Android Studio 中打开。
之后,我们将制作两个屏幕。第一个屏幕将是开始屏幕,下一个屏幕将是最终屏幕。所以继续在lib文件夹下创建两个dart文件。
主要的。 dart文件代码应如下所示
Dart
import 'package:flutter/material.dart';
import 'package:screen_animation_tutorial/start_screen.dart';

void main() {
  runApp(MyApp());
}

class MyApp extends StatelessWidget {

  // This widget is the root of your application.
  @override
  Widget build(BuildContext context) {
    return MaterialApp(
      title: 'GeeksForGeeks',
      theme: ThemeData(
        primarySwatch: Colors.green,
      ),
      home: StartScreen(),
    );
  }
}
Dart
import 'package:flutter/material.dart';
import 'package:screen_animation_tutorial/final_screen.dart';

class StartScreen extends StatelessWidget {
  const StartScreen({Key? key}) : super(key: key);

  @override
  Widget build(BuildContext context) {
    return Scaffold(
      appBar: AppBar(
        title: Text('GeeksForGeeks'),
      ),
      body: Container(
        color: Colors.yellow[200],
        child: Center(
          child: Column(
            mainAxisAlignment: MainAxisAlignment.center,
            children: [
              Text(
                'Start',
                style: TextStyle(fontSize: 48.0),
              ),
              ElevatedButton(
                onPressed: () {
                  Navigator.push(
                    context,
                    MaterialPageRoute(
                      builder: (_) => FinalScreen(),
                    ),
                  );
                },
                child: Text(
                  'Final',
                  style: TextStyle(
                    fontSize: 32.0,
                    fontWeight: FontWeight.w700,
                  ),
                ),
              ),
            ],
          ),
        ),
      ),
    );
  }
}
Dart
import 'package:flutter/material.dart';

class FinalScreen extends StatelessWidget {
  const FinalScreen({Key? key}) : super(key: key);

  @override
  Widget build(BuildContext context) {
    return Scaffold(
      appBar: AppBar(
        title: Text('GeeksForGeeks'),
      ),
      body: Container(
        color: Colors.red[200],
        child: Center(
          child: Text(
            'Final',
            style: TextStyle(fontSize: 48.0),
          ),
        ),
      ),
    );
  }
}
Dart
onPressed: () {
  Navigator.push(
    context,
    MaterialPageRoute(
      builder: (_) => FinalScreen(),
    ),
  );
},
Dart
PageRouteBuilder(
  pageBuilder: (BuildContext context,
                Animation animation,
                Animation secondaryAnimation) {},
  ),
);
Dart
pageBuilder: (BuildContext context,
              Animation animation,
              Animation secondaryAnimation) {
  return FinalScreen();
},
Dart
transitionsBuilder:
    (context, animation, secondaryAnimation, child) {
},
Dart
transitionsBuilder:
(context, animation, secondaryAnimation, child) {
  return ScaleTransition(
    alignment: Alignment.center,
    scale: Tween(begin: 0.1, end: 1).animate(
      CurvedAnimation(
        parent: animation,
        curve: Curves.bounceIn,
      ),
    ),
    child: child,
  );
},
Dart
transitionDuration: Duration(seconds: 2),Dart
import 'package:flutter/material.dart';
import 'package:screen_animation_tutorial/final_screen.dart';

class StartScreen extends StatelessWidget {
  const StartScreen({Key? key}) : super(key: key);

  @override
  Widget build(BuildContext context) {
    return Scaffold(
      appBar: AppBar(
        title: Text('GeeksForGeeks'),
      ),
      body: Container(
        color: Colors.yellow[200],
        child: Center(
          child: Column(
            mainAxisAlignment: MainAxisAlignment.center,
            children: [
              Text(
                'Start',
                style: TextStyle(fontSize: 48.0),
              ),
              ElevatedButton(
                onPressed: () {
                  Navigator.push(
                    context,
                    PageRouteBuilder(
                      transitionsBuilder:
                          (context, animation, secondaryAnimation, child) {
                        return ScaleTransition(
                          alignment: Alignment.center,
                          scale: Tween(begin: 0.1, end: 1).animate(
                            CurvedAnimation(
                              parent: animation,
                              curve: Curves.bounceIn,
                            ),
                          ),
                          child: child,
                        );
                      },
                      transitionDuration: Duration(seconds: 2),
                      pageBuilder: (BuildContext context,
                          Animation animation,
                          Animation secondaryAnimation) {
                        return FinalScreen();
                      },
                    ),
                  );
                },
                child: Text(
                  'Final',
                  style: TextStyle(
                    fontSize: 32.0,
                    fontWeight: FontWeight.w700,
                  ),
                ),
              ),
            ],
          ),
        ),
      ),
    );
  }
} 开始屏幕。dart应该是这样的。
Dart
import 'package:flutter/material.dart';
import 'package:screen_animation_tutorial/final_screen.dart';

class StartScreen extends StatelessWidget {
  const StartScreen({Key? key}) : super(key: key);

  @override
  Widget build(BuildContext context) {
    return Scaffold(
      appBar: AppBar(
        title: Text('GeeksForGeeks'),
      ),
      body: Container(
        color: Colors.yellow[200],
        child: Center(
          child: Column(
            mainAxisAlignment: MainAxisAlignment.center,
            children: [
              Text(
                'Start',
                style: TextStyle(fontSize: 48.0),
              ),
              ElevatedButton(
                onPressed: () {
                  Navigator.push(
                    context,
                    MaterialPageRoute(
                      builder: (_) => FinalScreen(),
                    ),
                  );
                },
                child: Text(
                  'Final',
                  style: TextStyle(
                    fontSize: 32.0,
                    fontWeight: FontWeight.w700,
                  ),
                ),
              ),
            ],
          ),
        ),
      ),
    );
  }
}
这 最终屏幕。dart应该是这样的。
Dart
import 'package:flutter/material.dart';

class FinalScreen extends StatelessWidget {
  const FinalScreen({Key? key}) : super(key: key);

  @override
  Widget build(BuildContext context) {
    return Scaffold(
      appBar: AppBar(
        title: Text('GeeksForGeeks'),
      ),
      body: Container(
        color: Colors.red[200],
        child: Center(
          child: Text(
            'Final',
            style: TextStyle(fontSize: 48.0),
          ),
        ),
      ),
    );
  }
}
运行应用程序。它应该如下所示:
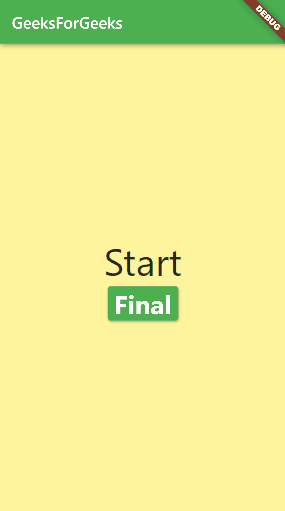
没有动画的屏幕导航
代码
现在我们将实现动画。
所以在start_screen 中。在 dart,我们将导航代码放在ElevatedButton小部件中。
Dart
onPressed: () {
  Navigator.push(
    context,
    MaterialPageRoute(
      builder: (_) => FinalScreen(),
    ),
  );
},
用PageRouteBuilder替换MaterialPageRoute 。它创建了一个委托给构建器回调的路由。
Dart
PageRouteBuilder(
  pageBuilder: (BuildContext context,
                Animation animation,
                Animation secondaryAnimation) {},
  ),
);
在pageBuilder花括号内,我们返回最终屏幕。
Dart
pageBuilder: (BuildContext context,
              Animation animation,
              Animation secondaryAnimation) {
  return FinalScreen();
},
现在在PageRouteBuilder 中添加transitionBuilder 。
Dart
transitionsBuilder:
    (context, animation, secondaryAnimation, child) {
},
现在是最有趣的部分。
在这里,我们将放置我们想要的动画。所以我想要弹出动画。所以我将使用ScaleTransition 。如果你想要滚动动画,你可以使用滑动动画。你可以在Flutter使用一堆动画。来吧,尝试一切。在这里,我将使用 ScaleTranstion。
Dart
transitionsBuilder:
(context, animation, secondaryAnimation, child) {
  return ScaleTransition(
    alignment: Alignment.center,
    scale: Tween(begin: 0.1, end: 1).animate(
      CurvedAnimation(
        parent: animation,
        curve: Curves.bounceIn,
      ),
    ),
    child: child,
  );
},
在这里,我们还可以使用transitionDuration字段使用自定义持续时间。
Dart
transitionDuration: Duration(seconds: 2),
这样我们就完成了教程。动画的基本类型是:
- 淡入淡出
- 大小转换
- 对齐过渡
- 规模转换
- 定位转换
这是start_screen的完整代码。dart,以防您错过或无法跟上。
Dart
import 'package:flutter/material.dart';
import 'package:screen_animation_tutorial/final_screen.dart';

class StartScreen extends StatelessWidget {
  const StartScreen({Key? key}) : super(key: key);

  @override
  Widget build(BuildContext context) {
    return Scaffold(
      appBar: AppBar(
        title: Text('GeeksForGeeks'),
      ),
      body: Container(
        color: Colors.yellow[200],
        child: Center(
          child: Column(
            mainAxisAlignment: MainAxisAlignment.center,
            children: [
              Text(
                'Start',
                style: TextStyle(fontSize: 48.0),
              ),
              ElevatedButton(
                onPressed: () {
                  Navigator.push(
                    context,
                    PageRouteBuilder(
                      transitionsBuilder:
                          (context, animation, secondaryAnimation, child) {
                        return ScaleTransition(
                          alignment: Alignment.center,
                          scale: Tween(begin: 0.1, end: 1).animate(
                            CurvedAnimation(
                              parent: animation,
                              curve: Curves.bounceIn,
                            ),
                          ),
                          child: child,
                        );
                      },
                      transitionDuration: Duration(seconds: 2),
                      pageBuilder: (BuildContext context,
                          Animation animation,
                          Animation secondaryAnimation) {
                        return FinalScreen();
                      },
                    ),
                  );
                },
                child: Text(
                  'Final',
                  style: TextStyle(
                    fontSize: 32.0,
                    fontWeight: FontWeight.w700,
                  ),
                ),
              ),
            ],
          ),
        ),
      ),
    );
  }
}
输出:
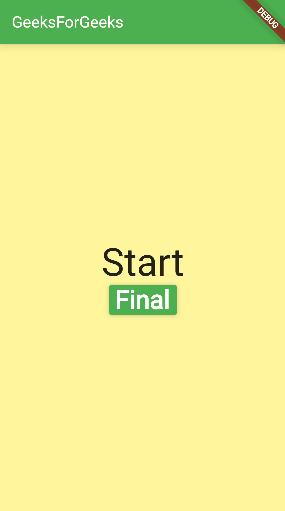
带动画的屏幕导航
希望您喜欢本教程并学到新东西。如果您有任何问题,请在下方评论。