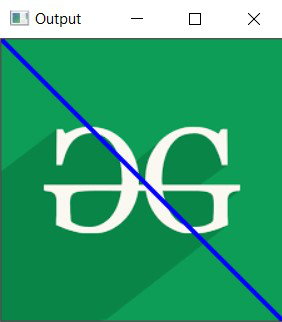
在本文中,我们将讨论如何在C++中使用OpenCV画一条线。这个想法是使用OpenCV C++库中的line()函数。
句法:
line(img, pt1, pt2, color, thickness, lineType, shift)
参数:
- img:这是图像文件。
- start:线段的起点。线段两端的第一个点。它是两个坐标(x坐标,y坐标)的元组。
- end:线段的端点。线段两端的第二个点。它是两个坐标(x坐标,y坐标)的元组。
- color:要绘制的线条的颜色。它是表示3种颜色(B,G,R)的元组。 (蓝色,绿色,红色)。
- 粗细:画出的线的粗细。
- lineType:线的类型。有3种类型的线:
- LINE_4:使用4个连接的Bresenham算法绘制了线。
- LINE_8:使用8个连接的Bresenham算法绘制的线。
- LINE_AA:绘制使用高斯滤波器形成的抗锯齿线。
- nshift:它是点坐标中的小数位数。
返回值:返回图像。
程序1:
下面的程序显示了如何在自形成的背景图像上绘制所有类型的线条:
C++
// C++ program for the above approach
#include
#include

// Library to include for
// drawing shapes
#include
#include
using namespace cv;
using namespace std;

// Driver Code
int main(int argc, char** argv)
{
    // Create a blank image of size
    // (500 x 500) with black
    // background (B, G, R) : (0, 0, 0)
    Mat image(500, 500, CV_8UC3,
              Scalar(0, 0, 0));

    // Check if the image is created
    // successfully
    if (!image.data) {
        cout << "Could not open or find"
             << " the image";

        return 0;
    }

    Point p1(0, 0), p2(100, 0);
    Point p3(200, 0), p4(500, 500);
    int thickness = 2;

    // Line drawn using 8 connected
    // Bresenham algorithm
    line(image, p1, p4, Scalar(255, 0, 0),
         thickness, LINE_8);

    // Line drawn using 4 connected
    // Bresenham algorithm
    line(image, p2, p4, Scalar(0, 255, 0),
         thickness, LINE_4);

    // Antialiased line
    line(image, p3, p4, Scalar(0, 0, 255),
         thickness, LINE_AA);

    // Show our image inside window
    imshow("Output", image);
    waitKey(0);

    return 0;
}
C++
// C++ program for the above approach
#include
#include

// Library to include for
// drawing shapes
#include
#include
using namespace cv;
using namespace std;

// Driver code
int main(int argc, char** argv)
{
    // Path of the image file
    Mat image = imread(
        "C:/Users/harsh/Downloads/geeks.png",
        IMREAD_COLOR);

    // Check if the image is loaded
    // successfully
    if (!image.data) {
        std::cout << "Could not open or "
                     "find the image";
        return 0;
    }

    Point p1(0, 0), p2(250, 250);
    int thickness = 2;

    // Line drawn using 8 connected
    // Bresenham algorithm
    line(image, p1, p2, Scalar(255, 0, 0),
         thickness, LINE_8);

    // Show our image inside window
    imshow("Output", image);
    waitKey(0);

    return 0;
}
输出:

程式2:
下面是显示如何在加载的图像上绘制线条的程序:
C++
// C++ program for the above approach
#include
#include

// Library to include for
// drawing shapes
#include
#include
using namespace cv;
using namespace std;

// Driver code
int main(int argc, char** argv)
{
    // Path of the image file
    Mat image = imread(
        "C:/Users/harsh/Downloads/geeks.png",
        IMREAD_COLOR);

    // Check if the image is loaded
    // successfully
    if (!image.data) {
        std::cout << "Could not open or "
                     "find the image";
        return 0;
    }

    Point p1(0, 0), p2(250, 250);
    int thickness = 2;

    // Line drawn using 8 connected
    // Bresenham algorithm
    line(image, p1, p2, Scalar(255, 0, 0),
         thickness, LINE_8);

    // Show our image inside window
    imshow("Output", image);
    waitKey(0);

    return 0;
}
输出:

要从最佳影片策划和实践问题去学习,检查了C++基础课程为基础,以先进的C++和C++ STL课程基础加上STL。要完成从学习语言到DS Algo等的更多准备工作,请参阅“完整面试准备课程” 。