没有 OpenCV 的图像处理 | Python
我们知道 OpenCV 广泛用于对图像进行操作,并且具有广泛的功能。但是,如果我们想在不使用任何外部库(如 OpenCV)的情况下处理图像文件怎么办。让我们看看如何做到这一点。
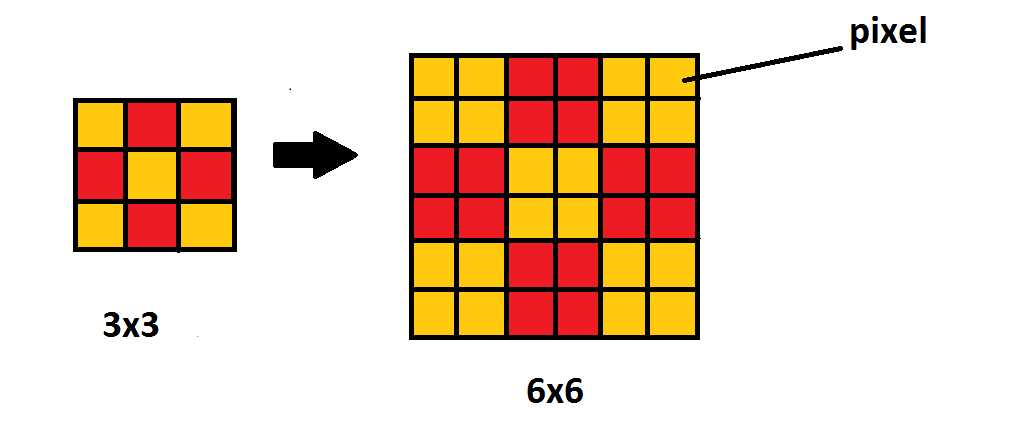
图像缩放(使用最近邻插值):
最近邻插值是最简单的插值方法。该方法简单地确定“最近的”相邻像素并假设它的强度值。
考虑一个小图像,它是 'w' 像素宽 x 'h' 像素高,假设 p>m 和 q>n,我们希望将其大小重新调整为 'p' 像素宽 x 'q' 像素高。现在,我们需要两个缩放常数:
scale_x = p/w
scale_y = q/h现在,我们简单地遍历输出图像中的所有像素,通过按scale_x和scale_y缩放我们的控制变量来寻址要复制的源像素,并对结果缩放后的索引值进行四舍五入。
图示:
3X3 像素的图像(共 9 个像素),现在如果我们想将图像的大小增加到 6X6,那么根据最近邻算法 6/3(即 2)像素应该具有与像素相同的 RGB 值原始图像。
缩放图像的程序:
Python3
# using matplotlib and numpy
import matplotlib.image as img
import numpy as npy
# provide the location of image for reading
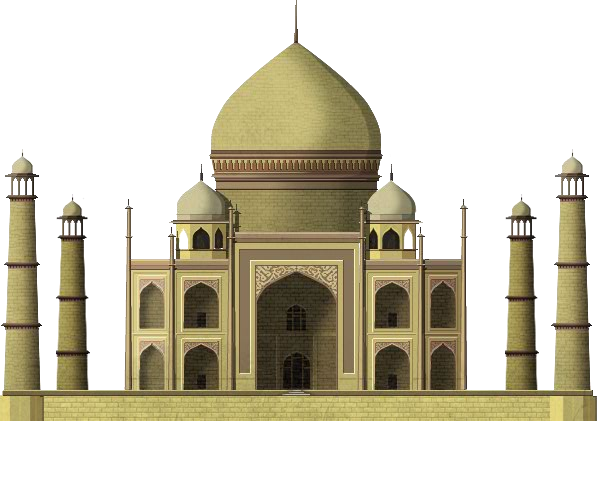
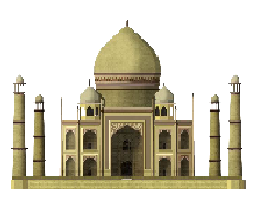
m = img.imread("taj.png");
# determining the length of original image
w, h = m.shape[:2];
# xNew and yNew are new width and
# height of image required
after scaling
xNew = int(w * 1 / 2);
yNew = int(h * 1 / 2);
# calculating the scaling factor
# work for more than 2 pixel
xScale = xNew/(w-1);
yScale = yNew/(h-1);
# using numpy taking a matrix of xNew
# width and yNew height with
# 4 attribute [alpha, B, G, B] values
newImage = npy.zeros([xNew, yNew, 4]);
for i in range(xNew-1):
for j in range(yNew-1):
newImage[i + 1, j + 1]= m[1 + int(i / xScale),
1 + int(j / yScale)]
# Save the image after scaling
img.imsave('scaled.png', newImage);Python3
# using numpy
import numpy as npy

# using matplotlib
import matplotlib.image as img

# using statistics to import mean
# for mean calculation
from statistics import mean

m = img.imread("taj.png")

# determining width and height of original image
w, h = m.shape[:2]

# new Image dimension with 4 attribute in each pixel
newImage = npy.zeros([w, h, 4])
print( w )
print( h )

for i in range(w):
   for j in range(h):
      # ratio of RGB will be between 0 and 1
      lst = [float(m[i][j][0]), float(m[i][j][1]), float(m[i][j][2])]
      avg = float(mean(lst))
      newImage[i][j][0] = avg
      newImage[i][j][1] = avg
      newImage[i][j][2] = avg
      newImage[i][j][3] = 1 # alpha value to be 1

# Save image using imsave
img.imsave('grayedImage.png', newImage)
Python3
# using matplotlib and numpy
import matplotlib.image as img
import numpy as npy

# reading image in variable m
m = img.imread("taj.png")

# determining dimension of image width(w) height(h)
w, h = m.shape[:2]

# required image size after cropping
xNew = int(w * 1 / 4)
yNew = int(h * 1 / 4)
newImage = npy.zeros([xNew, yNew, 4])

# print width height of original image
print(w)
print(h)

for i in range(1, xNew):
    for j in range(1, yNew):
       # cropping start from 100, 100 pixel of original image
        newImage[i, j]= m[100 + i, 100 + j]

# save image
img.imsave('cropped.png', newImage)
输出:
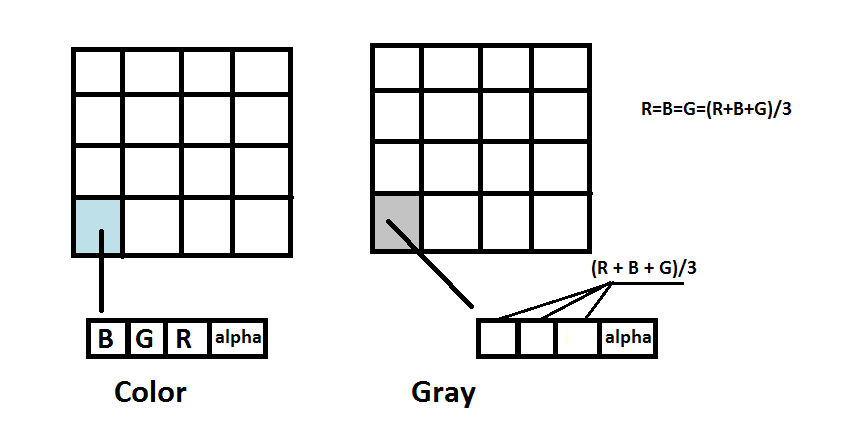
图像的灰度缩放:
使用平均值方法,此方法突出显示像素的强度,而不是显示它包含哪些 RGB 值。当我们计算RGB的平均值并将其分配给像素的RGB值时,由于像素的RGB值相同,因此无法创建任何颜色,因为所有颜色都是由于RGB值的不同比例形成的,因为在这种情况下的比例将是 1:1:1。因此,随后形成的图像将看起来像灰色图像。
图示:
灰度缩放图像的程序:
Python3
# using numpy
import numpy as npy

# using matplotlib
import matplotlib.image as img

# using statistics to import mean
# for mean calculation
from statistics import mean

m = img.imread("taj.png")

# determining width and height of original image
w, h = m.shape[:2]

# new Image dimension with 4 attribute in each pixel
newImage = npy.zeros([w, h, 4])
print( w )
print( h )

for i in range(w):
   for j in range(h):
      # ratio of RGB will be between 0 and 1
      lst = [float(m[i][j][0]), float(m[i][j][1]), float(m[i][j][2])]
      avg = float(mean(lst))
      newImage[i][j][0] = avg
      newImage[i][j][1] = avg
      newImage[i][j][2] = avg
      newImage[i][j][3] = 1 # alpha value to be 1

# Save image using imsave
img.imsave('grayedImage.png', newImage)
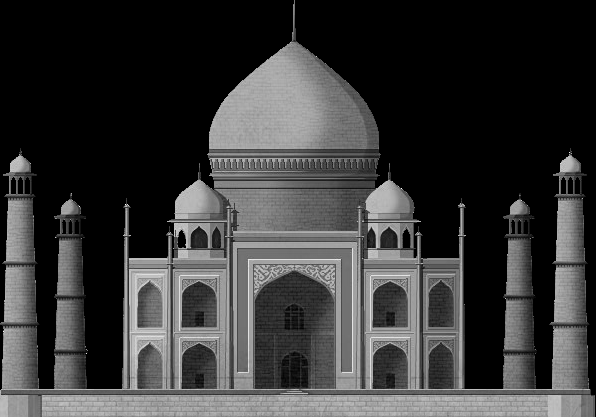
输出:
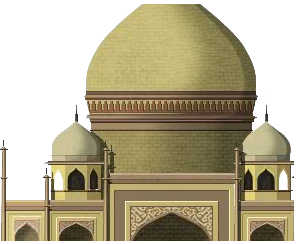
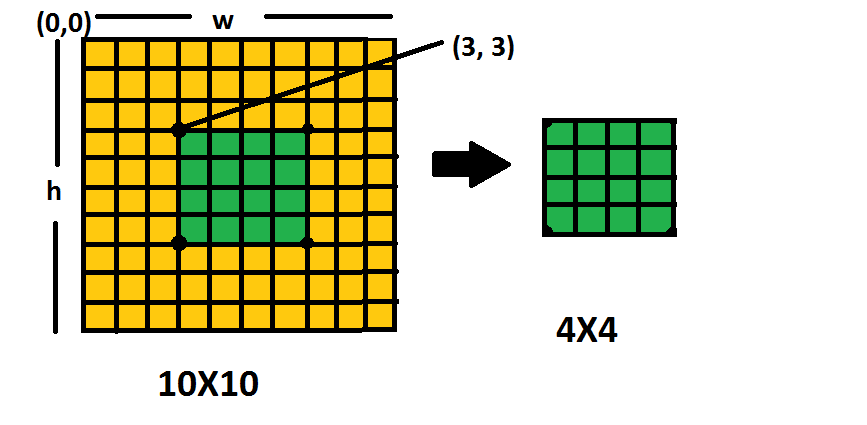
裁剪图像:
裁剪基本上是去除不需要的像素。这可以通过在不同的图像网格中获取所需的像素来完成,该网格的大小在裁剪后是所需的。
考虑一个大小为 10 X 10 像素的图像,如果我们只需要用 4 X 4 像素裁剪图像的中心,那么我们需要从 (3, 3) 开始收集 (10-4)/2 的像素值,直到x 方向4 个像素, y 方向4 个像素。
图示:
裁剪图像的程序:
Python3
# using matplotlib and numpy
import matplotlib.image as img
import numpy as npy

# reading image in variable m
m = img.imread("taj.png")

# determining dimension of image width(w) height(h)
w, h = m.shape[:2]

# required image size after cropping
xNew = int(w * 1 / 4)
yNew = int(h * 1 / 4)
newImage = npy.zeros([xNew, yNew, 4])

# print width height of original image
print(w)
print(h)

for i in range(1, xNew):
    for j in range(1, yNew):
       # cropping start from 100, 100 pixel of original image
        newImage[i, j]= m[100 + i, 100 + j]

# save image
img.imsave('cropped.png', newImage)
输出: