在Python中使用 Keras 进行图像处理
在本文中,我们将在Python中使用 Keras 进行图像处理。 Keras API 是一个深度学习库,提供加载、准备和处理图像的方法。
我们将在本文中介绍以下几点:
- 加载图像
- 处理图像
- 将图像转换为数组,反之亦然
- 更改图像的颜色
- 过程图像数据集
加载图像
在 Keras 中,load_img()函数用于加载图像。使用 load_img() 方法加载的图像是 PIL 对象。某些信息可以从加载的图像中访问,例如图像类型是 PIL 对象,格式是 JPEG,大小是(6000,4000),模式是 RGB 等。我们在整篇文章中都使用狗图像。
Python3
import keras
from keras.preprocessing.image import load_img

# load the image
img = load_img('dog.jpg')

# find more about the image
print(type(img))
print(img.format)
print(img.mode)
print(img.size)

# show the image
img.show()
Python3
img = load_img('dog.jpg')

# change image size
image = img.resize([30, 30])

# print new image size
print(image.size)
Python3
# convert image into array
from keras.preprocessing.image import img_to_array
from keras.preprocessing.image import array_to_img

# convert to numpy array
img_array = img_to_array(img)
print(img_array[0])
print(img_array.dtype)
print(img_array.shape)

# convert back to image
img = array_to_img(img_array)
print(type(img))
Python3
from keras.preprocessing.image import save_img
from keras.preprocessing.image import img_to_array

# load image as as grayscale
img = load_img('dog.jpg', grayscale=True)

# convert image to a numpy array
img_array = img_to_array(img)

# save the image with a new filename
save_img('dog_grayscale.jpg', img_array)

# load the image to confirm it was saved
# correctly
img = load_img('dog_grayscale.jpg')
print(type(img))
print(img.format)
print(img.mode)
print(img.size)
img.show()
Python3
from keras.datasets import mnist

(X_train, Y_train), (X_test, Y_test) = mnist.load_data()

# reshape the image
images = X_train.reshape(-1, 28, 28, 1).astype('float64')

print(images.shape)
print(type(images))
print(images.size)
输出:

调整图像大小
在训练任何模型之前,我们可以对图像执行某些功能,例如调整大小、更改颜色、转换为数组等。要调整图像的形状,在图像上调用 resize() 方法。我们要转换图像的大小应该是可迭代的。
Python3
img = load_img('dog.jpg')

# change image size
image = img.resize([30, 30])

# print new image size
print(image.size)
输出:
(30, 30)我们可以在输出中看到,30 x 30 是图像的新尺寸。
将图像转换为数组
有 img_to_array() 方法将图像转换为数组,array_to_img() 方法将图像数组转换回图像。在下面的示例中,我们只是访问图像数组的第 0个索引。我们可以获得图像数组的形状、类型等信息。当图像数组转换为图像时,它又是一个 PIL 对象。
Python3
# convert image into array
from keras.preprocessing.image import img_to_array
from keras.preprocessing.image import array_to_img

# convert to numpy array
img_array = img_to_array(img)
print(img_array[0])
print(img_array.dtype)
print(img_array.shape)

# convert back to image
img = array_to_img(img_array)
print(type(img))
输出:

更改图像的颜色
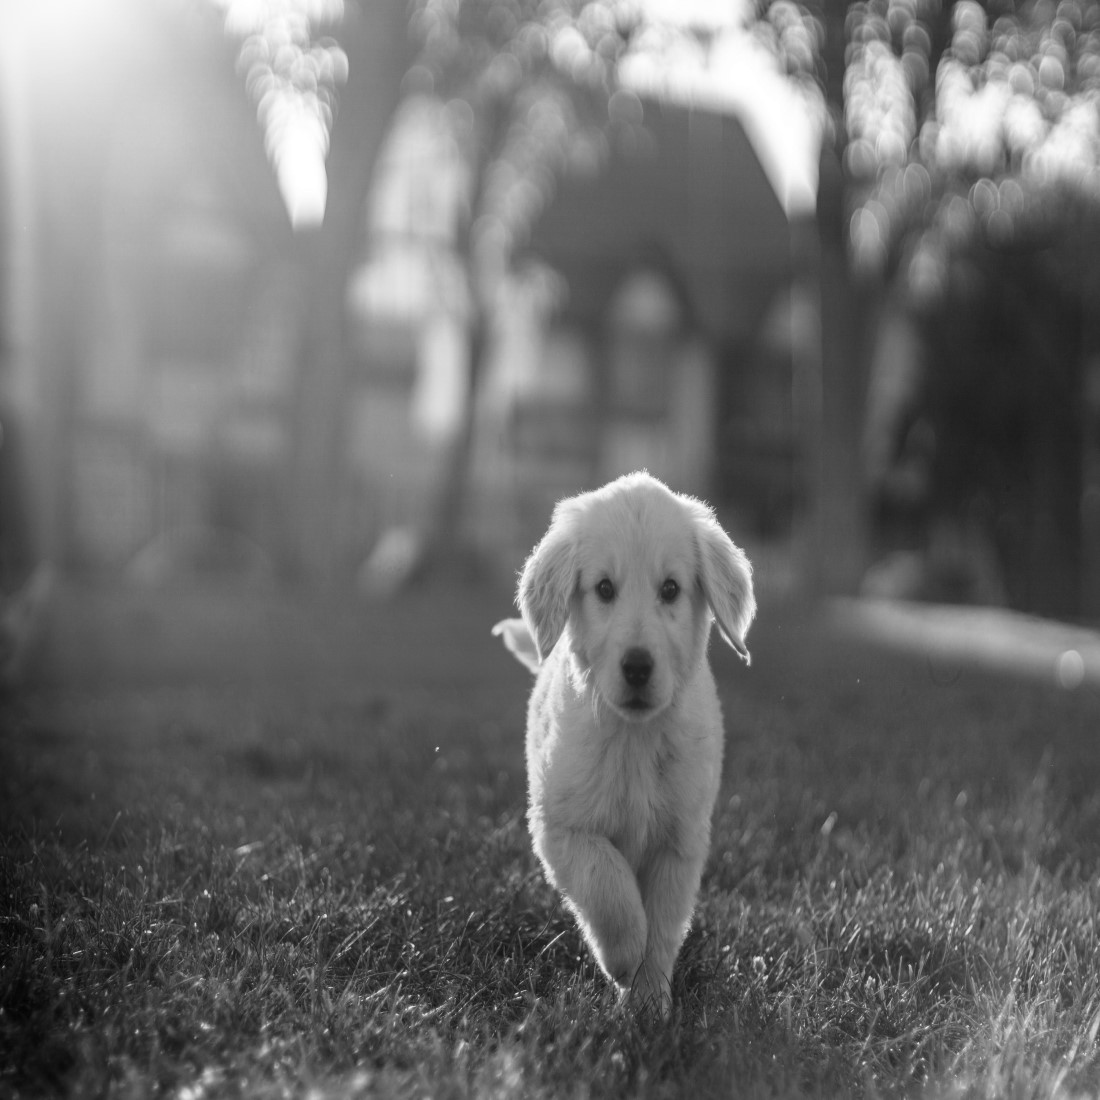
要将彩色图像转换为灰度,只需在 load_img() 方法中设置 grayscale = True 。要保存转换后的图像,我们需要将图像转换为数组,否则 save_img() 方法会抛出错误。将图像转换为灰度图像后,我们看到它仍然显示为 RGB 模式,并且大小相同。
Python3
from keras.preprocessing.image import save_img
from keras.preprocessing.image import img_to_array

# load image as as grayscale
img = load_img('dog.jpg', grayscale=True)

# convert image to a numpy array
img_array = img_to_array(img)

# save the image with a new filename
save_img('dog_grayscale.jpg', img_array)

# load the image to confirm it was saved
# correctly
img = load_img('dog_grayscale.jpg')
print(type(img))
print(img.format)
print(img.mode)
print(img.size)
img.show()
输出:

处理图像数据集
要从图像数据集中加载图像,简单的方法是在图像数据集上使用 load_data()。我们正在使用 Keras 中已经提供的 mnist 数据集。它将返回 x_train、y_train、x_test 和 y_test。 x_train 和 y_train 将用于训练模型,x_test 和 y_test 将用于测试目的。我们可以使用 reshape() 方法对数据集中的所有图像进行整形,并定义哪种类型的图像应该像“float64”或“float32”。
Python3
from keras.datasets import mnist

(X_train, Y_train), (X_test, Y_test) = mnist.load_data()

# reshape the image
images = X_train.reshape(-1, 28, 28, 1).astype('float64')

print(images.shape)
print(type(images))
print(images.size)
输出:

我们在上面的输出中看到,mnist 中的 60000 张图像已被重新整形为 28 x 28 大小,并且图像的类型为 numpy n 维数组。