理查森成熟度模型 – RESTful API
Leonard Richardson 开发了 Richardson 成熟度模型,以根据 API 对 REST 约束的遵守情况对 API 进行分级。具有高 REST 合规性分数的 API 被认为性能更好。
在确定服务的成熟度时,Richardson 强调了三个主要因素。它们包括:
- URI
- HTTP 方法
- HATEOAS(超媒体)
URI:统一资源标识符 (URI) 是 Web 技术用来标识 Web 上的资源的唯一字符序列。
HTTP 方法:超文本传输协议 (HTTP) 是一种用于传输超媒体文档的协议。 HTTP 请求由 HTTP 客户端以请求消息的形式发送到服务器。 HTTP 定义了一组请求方法来指定要对给定资源执行的操作。
- GET: GET 方法检索指定资源的表示。
- POST: POST 请求将数据传输到服务器。
- PUT: PUT 方法替换资源的所有现有表示。
- PATCH: PATCH 请求对资源进行部分更改。
- DELETE: DELETE 方法删除指定的资源。
HATEOAS(作为应用程序状态引擎的超媒体)指的是可发现性。客户端可以仅通过服务器的响应与 REST API 交互。它是一部自纪录片超媒体。客户无需参考任何文档即可与新 API 进行交互。
REST 服务根据 Richardson 成熟度模型分为成熟度级别。
- 0级
- 1级
- 2级
- 3级
0级:痘沼泽
0 级通常也称为 POX(Plain Old XML)。在级别 0,HTTP 仅用作传输协议。对于零成熟度级别的服务,我们使用单个 URL 和单个 HTTP 方法。我们向同一个 URI 发送请求以获取和发布数据。只能使用 POST 方法。例如,一家特定的公司可能有很多客户或用户。对于所有客户,我们只有一个端点。所有操作都是通过 POST 方法执行的。
- 获取数据:POST http://localhost:8080/users
- 发布数据:POST http://localhost:8080/users
级别 1:基于多个 URI 的资源和单个动词
在级别 1 中,每个资源都映射到特定的 URI。但是,只有一种 HTTP 方法 (POST) 用于检索和创建数据。例如,我们需要访问在公司工作的员工。
- 要将员工添加到特定部门:
POST/department//employee - 要访问特定员工:
POST/部门/<部门-id>/员工/<员工-id>
LEVEL 2:多个基于 URI 的资源和 HTTP 动词
在第 2 级,请求使用正确的 HTTP 动词发送。每个请求都会返回一个正确的 HTTP 响应代码。
例如:为了获取公司的用户,我们发送一个带有 URI 的请求
http://localhost:8080/users 和服务器发送正确的响应 200 OK。
第 3 级:仇恨
3级是最高的。它结合了 2 级和 HATEOS。它有助于自我记录。 HATEOS 指导可以找到新资源的地方。想象一家中餐馆作为类比。您点了面条,服务员给您端来想要的菜,解释您刚点的菜以及在哪里可以找到其他可用的菜。因此,我们可以认为想要的菜是 JSON 数据,而其余菜是超媒体。
当 API 达到第 4 级时,我们认为它是 RESTful。其他级别只是成为一个级别的垫脚石。让我们按照 Richardson 的成熟度模型制作一个 RESTFUL API
方法:我们将创建一个名为 gfg-wiki 的 RESTFUL API。我们将插入文章并发送 HTTP 请求。在这个过程中,我们将获取、修改和删除文章。 Robo3T 将用于数据库。 Postman 将用于发送请求。
为了在node.js中创建一个 RESTFUL API,请安装:
节点:一个 JavaScript 运行时环境
- 下载链接:https://nodejs.org/en/download/
Robo3t:一个 MongoDB 图形用户界面。我们将使用 robo3t 创建一个数据库。
- 下载链接:https://robomongo.org/
Postman:一个API开发和测试平台。
- 下载链接:https://www.postman.com/
Visual Studio Code 或(任何代码编辑器)
- 下载链接:https://code.visualstudio.com/download
JSON查看器专业版 Chrome 扩展程序
- 下载链接:https://chrome.google.com/webstore/detail/json-viewer-pro/eifflpmocdbdmepbjaopkkhbfmdg
第一步:新建目录,进入终端,运行以下命令初始化NPM。
npm init -y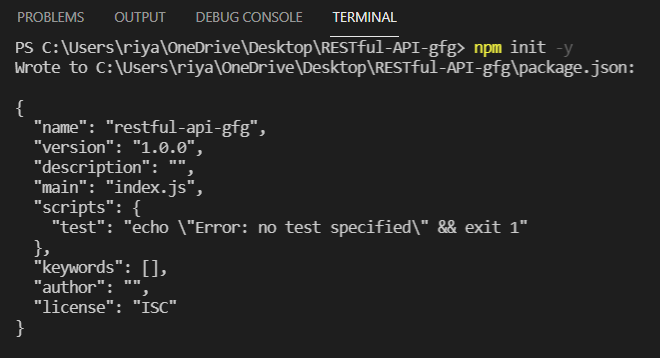
初始化 npm
第二步:安装body-parser、 mongoose、express
- body-parser:一个中间件,负责在处理传入的请求正文之前对其进行解析。
- express: node.js 框架
- mongoose : Mongoose将 MongoDB 连接到 Express Web 应用程序
npm i body-parser mongoose express 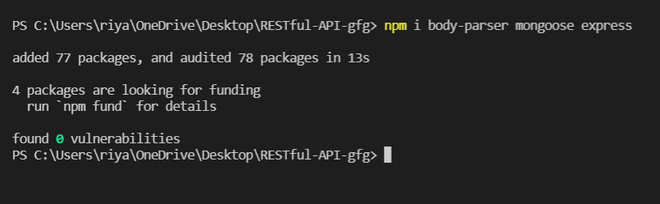
安装包
第三步:在当前目录下创建一个app.js文件并设置服务器。我们将包导入我们的项目并配置我们的服务器。
app.js
// app.js file
// Setting up the server

// jshint esversion:6

const express = require("express");
const bodyParser = require("body-parser");
const mongoose = require('mongoose');

const app = express();

app.use(bodyParser.urlencoded({
    extended: true
}));
app.use(express.static("public"));

app.listen(3000, function() {
    console.log("Server started on port 3000");
});
app.js
const express = require("express");
const bodyParser = require("body-parser");
const mongoose = require('mongoose');

const app = express();

app.use(bodyParser.urlencoded({
    extended: true
}));
app.use(express.static("public"));


// connecting gfg-wiki database to our express application
mongoose.connect("mongodb://localhost:27017/gfg-wiki",
    { useNewUrlParser: true });

// Writing schema for articles collection
const articleSchema = {
    title: String,
    content: String
};

//creating a model around articleSchema
const Article = mongoose.model("Article", articleSchema);


app.listen(3000, function() {
    console.log("Server started on port 3000");
});
app.js
// Fetching all the articles
app.get("/articles", (req, res) => {
    Article.find((err, foundArticles) => {
        if (!err) {
            res.send(foundArticles)
        } else {
            res.send(err);
        }
    })
})
app.js
// Posting a new article
app.post("/articles", (req, res) => {

    const newArticle = new Article({
        title: req.body.title,
        content: req.body.content
    });

    // Saving the article
    newArticle.save(function(err) {
        if (!err) {
            res.send("Successfully added a new article.");
        } else {
            res.send(err);
        }
    });
})
app.js
// Fetching a specific article
app.get("/articles/:articleTitle", function(req, res) {

    Article.findOne({ title: req.params.articleTitle },
        function(err, foundArticle) {
        if (foundArticle) {
            res.send(foundArticle);
        } else {
            res.send("No articles matching that title was found.");
        }
    });
})
app.js
// Replacing a specific article
app.put("/articles/:articleTitle", (req, res) => {
    Article.updateOne({ title: req.params.articleTitle },
        { title: req.body.title, content: req.body.content },
        { overwrite: true },
        function(err) {
            if (!err) {
                res.send("Successfully updated the selected article.");
            }
        }
    );
})
app.js
// Updating an article
app.patch("/articles/:articleTitle", function(req, res) {

    Article.update({ title: req.params.articleTitle },
        { $set: req.body },
        function(err) {
            if (!err) {
                res.send("Successfully updated article.");
            } else {
                res.send(err);
            }
        }
    );
})
app.js
// Deleting all the articles
app.delete("/articles", function(req, res) {

    Article.deleteMany(function(err) {
        if (!err) {
            res.send("Successfully deleted all articles.");
        } else {
            res.send(err);
        }
    });
});
app.js
// app.js file
// Setting up the server

// jshint esversion:6

const express = require("express");
const bodyParser = require("body-parser");
const mongoose = require('mongoose');

const app = express();

app.use(bodyParser.urlencoded({
    extended: true
}));
app.use(express.static("public"));


//Connecting gfg-wiki database to our express application
mongoose.connect("mongodb://localhost:27017/gfg-wiki",
    { useNewUrlParser: true });

// Writing schema for articles collection
const articleSchema = {
    title: String,
    content: String
};

// Creating a model around articleSchema
const Article = mongoose.model("Article", articleSchema);

// Fetching all the articles
app.get("/articles", (req, res) => {
    Article.find((err, foundArticles) => {
        if (!err) {

            res.send(foundArticles)
        } else {
            res.send(err);
        }
    })
})

// Posting a new article
app.post("/articles", (req, res) => {

    const newArticle = new Article({
        title: req.body.title,
        content: req.body.content
    });

    // Saving the article
    newArticle.save(function(err) {
        if (!err) {
            res.send("Successfully added a new article.");
        } else {
            res.send(err);
        }
    });
})

// Fetching a specific article

app.get("/articles/:articleTitle", function(req, res) {

    Article.findOne({ title: req.params.articleTitle },
        function(err, foundArticle) {
        if (foundArticle) {
            res.send(foundArticle);
        } else {
            res.send("No articles matching that title was found.");
        }
    });
})

// Replacing a specific article
app.put("/articles/:articleTitle", function(req, res) {

    Article.update({ title: req.params.articleTitle },
        { title: req.body.title, content: req.body.content },
        { overwrite: true },
        function(err) {
            if (!err) {
                res.send("Successfully updated the selected article.");
            }
        }
    );
})

// Modifying an article
app.patch("/articles/:articleTitle", function(req, res) {

    Article.update({ title: req.params.articleTitle },
        { $set: req.body },
        function(err) {
            if (!err) {
                res.send("Successfully updated article.");
            } else {
                res.send(err);
            }
        }
    );
})

// Deleting all the articles
app.delete("/articles", function(req, res) {

    Article.deleteMany(function(err) {
        if (!err) {
            res.send("Successfully deleted all articles.");
        } else {
            res.send(err);
        }
    });
});


app.listen(3000, function() {
    console.log("Server started on port 3000");
});
第 4 步:在 Robo3T 上创建数据库。考虑一个带有标题和内容的文章数据库。
{
“title” : “gfg”,
“content” : “GeeksforGeeks is a computer science portal for geeks. ”
}
{
“title” : “REST”,
“content” : “REST stands for REpresentational State Transfer. ”
{
“title” : “API”,
“content” : “Application Programming Interface”
}
{
“title” : “richardson-model”,
“content” : ” Grades APIs based on their adherence to REST constraints”
}
{
“title” : “Http”,
“content” : “Hypertext Transfer Protocol (HTTP) is a protocol used
to transfer hypermedia documents. ”
}
- 转到 Robo3t 并创建一个新连接。
- 通过单击新连接按钮 创建一个名为gfg-wiki的数据库。
- 将创建一个数据库“gfg-wiki”。现在单击它并创建一个名为“文章”的新集合
- 要插入文档,请单击文章并选择插入文档。
- 从上面复制每个文档并一张一张插入。
- 要查看所有文档,请单击文章。
如您所见,数据库如下所示:
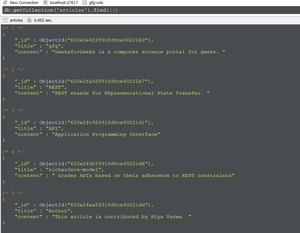
文章数据库
下面展示了如何创建数据库和插入文档。
在 Robo3T 中创建数据库
第 5 步:设置 MongoDB 并为我们的文章编写模式以创建模型。要设置 MongoDB,我们将使用mongoose。我们将我们的应用程序连接到 MongoDB 位置并将数据库名称添加到 URL字符串。默认情况下,MongoDB 使用端口 27017。
mongoose.connect("mongodb://localhost:27017/gfg-wiki", {useNewUrlParser: true});Schema 定义了我们集合的结构。我们将创建一个名为 articleSchema 的模式,它包含两个字段——文章的标题和内容
const articleSchema = {
  title: String,
  content: String
};
现在我们将从 articleSchema 创建一个模型
const Article = mongoose.model("Article", articleSchema);将以下代码添加到 app.js 文件中的现有代码中。
应用程序.js
const express = require("express");
const bodyParser = require("body-parser");
const mongoose = require('mongoose');

const app = express();

app.use(bodyParser.urlencoded({
    extended: true
}));
app.use(express.static("public"));


// connecting gfg-wiki database to our express application
mongoose.connect("mongodb://localhost:27017/gfg-wiki",
    { useNewUrlParser: true });

// Writing schema for articles collection
const articleSchema = {
    title: String,
    content: String
};

//creating a model around articleSchema
const Article = mongoose.model("Article", articleSchema);


app.listen(3000, function() {
    console.log("Server started on port 3000");
});
第 6 步:使用 GET 方法访问所有文章。我们可以通过指定资源的路由和处理请求的回调函数发送获取请求来获取所有文章。
app.get(route, (req,res)=>{
})
要检索所有文章,我们必须找到文章并从数据库中读取它们。
.find({conditions},function(err,results){
//using the result
});
将以下代码添加到现有的 app.js 文件中。
应用程序.js
// Fetching all the articles
app.get("/articles", (req, res) => {
    Article.find((err, foundArticles) => {
        if (!err) {
            res.send(foundArticles)
        } else {
            res.send(err);
        }
    })
})
通过运行以下命令启动您的应用程序
node app.js输出:我们可以在 localhost:3000/articles 访问文章。
检索所有文章
第 7 步:使用 POST 方法创建新文章。我们将创建一篇将添加到数据库中的新文章。在这里,客户端向服务器发送数据。
我们还没有前端,但是我们有一个可以访问我们的数据库的服务器。我们将使用 Postman 测试我们的 API,而不是创建表单或前端。我们的目标是向我们的服务器发送一个发布请求。
我们将使用 post 方法:
app.post(route,(req,res)=>{
    ...
})
一旦客户端发送了 post 请求,我们需要通过 req.body 获取该数据。
前往邮递员并向 localhost:3000/articles 发送发布请求。在 body 选项卡下,将编码更改为 form-url 编码,并在 key 中添加标题和内容,以及表示我们要与请求一起发送的数据的值。Key Value title http verbs content The most common HTTP verbs are POST, GET, PUT, PATCH, and DELETE.
我们需要将这篇文章保存在我们的数据库中。
const =new ({
:,..
});
将以下代码添加到app.js文件中的先前代码中
应用程序.js
// Posting a new article
app.post("/articles", (req, res) => {

    const newArticle = new Article({
        title: req.body.title,
        content: req.body.content
    });

    // Saving the article
    newArticle.save(function(err) {
        if (!err) {
            res.send("Successfully added a new article.");
        } else {
            res.send(err);
        }
    });
})
重新启动服务器并使用邮递员发送发布请求。
输出:转到 Robo3T 并刷新您的收藏以查看添加的文章。现在我们有一个额外的条目。
发送帖子请求以添加新文章
第 8 步:获取特定文章。
我们将使用 findOne 方法从我们的数据库中读取特定文章。
.findone({conditions},(req,res)=>{
 });
在这里,我们将获取标题为 REST 的文章
将以下代码添加到您的 app.js 文件中。
应用程序.js
// Fetching a specific article
app.get("/articles/:articleTitle", function(req, res) {

    Article.findOne({ title: req.params.articleTitle },
        function(err, foundArticle) {
        if (foundArticle) {
            res.send(foundArticle);
        } else {
            res.send("No articles matching that title was found.");
        }
    });
})
输出:我们将在 URL 中指定文章标题以及标题匹配的文章将被显示。
获取特定文章
第 9 步:使用 PUT 方法覆盖文章。
我们想提交一篇文章的新版本。要替换现有文章,我们将发送 put 请求。
app.put(route ,(req,res)=>{
    ...
});
我们将使用Mongoose更新方法更新文章。
覆盖指定我们要替换整篇文章。
.update(
    {conditions},
    {updates},
    {overwrite:true}
    (err,results)=>{
})
将以下代码添加到您的 app.js 文件中
应用程序.js
// Replacing a specific article
app.put("/articles/:articleTitle", (req, res) => {
    Article.updateOne({ title: req.params.articleTitle },
        { title: req.body.title, content: req.body.content },
        { overwrite: true },
        function(err) {
            if (!err) {
                res.send("Successfully updated the selected article.");
            }
        }
    );
})
在这种情况下,我们将标题从 API 改为 Postman,其内容从 Application Programming Interface 改为 Postman 是一个 API 平台。
title: Postman
content: Postman is an API platform
通过向路由 localhost:3000/articles/API 发送 put 请求
如果服务器找到一个标题为 API 的参数,它会将标题替换为新标题,并将内容替换为新标题。
覆盖文章
第 9 步:使用 PATCH 方法更新文章。
我们将通过发送带有我们希望更新的文章标题的补丁请求来更新现有文章。要更新文章,我们必须在正文选项卡中提供要更改的字段。
现在我们只更改一篇文章的一个字段而不是整篇文章,当我们调用 update 方法来更新我们的数据库时,就不需要 overwrite 方法了。要更新文章,我们必须在正文选项卡中提供要更改的字段。
在您的 app.js 文件中添加以下代码以修改文章。
应用程序.js
// Updating an article
app.patch("/articles/:articleTitle", function(req, res) {

    Article.update({ title: req.params.articleTitle },
        { $set: req.body },
        function(err) {
            if (!err) {
                res.send("Successfully updated article.");
            } else {
                res.send(err);
            }
        }
    );
})
输出:它只更新我们提供的字段。 REST 的文章标题更新为 Restful。
更新文章
第 10 步:使用 DELETE 方法删除所有文章。
要从我们的数据库中删除所有文章,我们将使用 deleteMany mongoose方法并从邮递员发送删除请求。
将以下代码添加到您的 app.js 文件中
应用程序.js
// Deleting all the articles
app.delete("/articles", function(req, res) {

    Article.deleteMany(function(err) {
        if (!err) {
            res.send("Successfully deleted all articles.");
        } else {
            res.send(err);
        }
    });
});
输出:我们将向 localhost:3000/articles 发送删除请求以删除我们所有的文章。访问 Robo3T 并刷新您的收藏。如果我们从邮递员那里发送删除请求,我们将不会观察到任何文章。
删除所有文章。
最终的 app.js 文件:
应用程序.js
// app.js file
// Setting up the server

// jshint esversion:6

const express = require("express");
const bodyParser = require("body-parser");
const mongoose = require('mongoose');

const app = express();

app.use(bodyParser.urlencoded({
    extended: true
}));
app.use(express.static("public"));


//Connecting gfg-wiki database to our express application
mongoose.connect("mongodb://localhost:27017/gfg-wiki",
    { useNewUrlParser: true });

// Writing schema for articles collection
const articleSchema = {
    title: String,
    content: String
};

// Creating a model around articleSchema
const Article = mongoose.model("Article", articleSchema);

// Fetching all the articles
app.get("/articles", (req, res) => {
    Article.find((err, foundArticles) => {
        if (!err) {

            res.send(foundArticles)
        } else {
            res.send(err);
        }
    })
})

// Posting a new article
app.post("/articles", (req, res) => {

    const newArticle = new Article({
        title: req.body.title,
        content: req.body.content
    });

    // Saving the article
    newArticle.save(function(err) {
        if (!err) {
            res.send("Successfully added a new article.");
        } else {
            res.send(err);
        }
    });
})

// Fetching a specific article

app.get("/articles/:articleTitle", function(req, res) {

    Article.findOne({ title: req.params.articleTitle },
        function(err, foundArticle) {
        if (foundArticle) {
            res.send(foundArticle);
        } else {
            res.send("No articles matching that title was found.");
        }
    });
})

// Replacing a specific article
app.put("/articles/:articleTitle", function(req, res) {

    Article.update({ title: req.params.articleTitle },
        { title: req.body.title, content: req.body.content },
        { overwrite: true },
        function(err) {
            if (!err) {
                res.send("Successfully updated the selected article.");
            }
        }
    );
})

// Modifying an article
app.patch("/articles/:articleTitle", function(req, res) {

    Article.update({ title: req.params.articleTitle },
        { $set: req.body },
        function(err) {
            if (!err) {
                res.send("Successfully updated article.");
            } else {
                res.send(err);
            }
        }
    );
})

// Deleting all the articles
app.delete("/articles", function(req, res) {

    Article.deleteMany(function(err) {
        if (!err) {
            res.send("Successfully deleted all articles.");
        } else {
            res.send(err);
        }
    });
});


app.listen(3000, function() {
    console.log("Server started on port 3000");
});