Flutter – 使用时区安排本地通知
在本文中,我们将探讨使用Flutter中的 Timezone 包调度本地通知的过程。
本地通知:
Flutter Local Notification 是一个跨平台插件,用于在Flutter应用程序中显示通知。这些通知可以是简单的、计划的或定期的,这些通知可以有自定义声音、无声音、振动或非振动,并且这些通知可以在被点击时做出反应。
预定的本地通知:
本地通知计划为一秒或一分钟或一小时或一天或一个月或一年。通知将仅在预定时间内通知。与其他类型的通知一样,它也可以在点击后发出声音、振动和反应。在此,我们将使用Timezone 包的zonedschedule ()方法。我们也可以使用schedule ()方法实现计划通知,但该方法在flutter_local_notifications: ^9.3.1包中已弃用。所以我们使用zonedschedule () 方法而不是这个方法。
时区:
timezone 包提供IANA 时区数据库。 timezone 包提供了各种功能,例如获取时区的位置、在时区之间转换日期时间等。但我们只会使用zonedschedule ()方法。 zonedschedule()方法安排通知在相对于特定时区的指定日期和时间显示。
好吧,让我们深入了解实现
在进入主要区域之前,我们应该将上述包的一些依赖项添加到pubspec.yaml 文件并保存,保存依赖后将自动执行pubget操作。
dependencies:
  flutter:
    sdk: flutter

  cupertino_icons: ^1.0.2
  flutter_local_notifications: ^9.3.1

  timezone: ^0.8.0
让我们进入主要的编码区域。
在主要实施之前。 dart文件,让我们创建另一个名为notificationservice 的dart文件。 dart来初始化和安排通知。
通知服务。dart实现:
我们应该将两个时区库导入到包含对象的文件中。
import 'package:timezone/timezone.dart' as tz;
import 'package:timezone/data/latest.dart' as tz;之后,我们应该为FlutterLocalNotificationsPlugin() 创建对象。
final FlutterLocalNotificationsPlugin flutterLocalNotificationsPlugin =
      FlutterLocalNotificationsPlugin();
然后我们应该为 android 和 iOS 创建适当的 Notification 初始化设置并初始化它们。
Future initNotification() async {

    // Android initialization
    final AndroidInitializationSettings initializationSettingsAndroid =
        AndroidInitializationSettings('@mipmap/ic_launcher');// should mention the app icon
                                                             // during initialization itself


    // Ios initialization
    final IOSInitializationSettings initializationSettingsIOS =
        IOSInitializationSettings(
      requestAlertPermission: false,
      requestBadgePermission: false,
      requestSoundPermission: false,
    );

    final InitializationSettings initializationSettings =
        InitializationSettings(
            android: initializationSettingsAndroid,
            iOS: initializationSettingsIOS);

    // the initialization settings are initialized after they are setted
    await flutterLocalNotificationsPlugin.initialize(initializationSettings);
} - 初始化之后,可以使用zonedschedule()方法安排通知。
- 在那,我们应该提供通知细节,如标题、描述等。
- Android 和 iOS 有自己的通知细节,就像 android 有频道,所以我们应该给出频道 id、频道名称、重要性、优先级等,我们应该给出 iOS 以及 mac 和 Linux 的具体细节。在此,我们仅针对 android 和 iOS 进行初始化。

Android中的通知通道
- 之后,我们可以使用TZDateTime安排通知以获取现在的确切时间,并为其添加持续时间,例如秒、分钟、小时等。
- 例如,让我们将持续时间设置为2 秒。
Future showNotification(int id, String title, String body) async {
    await flutterLocalNotificationsPlugin.zonedSchedule(
      id,
      title,
      body,
      tz.TZDateTime.now(tz.local).add(Duration(seconds: 1)),
      const NotificationDetails(
        // Android details
        android: AndroidNotificationDetails('main_channel', 'Main Channel',
            channelDescription: "ashwin",
            importance: Importance.max,
            priority: Priority.max),
        // iOS details
        iOS: IOSNotificationDetails(
          sound: 'default.wav',
          presentAlert: true,
          presentBadge: true,
          presentSound: true,
        ),
      ),
      // Type of time interpretation
      uiLocalNotificationDateInterpretation:
          UILocalNotificationDateInterpretation.absoluteTime,
      androidAllowWhileIdle: true,//To show notification even when the app is closed
    );
  }
这 通知服务。dart文件:
Dart
import 'package:flutter/material.dart';
import 'package:flutter_local_notifications/flutter_local_notifications.dart';
import 'package:timezone/timezone.dart' as tz;
import 'package:timezone/data/latest.dart' as tz;

class NotificationService {
  static final NotificationService _notificationService =
      NotificationService._internal();

  factory NotificationService() {
    return _notificationService;
  }

  final FlutterLocalNotificationsPlugin flutterLocalNotificationsPlugin =
      FlutterLocalNotificationsPlugin();

  NotificationService._internal();

  Future initNotification() async {

    // Android initialization
    final AndroidInitializationSettings initializationSettingsAndroid =
        AndroidInitializationSettings('@mipmap/ic_launcher');

    // ios initialization
    final IOSInitializationSettings initializationSettingsIOS =
        IOSInitializationSettings(
      requestAlertPermission: false,
      requestBadgePermission: false,
      requestSoundPermission: false,
    );

    final InitializationSettings initializationSettings =
        InitializationSettings(
            android: initializationSettingsAndroid,
            iOS: initializationSettingsIOS);
    // the initialization settings are initialized after they are setted
    await flutterLocalNotificationsPlugin.initialize(initializationSettings);
  }

  Future showNotification(int id, String title, String body) async {
    await flutterLocalNotificationsPlugin.zonedSchedule(
      id,
      title,
      body,
      tz.TZDateTime.now(tz.local).add(Duration(
          seconds: 1)), //schedule the notification to show after 2 seconds.
      const NotificationDetails(

        // Android details
        android: AndroidNotificationDetails('main_channel', 'Main Channel',
            channelDescription: "ashwin",
            importance: Importance.max,
            priority: Priority.max),
        // iOS details
        iOS: IOSNotificationDetails(
          sound: 'default.wav',
          presentAlert: true,
          presentBadge: true,
          presentSound: true,
        ),
      ),

      // Type of time interpretation
      uiLocalNotificationDateInterpretation:
          UILocalNotificationDateInterpretation.absoluteTime,
      androidAllowWhileIdle:
          true, // To show notification even when the app is closed
    );
  }
}
Dart
import 'package:flutter/material.dart';
import 'package:flutter_local_notifications/flutter_local_notifications.dart';
import 'package:schedule_local_notification/notificationservice.dart';
import 'package:timezone/timezone.dart' as tz;
import 'package:timezone/data/latest.dart' as tz;

void main() {

  // to ensure all the widgets are initialized.
  WidgetsFlutterBinding.ensureInitialized();

  // to initialize the notificationservice.
  NotificationService().initNotification();
  runApp(const MyApp());
}

class MyApp extends StatelessWidget {
  const MyApp({Key? key}) : super(key: key);

  @override
  Widget build(BuildContext context) {
    return MaterialApp(
      title: 'Flutter Demo',
      theme: ThemeData(
        primarySwatch: Colors.green,
      ),
      home: const MyHomePage(title: 'GeeksForGeeks'),
    );
  }
}

class MyHomePage extends StatefulWidget {
  const MyHomePage({Key? key, required this.title}) : super(key: key);

  final String title;

  @override
  _MyHomePageState createState() => _MyHomePageState();
}

class _MyHomePageState extends State {
  TextEditingController Notification_title = TextEditingController();
  TextEditingController Notification_descrp = TextEditingController();

  @override
  void initState() {
    super.initState();
    tz.initializeTimeZones();
  }

  @override
  Widget build(BuildContext context) {

    return Scaffold(
      appBar: AppBar(
        title: Text(widget.title),
      ),
      body: Center(
        child: Column(
          mainAxisAlignment: MainAxisAlignment.center,
          children: [
            Text("GeeksForGeeks"),
            Padding(
              padding: EdgeInsets.all(20),
              child: TextField(
                controller: Notification_title,
                decoration: InputDecoration(
                  border: OutlineInputBorder(),
                  labelText: "Enter Title",
                ),
              ),
            ),
            Padding(
              padding: EdgeInsets.all(20),
              child: TextField(
                controller: Notification_descrp,
                decoration: InputDecoration(
                  border: OutlineInputBorder(),
                  labelText: "Enter Description",
                ),
              ),
            ),
            Padding(
              padding: EdgeInsets.all(20),
              child: GestureDetector(
                onTap: () {
                  NotificationService().showNotification(
                      1, Notification_title.text, Notification_descrp.text);
                },
                child: Container(
                  height: 40,
                  width: 200,
                  color: Colors.green,
                  child: Center(
                    child: Text(
                      "Show Notification",
                      style: TextStyle(color: Colors.white),
                    ),
                  ),
                ),
              ),
            ),
          ],
        ),
      ),
    );
  }
}
好了,在上面实现了通知服务之后,我们就可以在 main.js 中添加必要的元素了。dart文件。
主要的。dart实现:
- 我们应该从notificationservice导入notificationservice () 类。dart 以及包时区,flutter_local_notification 包。
- 当应用程序启动时,我们应该启动通知服务,我们应该确保应用程序中实现的小部件是否在main()函数中初始化。
void main() {
  WidgetsFlutterBinding.ensureInitialized();
  NotificationService().initNotification();
  runApp(const MyApp());
}- Notification 应该包含 Title 和 body,所以我们可以创建TextFiled()来获取它们。要获取在文本字段中输入的值,我们应该实现TextEditingController() 对于适当的文本字段。
- 然后我们将使用GestureDetector()添加一个容器 这将显示从用户那里获得的带有标题和描述的通知。
主要的。dart文件:
Dart
import 'package:flutter/material.dart';
import 'package:flutter_local_notifications/flutter_local_notifications.dart';
import 'package:schedule_local_notification/notificationservice.dart';
import 'package:timezone/timezone.dart' as tz;
import 'package:timezone/data/latest.dart' as tz;

void main() {

  // to ensure all the widgets are initialized.
  WidgetsFlutterBinding.ensureInitialized();

  // to initialize the notificationservice.
  NotificationService().initNotification();
  runApp(const MyApp());
}

class MyApp extends StatelessWidget {
  const MyApp({Key? key}) : super(key: key);

  @override
  Widget build(BuildContext context) {
    return MaterialApp(
      title: 'Flutter Demo',
      theme: ThemeData(
        primarySwatch: Colors.green,
      ),
      home: const MyHomePage(title: 'GeeksForGeeks'),
    );
  }
}

class MyHomePage extends StatefulWidget {
  const MyHomePage({Key? key, required this.title}) : super(key: key);

  final String title;

  @override
  _MyHomePageState createState() => _MyHomePageState();
}

class _MyHomePageState extends State {
  TextEditingController Notification_title = TextEditingController();
  TextEditingController Notification_descrp = TextEditingController();

  @override
  void initState() {
    super.initState();
    tz.initializeTimeZones();
  }

  @override
  Widget build(BuildContext context) {

    return Scaffold(
      appBar: AppBar(
        title: Text(widget.title),
      ),
      body: Center(
        child: Column(
          mainAxisAlignment: MainAxisAlignment.center,
          children: [
            Text("GeeksForGeeks"),
            Padding(
              padding: EdgeInsets.all(20),
              child: TextField(
                controller: Notification_title,
                decoration: InputDecoration(
                  border: OutlineInputBorder(),
                  labelText: "Enter Title",
                ),
              ),
            ),
            Padding(
              padding: EdgeInsets.all(20),
              child: TextField(
                controller: Notification_descrp,
                decoration: InputDecoration(
                  border: OutlineInputBorder(),
                  labelText: "Enter Description",
                ),
              ),
            ),
            Padding(
              padding: EdgeInsets.all(20),
              child: GestureDetector(
                onTap: () {
                  NotificationService().showNotification(
                      1, Notification_title.text, Notification_descrp.text);
                },
                child: Container(
                  height: 40,
                  width: 200,
                  color: Colors.green,
                  child: Center(
                    child: Text(
                      "Show Notification",
                      style: TextStyle(color: Colors.white),
                    ),
                  ),
                ),
              ),
            ),
          ],
        ),
      ),
    );
  }
}
输出:
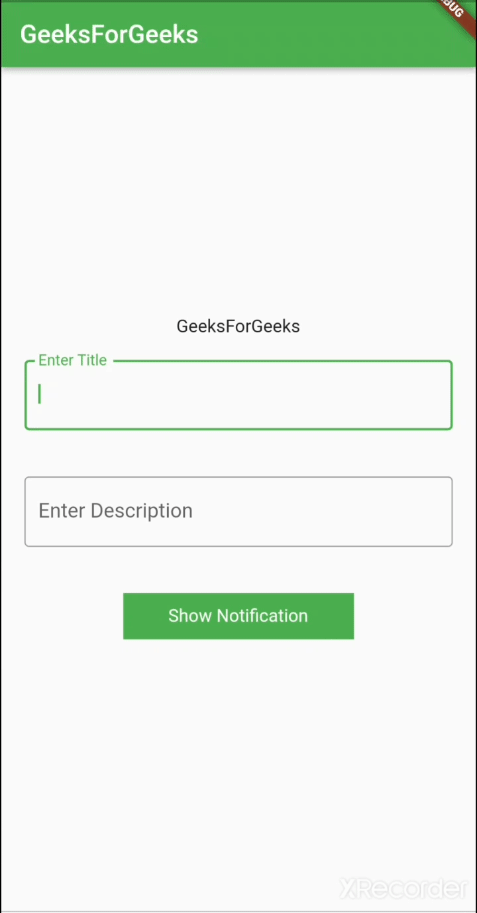
结果应用程序
参考:
- Flutter本地通知
- 时区包