- Android 中的通知示例(1)
- Android 中的通知示例
- Kotlin Android通知(1)
- Kotlin Android通知
- Android 通知功能示例(1)
- Android 通知功能示例
- Android-推送通知
- Android-推送通知(1)
- 如何在Android中推送通知?(1)
- 如何在Android中推送通知?
- 通知html(1)
- android 通知添加操作示例 - Java (1)
- android 推送通知颜色 (1)
- 如何在 Android Studio 中禁用通知?(1)
- 如何在 Android Studio 中禁用通知?
- 通知html代码示例
- 通知 js - Javascript (1)
- android 通知添加操作示例 - Java 代码示例
- 通知 jquery - Javascript (1)
- android 推送通知图标 - Java (1)
- 通知 js - Javascript 代码示例
- android 推送通知颜色 - 任何代码示例
- Kotlin 中的 Android 进度通知
- Kotlin 中的 Android 进度通知(1)
- python 通知图像 (1)
- 如何在 Android 中实现通知计数器?
- android studio 移除通知栏 - Java (1)
- android 推送通知图标 - Java 代码示例
- 通知图标徽章 android (1)
📅 最后修改于: 2021-01-05 04:59:35 🧑 作者: Mango
通知是一条消息,您可以在应用程序的常规UI之外向用户显示该消息。当您告诉系统发出通知时,它首先显示为通知区域中的图标。要查看通知的详细信息,用户可以打开通知抽屉。通知区域和通知抽屉都是用户可以随时查看的系统控制区域。
Android Toast类提供了一种方便的方式来向用户显示警报,但问题是这些警报不是持久性的,这意味着警报在屏幕上闪烁几秒钟然后消失。
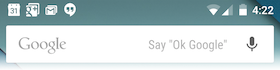
要查看通知的详细信息,您将必须选择图标,该图标将显示包含有关通知的详细信息的通知抽屉。在虚拟设备上使用模拟器时,您必须单击并向下拖动状态栏以展开它,这将为您提供以下详细信息。这将只有64 dp高,称为正常视图。
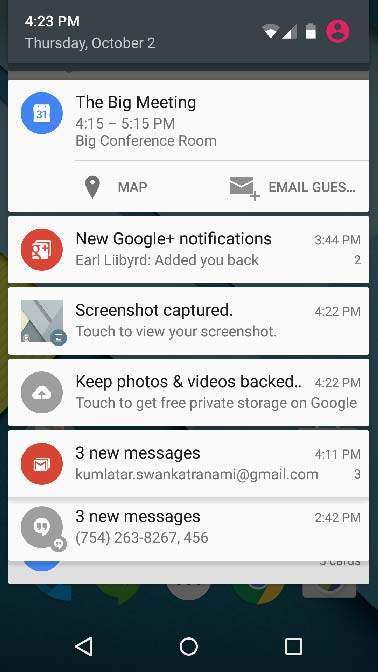
上面展开的表格可以有一个大视图,其中将包含有关通知的其他详细信息。您最多可以在通知中添加六行。以下屏幕快照显示了此类通知。
创建和发送通知
您可以通过简单的方法来创建通知。在您的应用程序中按照以下步骤创建通知-
第1步-创建通知生成器
第一步是使用NotificationCompat.Builder.build()创建通知生成器。您将使用Notification Builder设置各种Notification属性,例如其大小图标,标题,优先级等。
NotificationCompat.Builder mBuilder = new NotificationCompat.Builder(this)
第2步-设置通知属性
拥有Builder对象后,可以根据需要使用Builder对象设置其Notification属性。但这是强制性的,至少应设置-
-
一个小图标,由setSmallIcon()设置
-
标题,由setContentTitle()设置
-
详细信息文本,由setContentText()设置
mBuilder.setSmallIcon(R.drawable.notification_icon);
mBuilder.setContentTitle("Notification Alert, Click Me!");
mBuilder.setContentText("Hi, This is Android Notification Detail!");
您有很多可选属性,可以为通知设置。要了解有关它们的更多信息,请参阅NotificationCompat.Builder的参考文档。
步骤3-附加动作
这是可选部分,如果要在通知中附加操作,则这是必需的。一项操作使用户可以直接从通知转到应用程序中的“活动” ,在那里他们可以查看一个或多个事件或做进一步的工作。
该动作由PendingIntent定义,该PendingIntent包含在应用程序中启动Activity的Intent 。要将PendingIntent与手势相关联,请调用NotificationCompat.Builder的适当方法。例如,如果要在用户单击通知抽屉中的通知文本时启动Activity,则可以通过调用setContentIntent()添加PendingIntent。
PendingIntent对象可帮助您经常在以后的时间代表应用程序执行操作,而无需关心应用程序是否正在运行。
我们利用堆栈构建器对象的帮助,该对象将为启动的Activity包含一个人造的后向堆栈。这样可以确保从“活动”向后导航会导致您的应用程序退出到主屏幕。
Intent resultIntent = new Intent(this, ResultActivity.class);
TaskStackBuilder stackBuilder = TaskStackBuilder.create(this);
stackBuilder.addParentStack(ResultActivity.class);

// Adds the Intent that starts the Activity to the top of the stack
stackBuilder.addNextIntent(resultIntent);
PendingIntent resultPendingIntent = stackBuilder.getPendingIntent(0,PendingIntent.FLAG_UPDATE_CURRENT);
mBuilder.setContentIntent(resultPendingIntent);
步骤4-发出通知
最后,通过调用NotificationManager.notify()发送通知,将Notification对象传递到系统。通知它之前,请确保对构建器对象调用NotificationCompat.Builder.build()方法。此方法合并所有已设置的选项,并返回一个新的Notification对象。
NotificationManager mNotificationManager = (NotificationManager) getSystemService(Context.NOTIFICATION_SERVICE);

// notificationID allows you to update the notification later on.
mNotificationManager.notify(notificationID, mBuilder.build());
NotificationCompat.Builder类
NotificationCompat.Builder类可让您更轻松地控制所有标志,并有助于构造典型的通知布局。以下是一些作为NotificationCompat.Builder类的一部分可用的重要且最常用的方法。
| Sr.No. | Constants & Description |
|---|---|
| 1 |
Notification build() Combine all of the options that have been set and return a new Notification object. |
| 2 |
NotificationCompat.Builder setAutoCancel (boolean autoCancel) Setting this flag will make it so the notification is automatically canceled when the user clicks it in the panel. |
| 3 |
NotificationCompat.Builder setContent (RemoteViews views) Supply a custom RemoteViews to use instead of the standard one. |
| 4 |
NotificationCompat.Builder setContentInfo (CharSequence info) Set the large text at the right-hand side of the notification. |
| 5 |
NotificationCompat.Builder setContentIntent (PendingIntent intent) Supply a PendingIntent to send when the notification is clicked. |
| 6 |
NotificationCompat.Builder setContentText (CharSequence text) Set the text (second row) of the notification, in a standard notification. |
| 7 |
NotificationCompat.Builder setContentTitle (CharSequence title) Set the text (first row) of the notification, in a standard notification. |
| 8 |
NotificationCompat.Builder setDefaults (int defaults) Set the default notification options that will be used. |
| 9 |
NotificationCompat.Builder setLargeIcon (Bitmap icon) Set the large icon that is shown in the ticker and notification. |
| 10 |
NotificationCompat.Builder setNumber (int number) Set the large number at the right-hand side of the notification. |
| 11 |
NotificationCompat.Builder setOngoing (boolean ongoing) Set whether this is an ongoing notification. |
| 12 |
NotificationCompat.Builder setSmallIcon (int icon) Set the small icon to use in the notification layouts. |
| 13 |
NotificationCompat.Builder setStyle (NotificationCompat.Style style) Add a rich notification style to be applied at build time. |
| 14 |
NotificationCompat.Builder setTicker (CharSequence tickerText) Set the text that is displayed in the status bar when the notification first arrives. |
| 15 |
NotificationCompat.Builder setVibrate (long[] pattern) Set the vibration pattern to use. |
| 16 |
NotificationCompat.Builder setWhen (long when) Set the time that the event occurred. Notifications in the panel are sorted by this time. |
例
以下示例显示了Android 4.1中引入的使用NotificationCompat.Builder类的Android通知的功能。
| Step | Description |
|---|---|
| 1 | You will use Android studio IDE to create an Android application and name it as tutorialspoint under a package com.example.notificationdemo. |
| 2 | Modify src/MainActivity.java file and add the code to notify(“”), if user click on the button,it will call android notification service. |
| 3 | Create a new Java file src/NotificationView.java, which will be used to display new layout as a part of new activity which will be started when user will click any of the notifications |
| 4 | Modify layout XML file res/layout/activity_main.xml to add Notification button in relative layout. |
| 5 | Create a new layout XML file res/layout/notification.xml. This will be used as layout file for new activity which will start when user will click any of the notifications. |
| 6 | No need to change default string constants. Android studio takes care of default string constants |
| 7 | Run the application to launch Android emulator and verify the result of the changes done in the application. |
以下是修改后的主要活动文件src / com.example.notificationdemo / MainActivity.java的内容。该文件可以包括每个基本生命周期方法。
package com.example.notificationdemo;

import android.app.Activity;
import android.app.NotificationManager;
import android.app.PendingIntent;
import android.content.Context;
import android.content.Intent;
import android.support.v4.app.NotificationCompat;
import android.os.Bundle;
import android.view.View;
import android.widget.Button;

public class MainActivity extends Activity {
   Button b1;
   @Override
   protected void onCreate(Bundle savedInstanceState) {
      super.onCreate(savedInstanceState);
      setContentView(R.layout.activity_main);

      b1 = (Button)findViewById(R.id.button);
      b1.setOnClickListener(new View.OnClickListener() {
         @Override
         public void onClick(View v) {
            addNotification();
         }
      });
   }

   private void addNotification() {
      NotificationCompat.Builder builder =
         new NotificationCompat.Builder(this)
         .setSmallIcon(R.drawable.abc)
         .setContentTitle("Notifications Example")
         .setContentText("This is a test notification");

      Intent notificationIntent = new Intent(this, MainActivity.class);
      PendingIntent contentIntent = PendingIntent.getActivity(this, 0, notificationIntent,
         PendingIntent.FLAG_UPDATE_CURRENT);
      builder.setContentIntent(contentIntent);

      // Add as notification
      NotificationManager manager = (NotificationManager) getSystemService(Context.NOTIFICATION_SERVICE);
      manager.notify(0, builder.build());
   }
}
以下是res / layout / notification.xml文件的内容-
以下是修改后的主要活动文件src / com.example.notificationdemo / NotificationView.java的内容。
package com.example.notificationdemo;

import android.os.Bundle;
import android.app.Activity;

public class NotificationView extends Activity{
   @Override
   public void onCreate(Bundle savedInstanceState){
      super.onCreate(savedInstanceState);
      setContentView(R.layout.notification);
   }
}
以下是res / layout / activity_main.xml文件的内容-
下面将RES /值的内容/字符串.XML定义两个新常量-
   Settings
   tutorialspoint
以下是AndroidManifest.xml的默认内容-
让我们尝试运行您的tutorialspoint应用程序。我假设您在进行环境设置时已创建了AVD 。要从Android Studio运行APP,请打开您项目的活动文件之一,然后点击运行 工具栏中的图标。 Android Studio将应用程序安装在您的AVD上并启动它,如果设置和应用程序一切正常,它将显示在“模拟器”窗口下面-
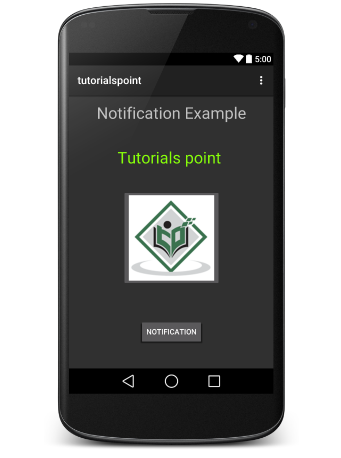
现在单击按钮,您将在顶部看到一条消息“新消息警报!”。会暂时显示,然后您将在随后的屏幕的左上角看到一个小图标。
现在让我们展开视图,长按小图标,一秒钟后它将显示日期信息,这是您应在不释放鼠标的情况下向下拖动状态栏的时间。您将看到状态栏将展开,并且您将获得以下屏幕:
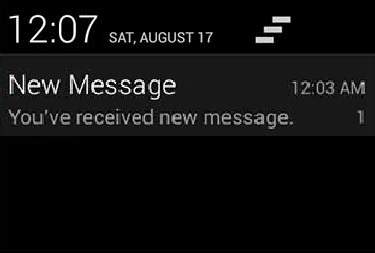
大视图通知
以下代码段演示了如何更改在上一个代码段中创建的通知,以使用Inbox大视图样式。我将更新displayNotification()修改方法以显示此功能-
protected void displayNotification() {
   Log.i("Start", "notification");

   /* Invoking the default notification service */
   NotificationCompat.Builder  mBuilder = new NotificationCompat.Builder(this);

   mBuilder.setContentTitle("New Message");
   mBuilder.setContentText("You've received new message.");
   mBuilder.setTicker("New Message Alert!");
   mBuilder.setSmallIcon(R.drawable.woman);

   /* Increase notification number every time a new notification arrives */
   mBuilder.setNumber(++numMessages);

   /* Add Big View Specific Configuration */
   NotificationCompat.InboxStyle inboxStyle = new NotificationCompat.InboxStyle();

   String[] events = new String[6];
   events[0] = new String("This is first line....");
   events[1] = new String("This is second line...");
   events[2] = new String("This is third line...");
   events[3] = new String("This is 4th line...");
   events[4] = new String("This is 5th line...");
   events[5] = new String("This is 6th line...");

   // Sets a title for the Inbox style big view
   inboxStyle.setBigContentTitle("Big Title Details:");

   // Moves events into the big view
   for (int i=0; i < events.length; i++) {
      inboxStyle.addLine(events[i]);
   }

   mBuilder.setStyle(inboxStyle);

   /* Creates an explicit intent for an Activity in your app */
   Intent resultIntent = new Intent(this, NotificationView.class);

   TaskStackBuilder stackBuilder = TaskStackBuilder.create(this);
   stackBuilder.addParentStack(NotificationView.class);

   /* Adds the Intent that starts the Activity to the top of the stack */
   stackBuilder.addNextIntent(resultIntent);
   PendingIntent resultPendingIntent =stackBuilder.getPendingIntent(0,PendingIntent.FLAG_UPDATE_CURRENT);

   mBuilder.setContentIntent(resultPendingIntent);
   mNotificationManager = (NotificationManager) getSystemService(Context.NOTIFICATION_SERVICE);

   /* notificationID allows you to update the notification later on. */
   mNotificationManager.notify(notificationID, mBuilder.build());
}
现在,如果您尝试运行您的应用程序,那么您将在视图的扩展形式中找到以下结果: