将 ML/DL 模型公开为 REST API
在本文中,我们将学习如何将 ML/DL 模型公开为烧瓶 API。
我们将使用的框架:
Keras是一个深度学习库,建立在 Tensorflow、Theano 或 CNTK 等后端之上。它提供抽象并允许快速开发 ML/DL 模型。
Flask是Python中的一个微型 Web 框架,用于快速启动服务器以提供页面服务。请参阅 Flask 简介。
由于本文的重点是使用 API 为 ML/DL 模型提供服务,因此我们不会深入探讨卷积模型的制作。我们将使用ResNet50卷积神经网络。
安装 TensorFlow 和 Keras
| Step | Linux/Mac | Windows | |||||||||||||||
|---|---|---|---|---|---|---|---|---|---|---|---|---|---|---|---|---|---|
| Update pip | pip install -U pip | python -m pip install -U pip | |||||||||||||||
| Install virtualenv | sudo pip install virtualenv | pip install virtualenv | |||||||||||||||
| Create a new folder ml-api | mkdir ml-api && cd ml-api | mkdir ml-api && cd ml-api | Create a virtual environment(Good practice) and activate it | virtualenv –system-site-packages -p python3 ./venv | virtualenv –system-site-packages -p python3 ./venv | Activate the virtual environment | source ./venv/bin/activate | .\venv\Scripts\activate | Install TensorFlow | pip install –upgrade tensorflow | pip install –upgrade tensorflow | Install Keras | pip install keras | pip install keras | Install other dependencies | pip install flask gevent requests pillow | pip install flask gevent requests pillow |
例子: 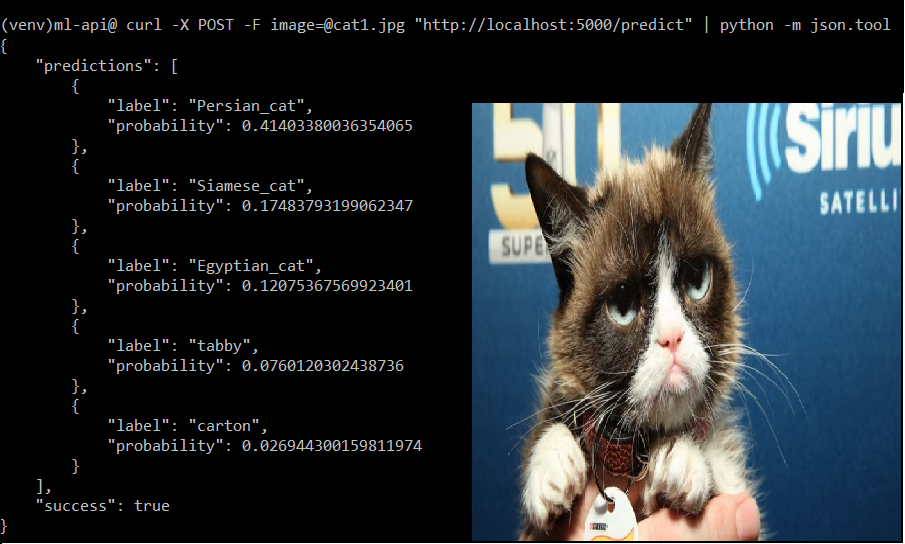
创建 REST API:
# keras_server.py

# Python program to expose a ML model as flask REST API

# import the necessary modules
from keras.applications import ResNet50 # pre-built CNN Model
from keras.preprocessing.image import img_to_array
from keras.applications import imagenet_utils
import tensorflow as tf
from PIL import Image
import numpy as np
import flask
import io

# Create Flask application and initialize Keras model
app = flask.Flask(__name__)
model = None

# Function to Load the model
def load_model():

    # global variables, to be used in another function
    global model
    model = ResNet50(weights ="imagenet")
    global graph
    graph = tf.get_default_graph()

# Every ML/DL model has a specific format
# of taking input. Before we can predict on
# the input image, we first need to preprocess it.
def prepare_image(image, target):
    if image.mode != "RGB":
        image = image.convert("RGB")

    # Resize the image to the target dimensions
    image = image.resize(target)

    # PIL Image to Numpy array
    image = img_to_array(image)

    # Expand the shape of an array,
    # as required by the Model
    image = np.expand_dims(image, axis = 0)

    # preprocess_input function is meant to
    # adequate your image to the format the model requires
    image = imagenet_utils.preprocess_input(image)

    # return the processed image
    return image

# Now, we can predict the results.
@app.route("/predict", methods =["POST"])
def predict():
    data = {} # dictionary to store result
    data["success"] = False

    # Check if image was properly sent to our endpoint
    if flask.request.method == "POST":
        if flask.request.files.get("image"):
            image = flask.request.files["image"].read()
            image = Image.open(io.BytesIO(image))

            # Resize it to 224x224 pixels
            # (required input dimensions for ResNet)
            image = prepare_image(image, target =(224, 224))

        # Predict ! global preds, results
            with graph.as_default():
                preds = model.predict(image)
                results = imagenet_utils.decode_predictions(preds)
                data["predictions"] = []


            for (ID, label, probability) in results[0]:
                r = {"label": label, "probability": float(probability)}
                data["predictions"].append(r)

            data["success"] = True

    # return JSON response
    return flask.jsonify(data)


if __name__ == "__main__":
    print(("* Loading Keras model and Flask starting server..."
        "please wait until server has fully started"))
    load_model()
    app.run()
运行烧瓶服务器
python keras_server.py
注意#1:第一次运行它,下载模型的权重需要一些时间。在随后的运行中,情况不会如此。
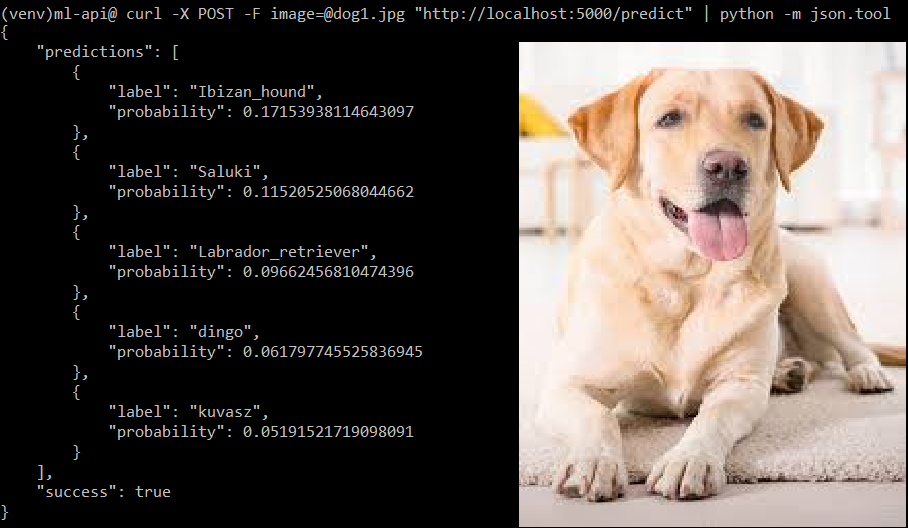
注意#2:将图像保存在同一目录(ml-api)- dog.jpg,cat.jpg,lion.jpg 。
向服务器发出请求:
方法 #1:使用 cURL (从这里下载适用于 Windows 的 cURL。)
$ curl -X POST -F image=@dog.jpg "http://localhost:5000/predict"
方法#2:(适用于制作具有适当 UI 的全栈 Web 应用程序)
创建一个简单的 HTML 表单
方法 #3:创建一个简单的Python脚本来向烧瓶服务器发出 HTTP 请求。
# simple_request.py
import requests
import sys

URL = "http://localhost:5000/predict"

# provide image name as command line argument
IMAGE_PATH = sys.argv[1]

image = open(IMAGE_PATH, "rb").read()
payload = {"image": image}

# make request to the API
request = requests.post(URL, files = payload).json()

if request["success"]:
    # Print formatted Result
    print("% s % 15s % s"%("Rank", "Label", "Probability"))
    for (i, result) in enumerate(request["predictions"]):
        print("% d.    % 17s %.4f"%(i + 1, result["label"],
            result["probability"]))

    else:
        print("Request failed")
运行它:
python simple_request.py dog.jpg输出: 
完成后停用(Windows 和 Linux):
> deactivate
所以工作流程,一般来说任何模型都是
- 构建模型并保存。
- 创建一个 Flask 应用程序。
- 加载模型
- 为每种类型的请求定义 API 的端点。
- 根据模型的架构预处理输入并将其提供给模型
- 处理输入并将输出发送回客户端。