- Android内部存储示例
- Android中的内部存储示例(1)
- Android中的内部存储示例
- Kotlin Android读写内部存储
- Kotlin Android读写内部存储(1)
- 内部 (1)
- 字符串如何在 python 3 内部存储 - Python (1)
- 字符串如何在 python 3 内部存储 - Python 代码示例
- Python中的内部类(1)
- Python中的内部类
- Java内部的类
- Java-内部类
- Java内部的类(1)
- Java中的内部类(1)
- Java-内部类
- Java-内部类(1)
- Java中的内部类
- Java-内部类(1)
- Java内部类(1)
- Java内部类
- Android 中的范围存储
- Android 中的范围存储(1)
- 内部 - 任何代码示例
- C++存储类(1)
- C-存储类(1)
- 块存储(1)
- C存储类(1)
- C++中的存储类(1)
- C++中的存储类
📅 最后修改于: 2021-01-05 05:17:48 🧑 作者: Mango
Android为应用程序提供了多种存储方式来存储其数据。这些存储位置是共享首选项,内部和外部存储,SQLite存储以及通过网络连接的存储。
在本章中,我们将研究内部存储。内部存储是私有数据在设备存储器上的存储。
默认情况下,这些文件是私有文件,只有您的应用程序可以访问它们,并且在用户删除应用程序时被删除。
写文件
为了使用内部存储在文件中写入一些数据,请使用文件名和模式调用openFileOutput()方法。该模式可以是private,public等,其语法如下-
FileOutputStream fOut = openFileOutput("file name here",MODE_WORLD_READABLE);
方法openFileOutput()返回FileOutputStream的实例。因此,您可以在FileInputStream对象中接收它。之后,您可以调用write方法在文件上写入数据。其语法如下-
String str = "data";
fOut.write(str.getBytes());
fOut.close();
读取文件
为了从刚刚创建的文件中读取,请使用文件名调用openFileInput()方法。它返回FileInputStream的实例。其语法如下-
FileInputStream fin = openFileInput(file);
之后,您可以调用read方法从文件中一次读取一个字符,然后进行打印。其语法如下-
int c;
String temp="";
while( (c = fin.read()) != -1){
   temp = temp + Character.toString((char)c);
}

//string temp contains all the data of the file.
fin.close();
除了write和close方法外, FileOutputStream类还提供了其他方法来更好地写入文件。这些方法在下面列出-
| Sr.No | Method & description |
|---|---|
| 1 |
FileOutputStream(File file, boolean append) This method constructs a new FileOutputStream that writes to file. |
| 2 |
getChannel() This method returns a write-only FileChannel that shares its position with this stream |
| 3 |
getFD() This method returns the underlying file descriptor |
| 4 |
write(byte[] buffer, int byteOffset, int byteCount) This method Writes count bytes from the byte array buffer starting at position offset to this stream |
除了读取和关闭方法外, FileInputStream类还提供了其他方法来更好地读取文件。这些方法在下面列出-
| Sr.No | Method & description |
|---|---|
| 1 |
available() This method returns an estimated number of bytes that can be read or skipped without blocking for more input |
| 2 |
getChannel() This method returns a read-only FileChannel that shares its position with this stream |
| 3 |
getFD() This method returns the underlying file descriptor |
| 4 |
read(byte[] buffer, int byteOffset, int byteCount) This method reads at most length bytes from this stream and stores them in the byte array b starting at offset |
例
这是一个示例,演示了如何使用内部存储来存储和读取文件。它创建一个基本的存储应用程序,使您可以从内部存储进行读取和写入。
要试验该示例,您可以在实际设备或仿真器上运行它。
| Steps | Description |
|---|---|
| 1 | You will use Android Studio IDE to create an Android application under a package com.example.sairamkrishna.myapplication. |
| 2 | Modify src/MainActivity.java file to add necessary code. |
| 3 | Modify the res/layout/activity_main to add respective XML components |
| 4 | Run the application and choose a running android device and install the application on it and verify the results |
以下是修改后的主要活动文件src / MainActivity.java的内容。
package com.example.sairamkrishna.myapplication;

import android.app.Activity;
import android.os.Bundle;
import android.view.View;
import android.widget.Button;
import android.widget.EditText;
import android.widget.TextView;
import android.widget.Toast;
import java.io.FileInputStream;
import java.io.FileOutputStream;

public class MainActivity extends Activity  {
   Button b1,b2;
   TextView tv;
   EditText ed1;

   String data;
   private String file = "mydata";

   @Override
   protected void onCreate(Bundle savedInstanceState) {
      super.onCreate(savedInstanceState);
      setContentView(R.layout.activity_main);

      b1=(Button)findViewById(R.id.button);
      b2=(Button)findViewById(R.id.button2);

      ed1=(EditText)findViewById(R.id.editText);
      tv=(TextView)findViewById(R.id.textView2);
      b1.setOnClickListener(new View.OnClickListener() {

         @Override
         public void onClick(View v) {
            data=ed1.getText().toString();
            try {
               FileOutputStream fOut = openFileOutput(file,MODE_WORLD_READABLE);
               fOut.write(data.getBytes());
               fOut.close();
               Toast.makeText(getBaseContext(),"file saved",Toast.LENGTH_SHORT).show();
            }
            catch (Exception e) {
               // TODO Auto-generated catch block
               e.printStackTrace();
            }
         }
      });

      b2.setOnClickListener(new View.OnClickListener() {

         @Override
         public void onClick(View v) {
            try {
               FileInputStream fin = openFileInput(file);
               int c;
               String temp="";
               while( (c = fin.read()) != -1){
                  temp = temp + Character.toString((char)c);
               }
               tv.setText(temp);
               Toast.makeText(getBaseContext(),"file read",Toast.LENGTH_SHORT).show();
            }
            catch(Exception e){
            }
         }
      });
   }
}
以下是xml res / layout / activity_main.xml的修改内容。
在下面的代码中, abc指示tutorialspoint.com的徽标
以下是res / values /字符串.xml的内容。
My Application
以下是AndroidManifest.xml文件的内容。
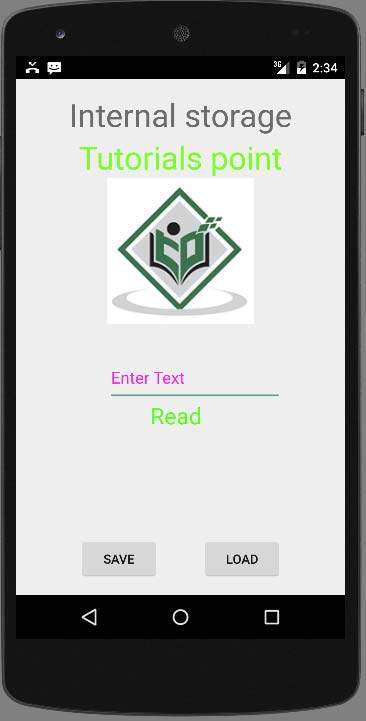
让我们尝试运行刚刚修改的存储应用程序。我假设您在进行环境设置时已创建了AVD 。要从Android Studio运行该应用,请打开您项目的活动文件之一,然后点击运行 工具栏中的图标。 Android studio将应用程序安装在您的AVD上并启动它,如果设置和应用程序一切正常,它将显示在“模拟器”窗口下面-
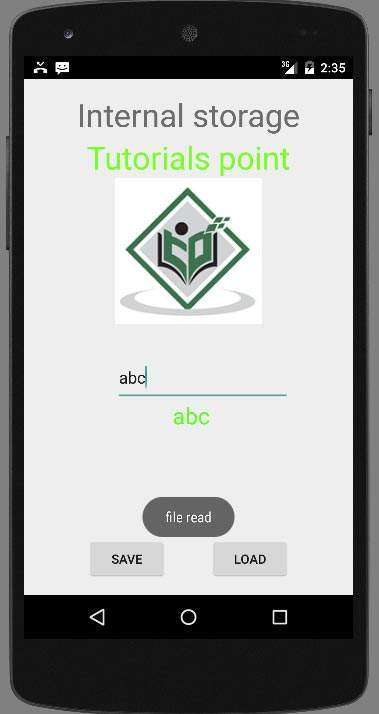
现在,您需要在字段中输入任何文本。例如,我输入了一些文本。按保存按钮。以下通知将出现在您的AVD中-

现在,当您按下加载按钮时,应用程序将读取文件,并显示数据。在我们的情况下,将返回以下数据-
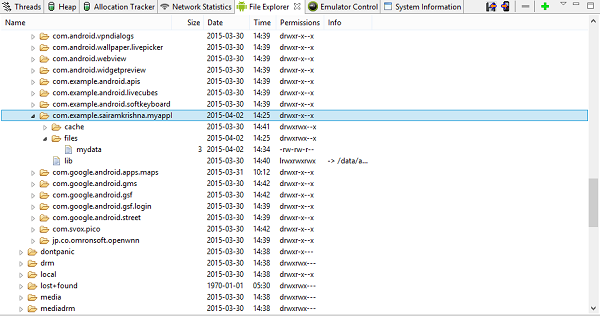
请注意,您实际上可以通过切换到DDMS选项卡来查看此文件。在DDMS中,选择文件资源管理器并浏览此路径。
tools>android>android device Monitor
下图也显示了这一点。