- 讨论JSF
- JSF-概述(1)
- JSF-概述
- JSF-Ajax
- JSF-Ajax(1)
- SQL中的复合键
- SQL 中的复合键(1)
- SQL中的复合键(1)
- sql中的复合键(1)
- SQL 中的复合键
- JSF-数据表
- JSF-数据表(1)
- MySQL复合键
- MySQL复合键(1)
- JSF-生命周期
- JSF-生命周期(1)
- sql代码示例中的复合键
- JSF-环境设置
- JSF-环境设置(1)
- JSF-体系结构
- JSF-体系结构(1)
- JSF-验证器标签(1)
- JSF-验证器标签
- cookie jsf - Java (1)
- JSF-第一个应用程序
- JSF-第一个应用程序(1)
- GWT与JSF(1)
- GWT与JSF
- JSF-基本标签
📅 最后修改于: 2020-10-23 06:46:26 🧑 作者: Mango
JSF为开发人员提供了强大的功能来定义他们自己的自定义组件,这些组件可用于呈现自定义内容。
定义自定义组件
在JSF中定义自定义组件是一个两步过程。
| Step | Description |
|---|---|
| 1a |
Create a resources folder. Create a xhtml file in resources folder with a composite namespace. |
| 1b |
Use composite tags composite:interface, composite:attribute and composite:implementation, to define content of the composite component. Use cc.attrs in composite:implementation to get variable defined using composite:attribute in composite:interface. |
步骤1a:创建自定义组件:loginComponent.xhtml
在resources文件夹中创建一个文件夹tutorialspoint,并在其中创建文件loginComponent.xhtml。
在html标头中使用复合名称空间。
...
步骤1b:使用复合标签:loginComponent.xhtml
下表描述了复合标签的用法。
| S.No | Tag & Description |
|---|---|
| 1 |
composite:interface Declares configurable values to be used in composite:implementation. |
| 2 |
composite:attribute Configuration values are declared using this tag. |
| 3 |
composite:implementation Declares JSF component. Can access the configurable values defined in composite:interface using #{cc.attrs.attribute-name} expression. |
使用自定义组件
在JSF中使用自定义组件是一个简单的过程。
| Step | Description |
|---|---|
| 2a | Create a xhtml file and use custom component’s namespace. Namespace will the http://java.sun.com/jsf/ |
| 2b | Use the custom component as normal JSF tags |
步骤2a:使用自定义命名空间:home.xhtml
xmlns:tp = "http://java.sun.com/jsf/composite/tutorialspoint">
步骤2b:使用自定义标记:home.xhtml和传递值
应用范例
让我们创建一个测试JSF应用程序以测试JSF中的自定义组件。
| Step | Description |
|---|---|
| 1 | Create a project with a name helloworld under a package com.tutorialspoint.test as explained in the JSF – First Application chapter. |
| 2 | Create resources folder under src → main folder. |
| 3 | Create tutorialspoint folder under src → main → resources folder. |
| 4 | Create loginComponent.xhtml file under src → main → resources → tutorialspoint folder. |
| 5 | Modify UserData.java file as explained below. |
| 6 | Modify home.xhtml as explained below. Keep the rest of the files unchanged. |
| 7 | Compile and run the application to make sure the business logic is working as per the requirements. |
| 8 | Finally, build the application in the form of war file and deploy it in Apache Tomcat Webserver. |
| 9 | Launch your web application using appropriate URL as explained below in the last step. |
loginComponent.xhtml
UserData.java
package com.tutorialspoint.test;

import java.io.Serializable;

import javax.faces.bean.ManagedBean;
import javax.faces.bean.SessionScoped;

@ManagedBean(name = "userData", eager = true)
@SessionScoped
public class UserData implements Serializable {
   private static final long serialVersionUID = 1L;
   private String name;
   private String password;

   public String getName() {
      return name;
   }

   public void setName(String name) {
      this.name = name;
   }

   public String getPassword() {
      return password;
   }

   public void setPassword(String password) {
      this.password = password;
   }

   public String login() {
      return "result";
   }
}
home.xhtml
JSF tutorial
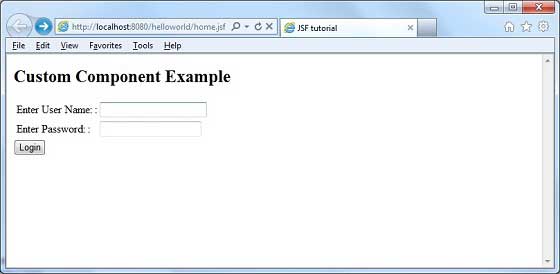
Custom Component Example
准备好所有更改后,让我们像在JSF-First Application一章中那样编译并运行该应用程序。如果您的应用程序一切正常,将产生以下结果。