结构化查询语言或 SQL 是一种标准的数据库语言,用于从 MySQL、Oracle、SQL Server、PostGre 等关系数据库中创建、维护和检索数据。在本文中,我们将了解如何将图像添加到使用 servlet 的MYSQL数据库。
MYSQL是一个关系型数据库。关系数据库意味着数据以关系(表)的形式存储和检索。 Servlet 是在支持Java 的Web 服务器或应用程序服务器上运行的 Java 程序。它们用于处理从网络服务器获得的请求,处理请求,产生响应,然后将响应发送回网络服务器。 servlet 的特性是它们在服务器端工作。它们能够处理从网络服务器获得的复杂请求。在本文中,Eclipse IDE 用于执行 servlet,MYSQL 工作台用于运行 MYSQL 数据库。可以按照以下步骤使用 servlet 和 JDBC 将图像添加到 MYSQL 数据库中:
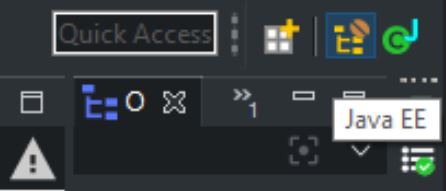
- 第 1 步:打开 Eclipse IDE,在右上角您会找到 2 个图标。悬停后,它将显示Java EE 和Java。由于我们将使用 Web 项目,因此我们将选择Java EE。选择后,转到File -> New -> Dynamic Web Project 。
- 第 2 步:现在我们需要将 MySQL 的 JDBC 驱动程序(连接器 – JAR_FILE)复制并粘贴到 WebContent 文件夹中的 WEB-INF 文件夹的 lib 文件夹中。 (项目的所有外部库都需要在这里)。

- 第 3 步:现在,我们需要创建一个主页,该主页将显示一个表单,用户可以在其中上传图像文件。我们可以在WebContent文件夹中创建 JSP 和 HTML 文件。例如,我们将创建AddFile.jsp 。我们还需要更新 web.xml 文件,以更新其欢迎文件列表。我们必须在欢迎文件列表中添加 AddFile.jsp。
AddFile.jsp - 第 4 步:现在,我们需要为上面创建的AddFile.jsp添加代码。该文件的代码如下:
<%@ page language="java" contentType="text/html; charset=ISO-8859-1" pageEncoding="ISO-8859-1"%>Add File Here - 第 5 步:现在,我们将创建一个类,用于使用 JDBC 建立与 MySql 数据库的连接,并且可以在将来随时使用该连接将任何内容反映到数据库上。例如,我们将创建“MyConnection. Java”类和“getConnection()”静态方法获取连接如下:
import java.sql.*; public class MyConnection { public static Connection getConnection() { // As java.sql package classes // contains Checked Exceptions, // we have to surround it with // Try/Catch Block. try { // We have to register the // Driver class present in // com.mysql.jdbc package. DriverManager.registerDriver( new com.mysql.jdbc.Driver()); // To get the connection, // 3 params need to be passed in // DriverManager.getConnection() method. Connection con = DriverManager.getConnection( "jdbc:mysql:// localhost:3306/" + "FileUploadDatabase", "root", "root"); /* 1. URL: "jdbc:mysql://", is the address "localhost: " is the local machine and "3306" is the port number and "FileUploadDatabase" is the name of the database. 2. UserName: "root", which is set while creating a database server in MySql Workbench. 3. Password: "root" */ return con; } catch (SQLException e) { System.out.println(e.getMessage()); } return null; } } - 第 6 步:现在,我们将创建一个数据库和表“users”,用于存储从 HTML 表单传递的内容。相同的查询如下:
CREATE DATABASE FileUploadDatabase
CREATE TABLE users (
id int(11) NOT NULL AUTO_INCREMENT,
first_name varchar(45) DEFAULT NULL,
last_name varchar(45) DEFAULT NULL,
photo mediumblob,
PRIMARY KEY (`id`)
) - 第 7 步:现在,我们将创建一个 Servlet,它将接收来自网页的请求并执行所有业务逻辑并将内容存储在 MySql 数据库中。例如,我们将其命名为“serv.Java”。以下是这个 servlet 中的代码:
// Java program to implement // the servlet package controllers; import java.io.IOException; import java.io.InputStream; import java.sql.Connection; import java.sql.PreparedStatement; import java.sql.SQLException; import javax.servlet .ServletConfig; import javax.servlet .ServletException; import javax.servlet .annotation.MultipartConfig; import javax.servlet .annotation.WebServlet; import javax.servlet .http.HttpServlet; import javax.servlet .http.HttpServletRequest; import javax.servlet .http.HttpServletResponse; import javax.servlet.http.Part; import Dao.UploadFileDao; import connection.copy.MyConnection; // This is the annotation-based // mapping URL to Servlet. @WebServlet("/serv") // This annotation defines the maximum // file size which can be taken. @MultipartConfig(maxFileSize = 16177215) public class serv extends HttpServlet { // auto generated private static final long serialVersionUID = 1L; public serv() { super(); } // This Method takes in All the information // required and is used to store in the // MySql Database. public int uploadFile(String firstName, String lastName, InputStream file) { String SQL = "INSERT INTO users " + "(first_name, last_name, " + "photo) values (?, ?, ?)"; int row = 0; Connection connection = MyConnection.getConnection(); PreparedStatement preparedStatement; try { preparedStatement = connection.prepareStatement(sql); preparedStatement .setString(1, firstName); preparedStatement .setString(2, lastName); if (file != null) { // Fetches the input stream // of the upload file for // the blob column preparedStatement.setBlob(3, file); } // Sends the statement to // the database server row = preparedStatement .executeUpdate(); } catch (SQLException e) { System.out.println(e.getMessage()); } return row; } // As Submit button is hit from // the Web Page, request is made // to this Servlet and // doPost method is invoked. protected void doPost( HttpServletRequest request, HttpServletResponse response) throws ServletException, IOException { // Getting the parametes from web page String firstName = request.getParameter("firstName"); String lastName = request.getParameter("lastName"); // Input stream of the upload file InputStream inputStream = null; String message = null; // Obtains the upload file // part in this multipart request Part filePart = request.getPart("photo"); if (filePart != null) { // Prints out some information // for debugging System.out.println( filePart.getName()); System.out.println( filePart.getSize()); System.out.println( filePart.getContentType()); // Obtains input stream of the upload file inputStream = filePart.getInputStream(); } // Sends the statement to the // database server int row = UploadFileDao .uploadFile(firstName, lastName, inputStream); if (row > 0) { message = "File uploaded and " + "saved into database"; } System.out.println(message); } }注意:以上代码不能在在线IDE上运行。
输出:
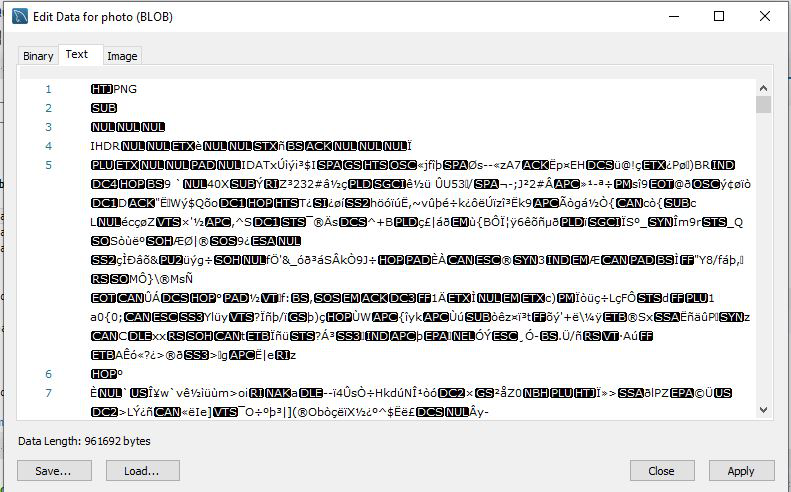
- 我们可以在运行代码后查看数据库,通过点击“Open Value In Editor”查看上传到数据库中的图片如下:

- 我们点击“在编辑器中打开值”后,会弹出一个窗口,显示以三种格式存储在数据库中的图像:二进制格式、文本格式和图像格式。
- 现在,如果我们单击图像选项,我们将能够看到上传的图像。