如果用户正在提供输入,并且输入需要显示为TextView,并且用户输入的内容可能会超出屏幕,则在这种情况下,应逐渐减小TextView字体。因此,在本文中讨论了开发人员如何在用户提供数据时逐渐减小TextView的大小。可以看看下面的GIF,以更好地理解它,以及我们将在本文结尾处构建的内容。注意,我们将使用Java语言实现该项目。
自动调整TextView的步骤
本文以拨号盘为例。此方法可用于构建计算器,并可在需要TextView调整大小的许多其他情况下使用。
第1步:创建一个具有空活动的android studio项目
- 您可以参考此Android |如何在Android Studio中创建/启动新项目,了解如何创建一个空活动的android studio项目。
- 将应用程序名称重命名为Auto resize TextView ,并将布局名称命名为activity_main.xml。
- 并选择Java作为Language。
步骤2:通过使用activity_main.xml文件构建适当的布局
- 由于我们以拨号盘为例来演示TextView的自动调整大小,因此请在activity_main.xml文件中调用以下代码以使UI像拨号盘一样。
XML
Java
import androidx.appcompat.app.AppCompatActivity;
import android.annotation.SuppressLint;
import android.os.Bundle;
import android.view.View;
import android.widget.TextView;

public class MainActivity extends AppCompatActivity {

    TextView primaryTextView;

    @Override
    protected void onCreate(Bundle savedInstanceState) {
        super.onCreate(savedInstanceState);
        setContentView(R.layout.activity_main);

        // register the button using appropriate ID of the TextView
        primaryTextView = findViewById(R.id.primaryTextView);
    }

    // handle the button 1 and append the 1 to the end of the TextView
    @SuppressLint("SetTextI18n")
    public void clickedOne(View view) {
        primaryTextView.setText(primaryTextView.getText() + "1");
    }

    // handle the button 2 and append the 2 to the end of the TextView
    @SuppressLint("SetTextI18n")
    public void clickedTwo(View view) {
        primaryTextView.setText(primaryTextView.getText() + "2");
    }

    // handle the button 3 and append the 3 to the end of the TextView
    @SuppressLint("SetTextI18n")
    public void clickedThree(View view) {
        primaryTextView.setText(primaryTextView.getText() + "3");
    }

    // handle the button 4 and append the 4 to the end of the TextView
    @SuppressLint("SetTextI18n")
    public void clickedFour(View view) {
        primaryTextView.setText(primaryTextView.getText() + "4");
    }

    // handle the button 5 and append the 5 to the end of the TextView
    @SuppressLint("SetTextI18n")
    public void clickedFive(View view) {
        primaryTextView.setText(primaryTextView.getText() + "5");
    }

    // handle the button 6 and append the 6 to the end of the TextView
    @SuppressLint("SetTextI18n")
    public void clickedSix(View view) {
        primaryTextView.setText(primaryTextView.getText() + "6");
    }

    // handle the button 7 and append the 7 to the end of the TextView
    @SuppressLint("SetTextI18n")
    public void clickedSeven(View view) {
        primaryTextView.setText(primaryTextView.getText() + "7");
    }

    // handle the button 8 and append the 8 to the end of the TextView
    @SuppressLint("SetTextI18n")
    public void clickedEight(View view) {
        primaryTextView.setText(primaryTextView.getText() + "8");
    }

    // handle the button 9 and append the 9 to the end of the TextView
    @SuppressLint("SetTextI18n")
    public void clickedNine(View view) {
        primaryTextView.setText(primaryTextView.getText() + "9");
    }

    // handle the button 0 and append the 0 to the end of the TextView
    @SuppressLint("SetTextI18n")
    public void clickedZero(View view) {
        primaryTextView.setText(primaryTextView.getText() + "0");
    }
}- 可以在上面的代码app:autoSizeMaxTextSize =“ 80sp”中看到TextView的属性,这是TextView的初始大小。
- app:autoSizeMinTextSize =“ 10sp”使用此属性,TextView的大小将调整为10sp, app:autoSizeStepGranularity =“ 2sp”使用此属性,我们将TextView的大小统一缩小到屏幕外时的2sp 。
- app:autoSizeTextType =“ uniform”通过使用此属性,我们只是在均匀地调整TextView的大小。
- 要记住的一件事是,不应将TextView的高度和宽度设置为wrap_content。
- 要禁用TextView的大小调整,可以将此属性设置为none。如您在下面看到的。
app:autoSizeTextType=”none”
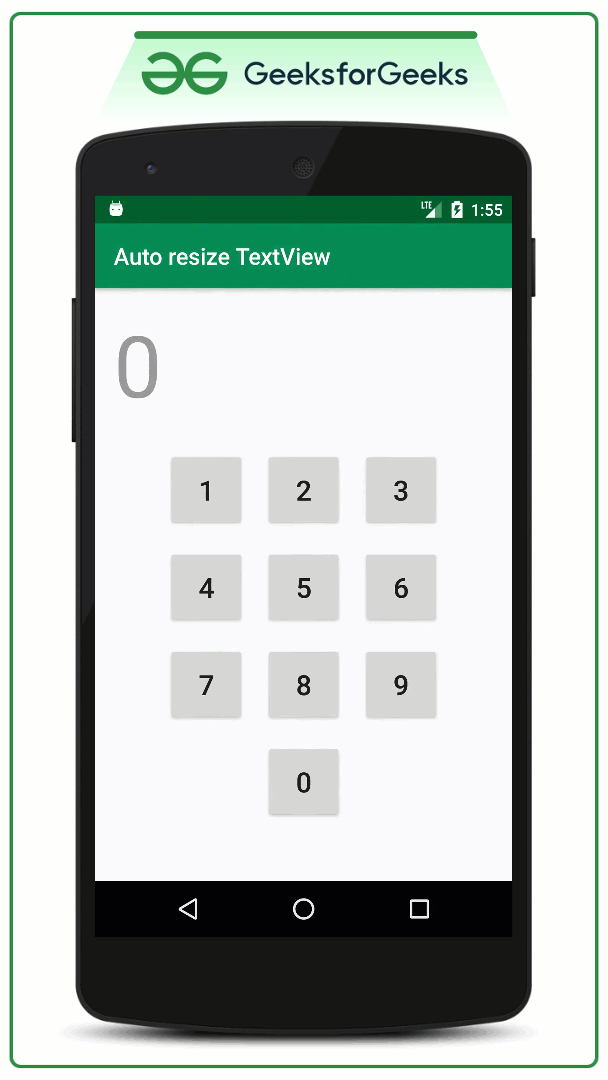
产生以下输出UI:
步骤3:现在,使用onClick XML属性分别处理每个Button
- 现在在MainActivity中。 Java文件,我们将分别处理每个Button的所有onClick函数,并在按下时将TextView设置为适当的数字。因此,现在调用以下代码:
Java
import androidx.appcompat.app.AppCompatActivity;
import android.annotation.SuppressLint;
import android.os.Bundle;
import android.view.View;
import android.widget.TextView;

public class MainActivity extends AppCompatActivity {

    TextView primaryTextView;

    @Override
    protected void onCreate(Bundle savedInstanceState) {
        super.onCreate(savedInstanceState);
        setContentView(R.layout.activity_main);

        // register the button using appropriate ID of the TextView
        primaryTextView = findViewById(R.id.primaryTextView);
    }

    // handle the button 1 and append the 1 to the end of the TextView
    @SuppressLint("SetTextI18n")
    public void clickedOne(View view) {
        primaryTextView.setText(primaryTextView.getText() + "1");
    }

    // handle the button 2 and append the 2 to the end of the TextView
    @SuppressLint("SetTextI18n")
    public void clickedTwo(View view) {
        primaryTextView.setText(primaryTextView.getText() + "2");
    }

    // handle the button 3 and append the 3 to the end of the TextView
    @SuppressLint("SetTextI18n")
    public void clickedThree(View view) {
        primaryTextView.setText(primaryTextView.getText() + "3");
    }

    // handle the button 4 and append the 4 to the end of the TextView
    @SuppressLint("SetTextI18n")
    public void clickedFour(View view) {
        primaryTextView.setText(primaryTextView.getText() + "4");
    }

    // handle the button 5 and append the 5 to the end of the TextView
    @SuppressLint("SetTextI18n")
    public void clickedFive(View view) {
        primaryTextView.setText(primaryTextView.getText() + "5");
    }

    // handle the button 6 and append the 6 to the end of the TextView
    @SuppressLint("SetTextI18n")
    public void clickedSix(View view) {
        primaryTextView.setText(primaryTextView.getText() + "6");
    }

    // handle the button 7 and append the 7 to the end of the TextView
    @SuppressLint("SetTextI18n")
    public void clickedSeven(View view) {
        primaryTextView.setText(primaryTextView.getText() + "7");
    }

    // handle the button 8 and append the 8 to the end of the TextView
    @SuppressLint("SetTextI18n")
    public void clickedEight(View view) {
        primaryTextView.setText(primaryTextView.getText() + "8");
    }

    // handle the button 9 and append the 9 to the end of the TextView
    @SuppressLint("SetTextI18n")
    public void clickedNine(View view) {
        primaryTextView.setText(primaryTextView.getText() + "9");
    }

    // handle the button 0 and append the 0 to the end of the TextView
    @SuppressLint("SetTextI18n")
    public void clickedZero(View view) {
        primaryTextView.setText(primaryTextView.getText() + "0");
    }
}
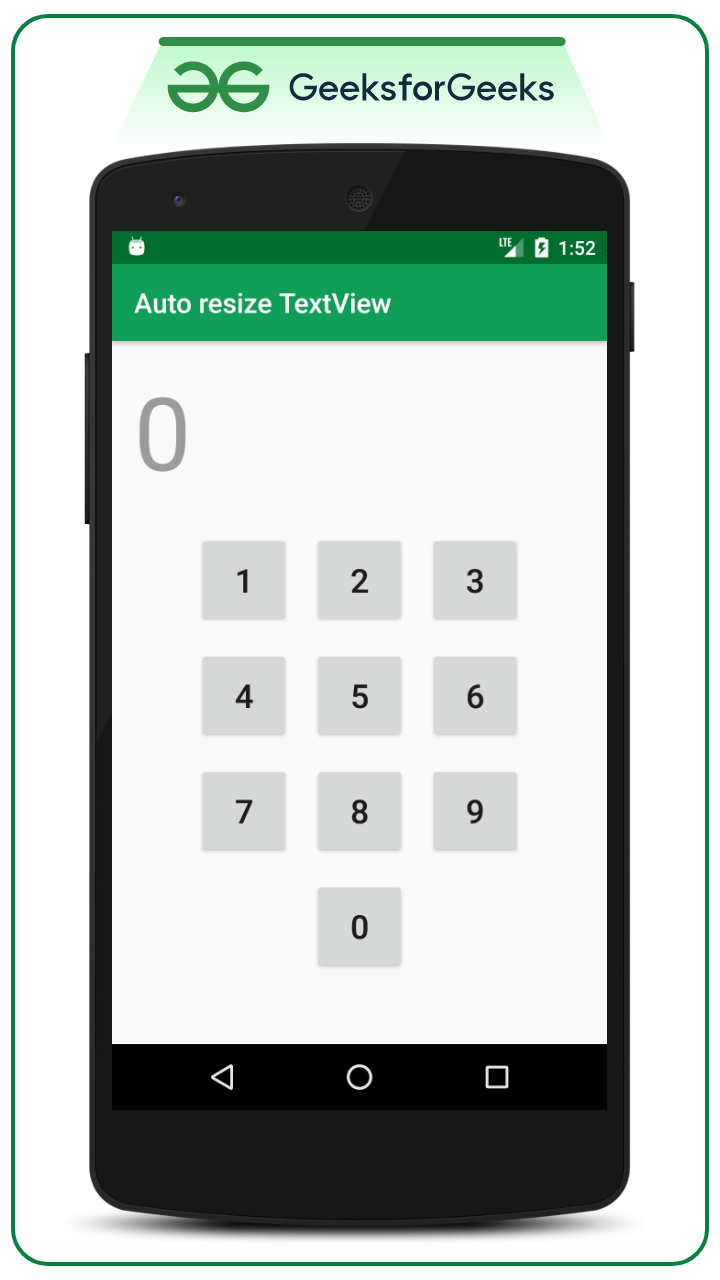
输出:在模拟器上运行
想要一个节奏更快,更具竞争性的环境来学习Android的基础知识吗?
单击此处,前往由我们的专家精心策划的指南,以使您立即做好行业准备!