ElectronJS 简介
如果您有兴趣使用 Web 开发技能为不同的桌面平台(如 Windows、Linux 或 macOS)开发应用程序,Electron 是满足您需求的完美框架。让我们先简单介绍一下 Electron。
ElectronJS: Electron 于 2013 年最近由开源和版本控制巨头 GitHub 开发。 Electron 在其核心中使用 NodeJs,将基于 HTML 和 CSS 构建的页面作为桌面应用程序提供服务。这意味着熟悉 HTML5 或 Android 开发的开发人员可以轻松地将他们的平台切换到 Electron。
Electron 应用程序可以分为两个主要进程,即 Main 和 Renderer 进程。
表演文化:电子表演文化有两个过程:
BrowserWindow实例创建窗口。单个 BrowserWINdow 实例在其渲染器进程中渲染网页。销毁 BrowserWindow 实例意味着相应的渲染器进程也被终止。Electron 支持主进程和渲染器进程的各种 API,这有助于与桌面操作系统及其资源进行交互。
先决条件:下面列出了对开始使用 Electron 很重要的主要先决条件。
- 用于用户界面的 HTML 和 CSS。
- JavaScript 作为主要语言。
- Node.js 和 npm
安装 Electron:让我们从使用 Electron 开发的构建块开始。
node -vnpm -v
npm install electron --save-dev {
"name": "electronapp",
"version": "1.0.0",
"description": "Electron application",
"main": "main.js",
"scripts": {
"start": "electron ."
},
"keywords": [
"Electron"
],
"author": "xyz",
"devDependencies": {
"electron": "^7.1.7"
}
}
const { app, BrowserWindow } = require('electron')

let win

function createWindow () {
  // Create the browser window.
  win = new BrowserWindow({
    width: 800,
    height: 600,
    icon: ( './icon.png'),
    webPreferences: {
      nodeIntegration: true
    }
  })

  // and load the index.html of the app.
  win.loadFile('./index.html')
  //win.loadURL('https://google.com/')

  // Open the DevTools.
   win.webContents.openDevTools()

  // Emitted when the window is closed.
  win.on('closed', () => {
    // Dereference the window object, usually you would store windows
    // in an array if your app supports multi windows, this is the time
    // when you should delete the corresponding element.
    win = null
  })
}

// This method will be called when Electron has finished
// initialization and is ready to create browser windows.
// Some APIs can only be used after this event occurs.
app.on('ready', createWindow)

// Quit when all windows are closed.
app.on('window-all-closed', () => {
  // On macOS it is common for applications and their menu bar
  // to stay active until the user quits explicitly with Cmd + Q
  if (process.platform !== 'darwin') {
    app.quit()
  }
})

app.on('activate', () => {
  // On macOS it's common to re-create a window in the app when the
  // dock icon is clicked and there are no other windows open.
  if (win === null) {
    createWindow()
  }
})
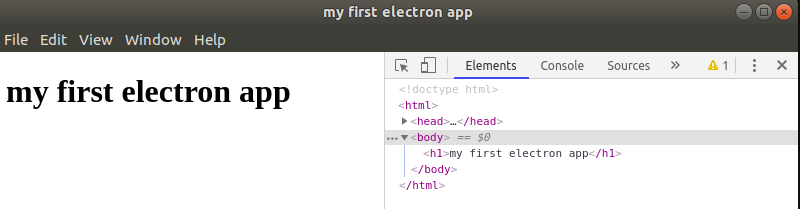
    my first electron app


        my first electron app
npm install --unsafe-perm=true
将下载必要的 node_modules,电子需要渲染页面。 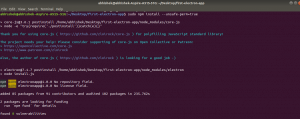
npm run start应用程序,开始是我们在 package.json 中定义的脚本。 
输出:
参考资料: https://electronjs.org/docs/tutorial/first-app#installing-electron