在 OpenCV 中使用卷积进行图像过滤
先决条件: OpenCV基础,卷积基础
在本文中,讨论了在 OpenCV(开源计算机视觉)中使用卷积过滤图像。为了在Python中使用 OpenCV 库,应安装以下库作为先决条件:
- Numpy 库
- Matplotlib 库
- OpenCV 库
要安装以下库,请在命令提示符下运行以下命令:
pip install opencv-python
 pip install numpy
 pip install matplotlib
二维卷积
图像处理中最基本和最基本的操作是卷积。这可以通过使用内核来实现。核是一个矩阵,通常比图像小,核矩阵的中心与像素重合。
在 2D 卷积中,核矩阵是一个二维方形 A x B 矩阵,其中 A 和 B 都是奇数
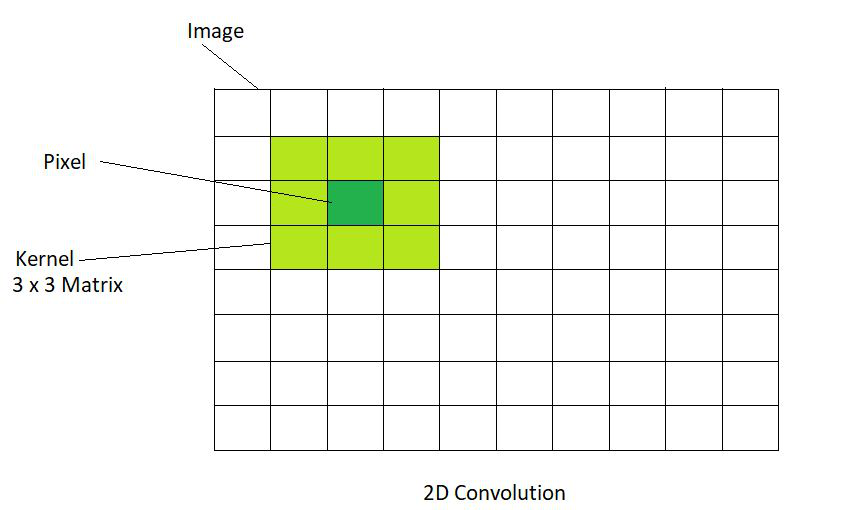
输出图像的位置是通过将矩阵的每个值与图像矩阵的对应值相乘,然后将它们相加得到。基于执行的这些操作,可以执行各种效果,例如图像的模糊和锐化。
身份内核
身份内核是可以执行的最简单和最基本的内核操作。生成的输出图像与作为输入给出的图像完全一样。它确实改变了输入图像。它是一个中心元素等于1的方阵。矩阵的所有其他元素都是0。下面给出的代码演示了Identity Kernel的操作:
使用的图像:

Python3
# Importing OpenCV and Numpy Libraries
import cv2
import numpy as np

# Reads image from the disk using cv2.imread() function
img = cv2.imread('geeksforgeeks.png')

# Apply identity kernel
# In an Identity Kernel matrix the value of the middle element is 1
# The values of all the other elements are 0
id_kernel = np.array([[0, 0, 0],
                    [0, 1, 0],
                    [0, 0, 0]])

# Filtered image is obtained using the variable flt_img
# cv2.fliter2D() is the function used
# src is the source of image(here, img)
# ddepth is destination depth. -1 will mean output image will have same depth as input image
# kernel is used for specifying the kernel operation (here, id_kernel)
flt_img = cv2.filter2D(src=img, ddepth=-1, kernel=id_kernel)

# Display the filtered image using cv2.imshow() function
# Here, output image is same as input image since we are using identity kernel
cv2.imshow('Identity', flt_img)

# cv2.waitkey(delay) function holds the screen till any key is pressed by the user
# It pauses the screen for delay milliseconds if the delay is a positive value
# It pauses the screen for a key event infinitely if the delay is 0 or negative
cv2.waitKey(0)

# cv2.destroyAllWindows() function deletes all the GUI windows from memory
cv2.destroyAllWindows()
Python3
# Importing the OpenCV, Numpy and Mat libraries
import cv2
import numpy as np
import matplotlib.pyplot as plt

# Reading the image from the disk using cv2.imread() function
# Showing the original image using matplotlib library function plt.imshow()
img = cv2.imread('geeksforgeeks.png')
plt.imshow(img)
plt.show()

# Kernel for box blur filter
# It is a unity matrix which is divided by 9
box_blur_ker = np.array([[0.1111111, 0.1111111, 0.1111111],
                    [0.1111111, 0.1111111, 0.1111111],
                    [0.1111111, 0.1111111, 0.1111111]])

# Applying Box Blur effect
# Using the cv2.filter2D() function
# src is the source of image(here, img)
# ddepth is destination depth. -1 will mean output image will have same depth as input image
# kernel is used for specifying the kernel operation (here, box_blur_ker)
Box_blur = cv2.filter2D(src=img, ddepth=-1, kernel=box_blur_ker)

# Showing the box blur image using matplotlib library function plt.imshow()
plt.imshow(Box_blur)
plt.show()
Python3
# Importing the OpenCV, Numpy and Matplotlib libraries
import cv2
import numpy as np
import matplotlib.pyplot as plt

# Reading the image from the disk using cv2.imread() function
# Showing the original image using matplotlib library function plt.imshow()
img = cv2.imread('geeksforgeeks.png')
plt.imshow(img)
plt.show()

# Applying Gaussian Blur Filter using cv2.GaussianBlur() function
# src is the source of image(here, img)
# ksize is the size of kernel in the form A x B (here 3 x 3)
# sigmaX is standard deviation of X axis
# sigmaY is the standard deviation of Y axis
# Since sigmaX and sigmaY is 0, the standard deviation the size of kernel
gaussian_blur = cv2.GaussianBlur(src=img, ksize=(3,3),sigmaX=0, sigmaY=0)

# Showing the Gaussian blur image using matplotlib library function plt.imshow()
plt.imshow(gaussian_blur)
plt.show()
Python3
# Importing the OpenCV, Numpy and Matplotlib libraries
import cv2
import numpy as np
import matplotlib.pyplot as plt

# Reading the image from the disk using cv2.imread() function
# Showing the original image using matplotlib library function plt.imshow()
img = cv2.imread('geeksforgeeks.png')
plt.imshow(img)
plt.show()

# Applying median Blur Filter using cv2.medianBlur() function
# src is the source of image(here, img)
# ksize is the size of kernel. Should have a positive odd value
median_blur = cv2.medianBlur(src=img, ksize=9)

# Showing the Median blur image using matplotlib library function plt.imshow()
plt.imshow(median_blur)
plt.show()
Python3
# Importing the OpenCV, Numpy and Matplotlib libraries
import cv2
import numpy as np
import matplotlib.pyplot as plt

# Reading the image from the disk using cv2.imread() function
# Showing the original image using matplotlib library function plt.imshow()
img = cv2.imread('geeksforgeeks.png')
plt.imshow(img)
plt.show()

# Apply kernel for sharpening
sharp_kernel = np.array([[0, -1, 0],
                    [-1, 5, -1],
                    [0, -1, 0]])

# Sharpeneded image is obtained using the variable sharp_img
# cv2.fliter2D() is the function used
# src is the source of image(here, img)
# ddepth is destination depth. -1 will mean output image will have same depth as input image
# kernel is used for specifying the kernel operation (here, sharp_kernel)
sharp_img = cv2.filter2D(src=img, ddepth=-1, kernel=sharp_kernel)

# Showing the sharpened image using matplotlib library function plt.imshow()
plt.imshow(sharp_img)
plt.show()
Python3
# Importing the OpenCV, Numpy and Matplotlib libraries
import cv2
import numpy as np
import matplotlib.pyplot as plt

# Reading the image from the disk using cv2.imread() function
# Showing the original image using matplotlib library function plt.imshow()
img = cv2.imread('geeksforgeeks.png')
plt.imshow(img)
plt.show()

# Apply kernel for embossing
emboss_kernel = np.array([[-1, 0, 0],
                    [0, 0, 0],
                    [0, 0, 1]])

# Embossed image is obtained using the variable emboss_img
# cv2.fliter2D() is the function used
# src is the source of image(here, img)
# ddepth is destination depth. -1 will mean output image will have same depth as input image
# kernel is used for specifying the kernel operation (here, emboss_kernel)
emboss_img = cv2.filter2D(src=img, ddepth=-1, kernel=emboss_kernel)

# Showing the embossed image using matplotlib library function plt.imshow()
plt.imshow(emboss_img)
plt.show()
输出 :

模糊
模糊被定义为对邻域内像素的值进行平均。这种平均效果使锐利的边缘变得平滑或模糊。模糊效果也被称为“低通滤波器”效果,因为它只允许低频(像素变化率低)通过它。
模糊图像所涉及的步骤:
- 在像素 (p) 上选择内核的大小。核的大小越大,平滑效果越大。这是因为,大内核会产生相对于相邻像素的大平均值,从而导致大量平滑。
- 将内核的每个值与图像矩阵的相应值相乘。
- 将乘法的结果相加并计算平均值并获得结果。
- 最后,用获得的结果替换像素 (p) 的值。
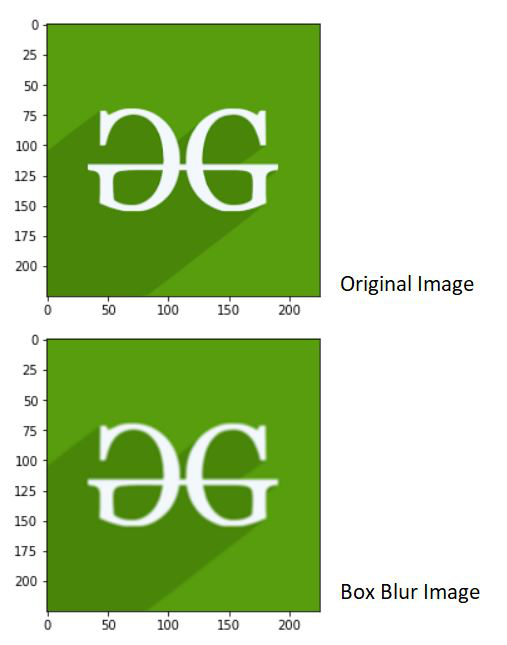
框模糊:
这是通过对邻域中的值进行均匀平均而获得的。这是一个简单的模糊。它表示如下:
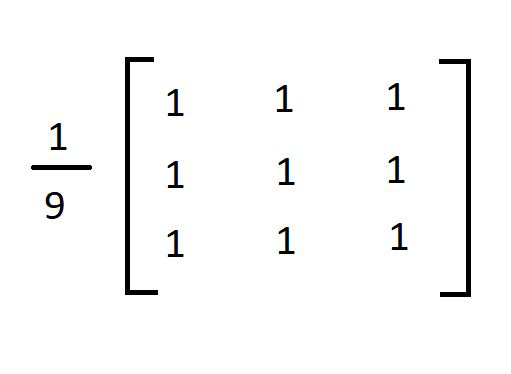
这些值的总和应为 1。这就是我们将矩阵除以 9 的原因。这称为归一化。以下是演示框模糊效果的代码:
蟒蛇3
# Importing the OpenCV, Numpy and Mat libraries
import cv2
import numpy as np
import matplotlib.pyplot as plt

# Reading the image from the disk using cv2.imread() function
# Showing the original image using matplotlib library function plt.imshow()
img = cv2.imread('geeksforgeeks.png')
plt.imshow(img)
plt.show()

# Kernel for box blur filter
# It is a unity matrix which is divided by 9
box_blur_ker = np.array([[0.1111111, 0.1111111, 0.1111111],
                    [0.1111111, 0.1111111, 0.1111111],
                    [0.1111111, 0.1111111, 0.1111111]])

# Applying Box Blur effect
# Using the cv2.filter2D() function
# src is the source of image(here, img)
# ddepth is destination depth. -1 will mean output image will have same depth as input image
# kernel is used for specifying the kernel operation (here, box_blur_ker)
Box_blur = cv2.filter2D(src=img, ddepth=-1, kernel=box_blur_ker)

# Showing the box blur image using matplotlib library function plt.imshow()
plt.imshow(Box_blur)
plt.show()
输出 :
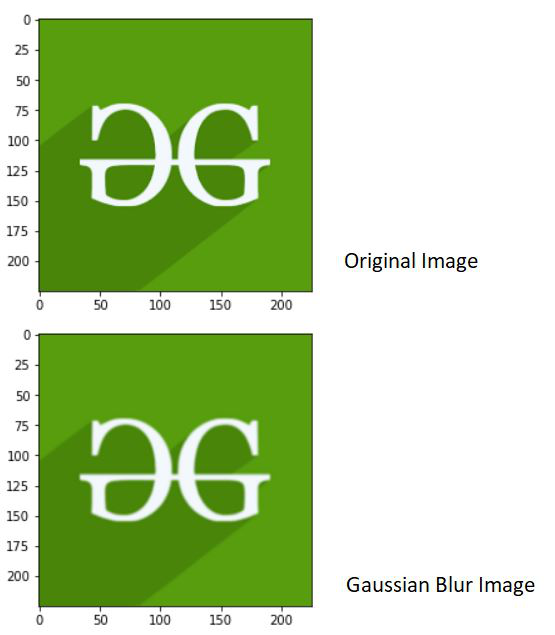
高斯模糊:
可以通过找到像素的加权平均值来获得该滤波器。像素的权重是根据到内核中心的距离计算的。靠近内核中心的像素对加权平均值的影响更大。
高斯滤波器需要 2 个规格——X 轴的标准偏差和 Y 轴的标准偏差,分别表示为sigmaX和sigmaY 。如果它们都设置为 0,则采用内核大小来计算标准偏差。
下面给出的代码演示了高斯模糊过滤器:
蟒蛇3
# Importing the OpenCV, Numpy and Matplotlib libraries
import cv2
import numpy as np
import matplotlib.pyplot as plt

# Reading the image from the disk using cv2.imread() function
# Showing the original image using matplotlib library function plt.imshow()
img = cv2.imread('geeksforgeeks.png')
plt.imshow(img)
plt.show()

# Applying Gaussian Blur Filter using cv2.GaussianBlur() function
# src is the source of image(here, img)
# ksize is the size of kernel in the form A x B (here 3 x 3)
# sigmaX is standard deviation of X axis
# sigmaY is the standard deviation of Y axis
# Since sigmaX and sigmaY is 0, the standard deviation the size of kernel
gaussian_blur = cv2.GaussianBlur(src=img, ksize=(3,3),sigmaX=0, sigmaY=0)

# Showing the Gaussian blur image using matplotlib library function plt.imshow()
plt.imshow(gaussian_blur)
plt.show()
输出 :
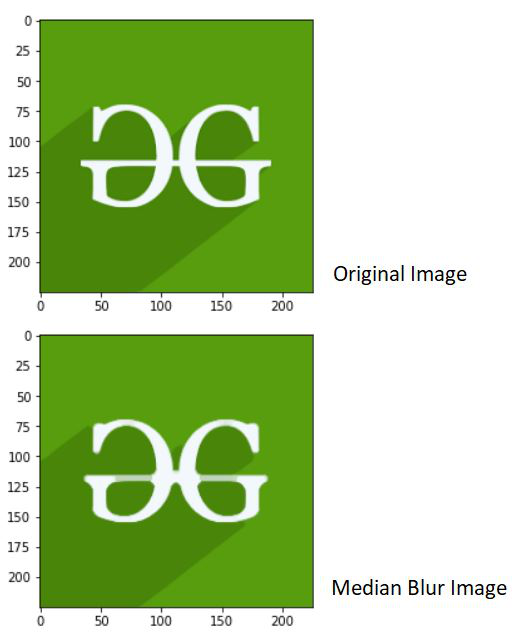
中值模糊:
Median Blur 过滤效果是将每个像素值替换为邻域内图像像素的中值。
下面给出的代码演示了中值模糊:
蟒蛇3
# Importing the OpenCV, Numpy and Matplotlib libraries
import cv2
import numpy as np
import matplotlib.pyplot as plt

# Reading the image from the disk using cv2.imread() function
# Showing the original image using matplotlib library function plt.imshow()
img = cv2.imread('geeksforgeeks.png')
plt.imshow(img)
plt.show()

# Applying median Blur Filter using cv2.medianBlur() function
# src is the source of image(here, img)
# ksize is the size of kernel. Should have a positive odd value
median_blur = cv2.medianBlur(src=img, ksize=9)

# Showing the Median blur image using matplotlib library function plt.imshow()
plt.imshow(median_blur)
plt.show()
输出 :
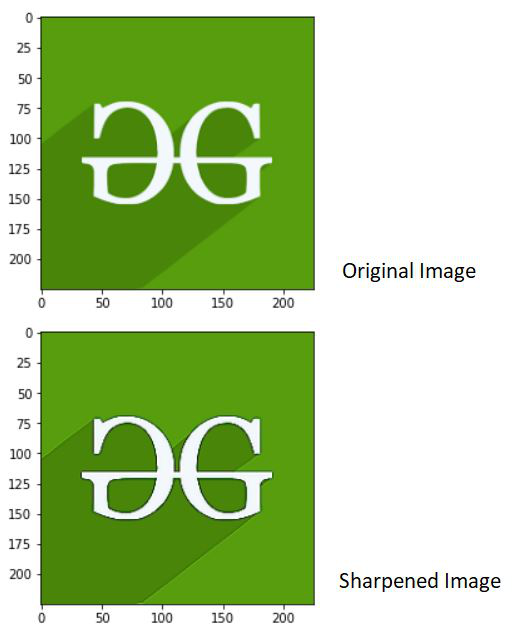
锐化
图像锐化有助于增强边缘并使其清晰。此过滤器有助于锐化边缘并使图像看起来突出。使用此过滤器时,图像中的特征看起来很独特。
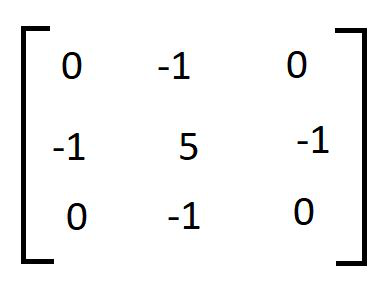
我们使用自定义 2D 内核来应用这种过滤技术。以下内核可用于锐化图像:
下面给出的代码演示了锐化过滤器的用法:
蟒蛇3
# Importing the OpenCV, Numpy and Matplotlib libraries
import cv2
import numpy as np
import matplotlib.pyplot as plt

# Reading the image from the disk using cv2.imread() function
# Showing the original image using matplotlib library function plt.imshow()
img = cv2.imread('geeksforgeeks.png')
plt.imshow(img)
plt.show()

# Apply kernel for sharpening
sharp_kernel = np.array([[0, -1, 0],
                    [-1, 5, -1],
                    [0, -1, 0]])

# Sharpeneded image is obtained using the variable sharp_img
# cv2.fliter2D() is the function used
# src is the source of image(here, img)
# ddepth is destination depth. -1 will mean output image will have same depth as input image
# kernel is used for specifying the kernel operation (here, sharp_kernel)
sharp_img = cv2.filter2D(src=img, ddepth=-1, kernel=sharp_kernel)

# Showing the sharpened image using matplotlib library function plt.imshow()
plt.imshow(sharp_img)
plt.show()
输出 :
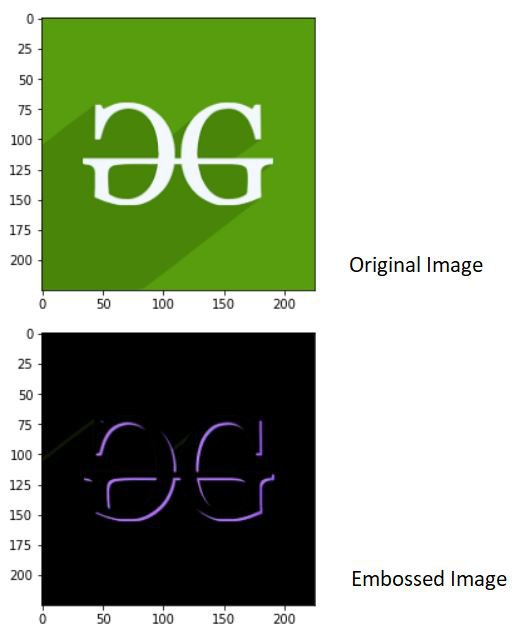
浮雕
形成从表面弹出的 3D 设计称为浮雕。它用阴影或高光替换像素。
以下内核矩阵可用于应用浮雕过滤器:
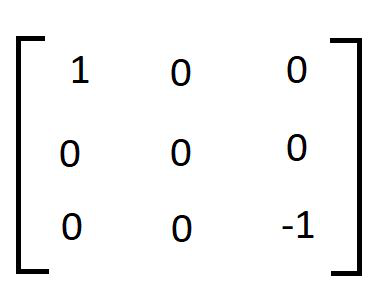
以下代码演示了压花过滤器的应用:
蟒蛇3
# Importing the OpenCV, Numpy and Matplotlib libraries
import cv2
import numpy as np
import matplotlib.pyplot as plt

# Reading the image from the disk using cv2.imread() function
# Showing the original image using matplotlib library function plt.imshow()
img = cv2.imread('geeksforgeeks.png')
plt.imshow(img)
plt.show()

# Apply kernel for embossing
emboss_kernel = np.array([[-1, 0, 0],
                    [0, 0, 0],
                    [0, 0, 1]])

# Embossed image is obtained using the variable emboss_img
# cv2.fliter2D() is the function used
# src is the source of image(here, img)
# ddepth is destination depth. -1 will mean output image will have same depth as input image
# kernel is used for specifying the kernel operation (here, emboss_kernel)
emboss_img = cv2.filter2D(src=img, ddepth=-1, kernel=emboss_kernel)

# Showing the embossed image using matplotlib library function plt.imshow()
plt.imshow(emboss_img)
plt.show()
输出 :