MoviePy 简介
MoviePy是一个用于视频编辑的Python模块,可用于基本操作(如剪切、连接、标题插入)、视频合成(也称为非线性编辑)、视频处理或创建高级效果。它可以读写最常见的视频格式,包括 GIF。
安装
要安装电影编辑器库,请打开终端并编写:
pip install moviepy注意:此模块会自动安装 FFmpeg。但是,在某些情况下,您可能会提示安装。
即使在安装 MoviePy 之后,除非安装 ImageMagick,否则某些功能将无法使用,例如在视频或 GIF 上添加文本等功能。
安装 ImageMagick
ImageMagick不是严格要求的,只有当用户想要写文本时。它也可以用作 GIF 的后端,尽管用户可以在没有 ImageMagick 的情况下使用 MoviePy 制作 GIF。下面是ImageMagick的下载链接
https://imagemagick.org/script/download.php安装后,MoviePy 将自动检测 ImageMagick,Windows 除外。 Windows 用户必须进入moviepy/config_defaults.py 文件并提供名为magick 的ImageMagick 二进制文件的路径。
IMAGEMAGICK_BINARY = "C:\\Program Files\\ImageMagick_VERSION\\magick.exe"
or for some older versions of ImageMagick it will be
IMAGEMAGICK_BINARY = "C:\\Program Files\\ImageMagick_VERSION\\convert.exe"
要在文章改进时使用视频 – 单击此处示例 1
我们将加载视频,我们将从整个视频中剪切一个剪辑,然后将视频倒置旋转,在此示例中,不需要安装 ImageMagick。
下面是实现
Python3
# Import everything needed to edit video clips
from moviepy.editor import *

# loading video dsa gfg intro video
clip = VideoFileClip("dsa_geek.webm")

# clipping of the video
# getting video for only starting 10 seconds
clip = clip.subclip(0, 10)

# rotating video by 180 degree
clip = clip.rotate(180)

# Reduce the audio volume (volume x 0.5)
clip = clip.volumex(0.5)

# showing clip
clip.ipython_display(width = 280)
Python3
# Import everything needed to edit video clips
from moviepy.editor import *

# loading video dsa gfg intro video
clip = VideoFileClip("dsa_geek.webm")

# clipping of the video
# getting video for only starting 10 seconds
clip = clip.subclip(0, 10)

# Reduce the audio volume (volume x 0.8)
clip = clip.volumex(0.8)

# Generate a text clip
txt_clip = TextClip("GeeksforGeeks", fontsize = 70, color = 'white')

# setting position of text in the center and duration will be 10 seconds
txt_clip = txt_clip.set_pos('center').set_duration(10)

# Overlay the text clip on the first video clip
video = CompositeVideoClip([clip, txt_clip])

# showing video
video.ipython_display(width = 280)
Python3
import moviepy.editor as me

# Our focus is on how to export video file,
# you can use any code, or just refer following code
'''
vid= me.VideoFileClip('Video_1.mp4')
# Grabbing Object from storage

# Creating a page with 'My Title' text in red
colout with given size and background colour
white and fontsize 30
'''
SYNTAX:
obj=me.TextClip("Text That you want",
                color='{as string}',
                size=(as,tuple),
                bg_color='as string',
                fontsize=int )

'''

title=me.TextClip('My Title',color='red',size=(1920,1000),bg_color='white',fontsize=30)

# title.set_duration(int seconds)
title_clip_ = title.set_duration(3)
#For 3 seconds My Title willbe shown in video

render=me.concatenate_videoclips([title_clip_,vid])
# Combining our manually created Video i.e My Title of 3 sec with grabbed video

'''

me.write_videofile("Name you want".mp4,endcoding)

# If successfully executor there will be file.mp4 or at path
# If you have explicitly mentioned else in same folder as program
print("Done")
Python3
import moviepy.editor

'''
Grabbing The video's from storage
syntax:
variable_holding_video_name= moviepy.editor.VideoFileCLip("{{Filename}}.{{extension}}")

'''
clip_1= moviepy.editor.VideoFileClip("Video_1.mp4")
clip_2= moviepy.editor.VideoFileClip("Video_2.mp4")

'''
TO join the video's i.e. concatenate the videos'
use function concatenate_videoclips(list_of_clips_to_mearged)
syntax:
variable_to_hold_mearged_video= moviepy.editor.concatenate_videclips([video_1,Video_2,. . .])
'''
Mearged_video=moviepy.editor.concatenate_videoclips([clip_1,clip_2])

# Saving File as output.mp4  in same folder
# libx264 is encoding lib for creating video stream(H.264)
Mearged_video.write_videofile("Output.mp4",codec='libx264')

print("Done")
Python3
import moviepy.editor as me

# Grabbing file
vid= me.VideoFileClip("Video_1.mp4")

print(str(vid.duration))
输出 :
Moviepy - Building video __temp__.mp4.
Moviepy - Writing video __temp__.mp4


Moviepy - Done !
Moviepy - video ready __temp__.mp4示例 2:
我们将加载视频并从整个视频中剪切一个剪辑,然后我们将在视频中添加文本,在此示例中,我们必须安装 ImageMagick 否则它将无法工作。
下面是实现
Python3
# Import everything needed to edit video clips
from moviepy.editor import *

# loading video dsa gfg intro video
clip = VideoFileClip("dsa_geek.webm")

# clipping of the video
# getting video for only starting 10 seconds
clip = clip.subclip(0, 10)

# Reduce the audio volume (volume x 0.8)
clip = clip.volumex(0.8)

# Generate a text clip
txt_clip = TextClip("GeeksforGeeks", fontsize = 70, color = 'white')

# setting position of text in the center and duration will be 10 seconds
txt_clip = txt_clip.set_pos('center').set_duration(10)

# Overlay the text clip on the first video clip
video = CompositeVideoClip([clip, txt_clip])

# showing video
video.ipython_display(width = 280)
输出 :
Moviepy - Building video __temp__.mp4.
Moviepy - Writing video __temp__.mp4


Moviepy - Done !
Moviepy - video ready __temp__.mp4导出视频文件:
您需要函数write_videofile(arg1, arg2),如果不这样做,它不会反映在硬盘文件上,因为文件已加载到 RAM 中。
Python3
import moviepy.editor as me

# Our focus is on how to export video file,
# you can use any code, or just refer following code
'''
vid= me.VideoFileClip('Video_1.mp4')
# Grabbing Object from storage

# Creating a page with 'My Title' text in red
colout with given size and background colour
white and fontsize 30
'''
SYNTAX:
obj=me.TextClip("Text That you want",
                color='{as string}',
                size=(as,tuple),
                bg_color='as string',
                fontsize=int )

'''

title=me.TextClip('My Title',color='red',size=(1920,1000),bg_color='white',fontsize=30)

# title.set_duration(int seconds)
title_clip_ = title.set_duration(3)
#For 3 seconds My Title willbe shown in video

render=me.concatenate_videoclips([title_clip_,vid])
# Combining our manually created Video i.e My Title of 3 sec with grabbed video

'''

me.write_videofile("Name you want".mp4,endcoding)

# If successfully executor there will be file.mp4 or at path
# If you have explicitly mentioned else in same folder as program
print("Done")
输出:
合并视频文件 –
我们可以合并 2 按照我们的要求将视频文件转换为单个文件
Python3
import moviepy.editor

'''
Grabbing The video's from storage
syntax:
variable_holding_video_name= moviepy.editor.VideoFileCLip("{{Filename}}.{{extension}}")

'''
clip_1= moviepy.editor.VideoFileClip("Video_1.mp4")
clip_2= moviepy.editor.VideoFileClip("Video_2.mp4")

'''
TO join the video's i.e. concatenate the videos'
use function concatenate_videoclips(list_of_clips_to_mearged)
syntax:
variable_to_hold_mearged_video= moviepy.editor.concatenate_videclips([video_1,Video_2,. . .])
'''
Mearged_video=moviepy.editor.concatenate_videoclips([clip_1,clip_2])

# Saving File as output.mp4  in same folder
# libx264 is encoding lib for creating video stream(H.264)
Mearged_video.write_videofile("Output.mp4",codec='libx264')

print("Done")
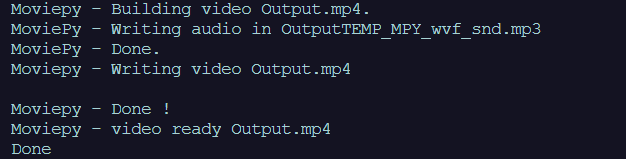
输出:

要知道视频的长度:
Python3
import moviepy.editor as me

# Grabbing file
vid= me.VideoFileClip("Video_1.mp4")

print(str(vid.duration))
输出:
9.04 电影派的优势
- 简单:基本操作可以一行完成,代码易学易懂,新手易懂。
- 灵活:用户可以完全控制视频和音频的帧,创建自己的效果就像 Py.
- 便携:代码使用非常常见的软件,例如 Numpy 和 FFMPEG。并且可以在几乎任何具有几乎任何版本的Python的机器上运行。
MoviePy 的缺点:
- MoviePy 还不能流式传输视频(从网络摄像头读取,或在远程机器上实时渲染视频)
- 它并不是真正为涉及电影的许多连续帧的视频处理而设计的(比如视频稳定,你需要另一个软件)
- 如果用户同时使用多个视频、音频和图像源 (>100),可能会出现内存问题