开始进入计算机视觉的基本 OpenCV 函数
计算机视觉是一个过程,通过它我们可以了解图像和视频的存储方式以及我们如何操作和从中检索数据。计算机视觉是人工智能的基础或主要用于人工智能。计算机视觉在自动驾驶汽车、机器人技术以及照片校正应用程序中发挥着重要作用。
OpenCV 是用于计算机视觉、机器学习和图像处理的大型开源库,现在它在实时操作中发挥着重要作用,这在当今的系统中非常重要。通过使用它,人们可以处理图像和视频以识别物体、面部甚至是人类的笔迹。当它与各种库(例如 NumPy)集成时, Python能够处理 OpenCV 数组结构以进行分析。为了识别图像模式及其各种特征,我们使用向量空间并对这些特征执行数学运算。
在本文中,我们将讨论 OpenCV 中的一些常用函数及其应用。
注意:本文中使用的函数对于 OpenCV 支持的不同语言是通用的。
阅读图像
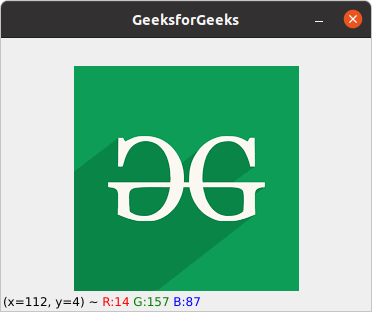
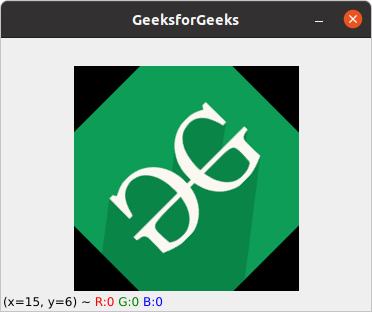
使用 cv2.imread() 方法读取图像。此方法从指定文件加载图像。如果无法读取图像(由于缺少文件、权限不正确、格式不受支持或无效),则此方法返回一个空矩阵。
使用的图像

示例: Python OpenCV 读取图像
Python3
# Python code to read image
import cv2

# To read image from disk, we use
# cv2.imread function, in below method,
img = cv2.imread("geeks.png", cv2.IMREAD_COLOR)

# Creating GUI window to display an image on screen
# first Parameter is windows title (should be in string format)
# Second Parameter is image array
cv2.imshow("GeeksforGeeks", img)

# To hold the window on screen, we use cv2.waitKey method
# Once it detected the close input, it will release the control
# To the next line
# First Parameter is for holding screen for specified milliseconds
# It should be positive integer. If 0 pass an parameter, then it will
# hold the screen until user close it.
cv2.waitKey(0)

# It is for removing/deleting created GUI window from screen
# and memory
cv2.destroyAllWindows()
Python3
# Python program to explain cv2.imwrite() method

# importing cv2
import cv2

image_path = 'geeks.png'

# Using cv2.imread() method
# to read the image
img = cv2.imread(image_path)

# Filename
filename = 'savedImage.jpg'

# Using cv2.imwrite() method
# Saving the image
cv2.imwrite(filename, img)

# Reading and showing the saved image
img = cv2.imread(filename)
cv2.imshow("GeeksforGeeks", img)

cv2.waitKey(0)
cv2.destroyAllWindows()
Python3
import cv2
import numpy as np
import matplotlib.pyplot as plt

image = cv2.imread("geeks.png", 1)
# Loading the image

half = cv2.resize(image, (0, 0), fx = 0.1, fy = 0.1)
bigger = cv2.resize(image, (1050, 1610))

stretch_near = cv2.resize(image, (780, 540),
            interpolation = cv2.INTER_NEAREST)


Titles =["Original", "Half", "Bigger", "Interpolation Nearest"]
images =[image, half, bigger, stretch_near]
count = 4

for i in range(count):
    plt.subplot(2, 3, i + 1)
    plt.title(Titles[i])
    plt.imshow(images[i])

plt.show()
Python3
# Python program to explain cv2.cvtColor() method

# importing cv2
import cv2

# path
path = 'geeks.png'

# Reading an image in default mode
src = cv2.imread(path)

# Window name in which image is displayed
window_name = 'GeeksforGeeks'

# Using cv2.cvtColor() method
# Using cv2.COLOR_BGR2GRAY color space
# conversion code
image = cv2.cvtColor(src, cv2.COLOR_BGR2GRAY )

# Displaying the image
cv2.imshow(window_name, image)

cv2.waitKey(0)
cv2.destroyAllWindows()
Python3
# Python program to explain cv2.rotate() method

# importing cv2
import cv2

# path
path = 'geeks.png'

# Reading an image in default mode
src = cv2.imread(path)

# Window name in which image is displayed
window_name = 'Image'

# Using cv2.rotate() method
# Using cv2.ROTATE_90_CLOCKWISE rotate
# by 90 degrees clockwise
image = cv2.rotate(src, cv2.cv2.ROTATE_90_CLOCKWISE)

# Displaying the image
cv2.imshow(window_name, image)
cv2.waitKey(0)
Python3
import cv2
import numpy as np

FILE_NAME = 'geeks.png'

# Read image from the disk.
img = cv2.imread(FILE_NAME)

# Shape of image in terms of pixels.
(rows, cols) = img.shape[:2]

# getRotationMatrix2D creates a matrix needed
# for transformation. We want matrix for rotation
# w.r.t center to 45 degree without scaling.
M = cv2.getRotationMatrix2D((cols / 2, rows / 2), 45, 1)
res = cv2.warpAffine(img, M, (cols, rows))

cv2.imshow("GeeksforGeeks", res)

cv2.waitKey(0)
cv2.destroyAllWindows()
Python3
import cv2
import numpy as np

image = cv2.imread('geeks.png')

# Store height and width of the image
height, width = image.shape[:2]

quarter_height, quarter_width = height / 4, width / 4

T = np.float32([[1, 0, quarter_width], [0, 1, quarter_height]])

# We use warpAffine to transform
# the image using the matrix, T
img_translation = cv2.warpAffine(image, T, (width, height))

cv2.imshow('Translation', img_translation)
cv2.waitKey(0)

cv2.destroyAllWindows()
Python3
import cv2

FILE_NAME = 'geeks.png'

# Read image from disk.
img = cv2.imread(FILE_NAME)

# Canny edge detection.
edges = cv2.Canny(img, 100, 200)

# Write image back to disk.
cv2.imshow('Edges', edges)
cv2.waitKey(0)
cv2.destroyAllWindows()
输出:

保存图像
cv2.imwrite() 方法用于将图像保存到任何存储设备。这将根据当前工作目录中的指定格式保存图像。
示例: Python OpenCV 保存图像
Python3
# Python program to explain cv2.imwrite() method

# importing cv2
import cv2

image_path = 'geeks.png'

# Using cv2.imread() method
# to read the image
img = cv2.imread(image_path)

# Filename
filename = 'savedImage.jpg'

# Using cv2.imwrite() method
# Saving the image
cv2.imwrite(filename, img)

# Reading and showing the saved image
img = cv2.imread(filename)
cv2.imshow("GeeksforGeeks", img)

cv2.waitKey(0)
cv2.destroyAllWindows()
输出:
调整图像大小
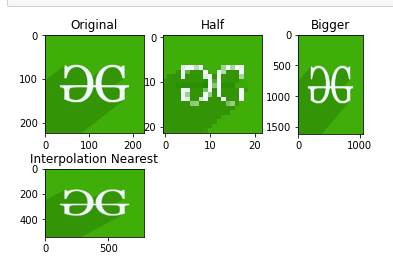
图像大小调整是指图像的缩放。它有助于减少图像中的像素数量,并且有几个优点,例如它可以减少神经网络的训练时间,因为图像中的像素数量越多,输入节点的数量就越多,这反过来又会增加模型的复杂性。它还有助于放大图像。很多时候,我们需要调整图像的大小,即缩小或放大图像以满足尺寸要求。
OpenCV 为我们提供了几种调整图像大小的插值方法。调整大小的插值方法的选择 -
- cv2.INTER_AREA:当我们需要缩小图像时使用。
- cv2.INTER_CUBIC:这很慢但更有效。
- cv2.INTER_LINEAR:主要在需要缩放时使用。这是 OpenCV 中的默认插值技术。
示例: Python OpenCV 图像大小调整
Python3
import cv2
import numpy as np
import matplotlib.pyplot as plt

image = cv2.imread("geeks.png", 1)
# Loading the image

half = cv2.resize(image, (0, 0), fx = 0.1, fy = 0.1)
bigger = cv2.resize(image, (1050, 1610))

stretch_near = cv2.resize(image, (780, 540),
            interpolation = cv2.INTER_NEAREST)


Titles =["Original", "Half", "Bigger", "Interpolation Nearest"]
images =[image, half, bigger, stretch_near]
count = 4

for i in range(count):
    plt.subplot(2, 3, i + 1)
    plt.title(Titles[i])
    plt.imshow(images[i])

plt.show()
输出:
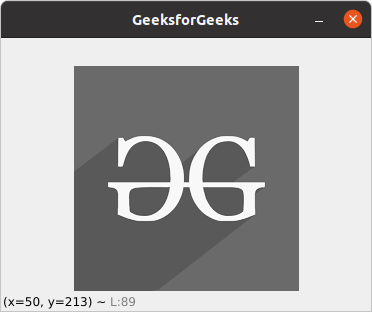
色彩空间
颜色空间是一种表示图像中存在的颜色通道的方法,它赋予图像特定的色调。有几种不同的色彩空间,每一种都有自己的意义。一些流行的色彩空间是 RGB(红色、绿色、蓝色)、CMYK(青色、品红色、黄色、黑色)、HSV(色相、饱和度、值)等。
cv2.cvtColor() 方法用于将图像从一种颜色空间转换为另一种颜色空间。 OpenCV 中有超过 150 种颜色空间转换方法可用。
示例: Python OpenCV 颜色空间
Python3
# Python program to explain cv2.cvtColor() method

# importing cv2
import cv2

# path
path = 'geeks.png'

# Reading an image in default mode
src = cv2.imread(path)

# Window name in which image is displayed
window_name = 'GeeksforGeeks'

# Using cv2.cvtColor() method
# Using cv2.COLOR_BGR2GRAY color space
# conversion code
image = cv2.cvtColor(src, cv2.COLOR_BGR2GRAY )

# Displaying the image
cv2.imshow(window_name, image)

cv2.waitKey(0)
cv2.destroyAllWindows()
输出:
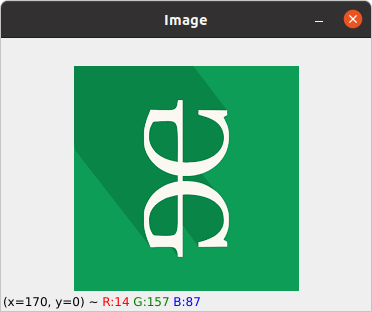
旋转图像
cv2.rotate() 方法用于将二维数组旋转 90 度的倍数。函数cv::rotate 以三种不同的方式旋转数组。
示例: Python OpenCV 旋转图像
Python3
# Python program to explain cv2.rotate() method

# importing cv2
import cv2

# path
path = 'geeks.png'

# Reading an image in default mode
src = cv2.imread(path)

# Window name in which image is displayed
window_name = 'Image'

# Using cv2.rotate() method
# Using cv2.ROTATE_90_CLOCKWISE rotate
# by 90 degrees clockwise
image = cv2.rotate(src, cv2.cv2.ROTATE_90_CLOCKWISE)

# Displaying the image
cv2.imshow(window_name, image)
cv2.waitKey(0)
输出:
上述功能限制我们只能将图像旋转 90 度的倍数。我们还可以通过定义列出旋转点、旋转度数和缩放因子的旋转矩阵来将图像旋转到任意角度。
示例: Python OpenCV 任意角度旋转图像
Python3
import cv2
import numpy as np

FILE_NAME = 'geeks.png'

# Read image from the disk.
img = cv2.imread(FILE_NAME)

# Shape of image in terms of pixels.
(rows, cols) = img.shape[:2]

# getRotationMatrix2D creates a matrix needed
# for transformation. We want matrix for rotation
# w.r.t center to 45 degree without scaling.
M = cv2.getRotationMatrix2D((cols / 2, rows / 2), 45, 1)
res = cv2.warpAffine(img, M, (cols, rows))

cv2.imshow("GeeksforGeeks", res)

cv2.waitKey(0)
cv2.destroyAllWindows()
输出:
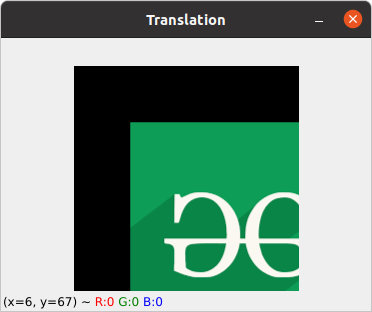
图像翻译
平移是指对象的直线移动,即图像从一个位置到另一个位置。如果我们知道水平和垂直方向的偏移量,比如 (tx, ty),那么我们可以制作一个变换矩阵。现在,我们可以使用 cv2.wrapAffine()函数来实现翻译。此函数需要一个 2×3 数组。 numpy 数组应该是浮点类型。
示例: Python OpenCV 图像翻译
Python3
import cv2
import numpy as np

image = cv2.imread('geeks.png')

# Store height and width of the image
height, width = image.shape[:2]

quarter_height, quarter_width = height / 4, width / 4

T = np.float32([[1, 0, quarter_width], [0, 1, quarter_height]])

# We use warpAffine to transform
# the image using the matrix, T
img_translation = cv2.warpAffine(image, T, (width, height))

cv2.imshow('Translation', img_translation)
cv2.waitKey(0)

cv2.destroyAllWindows()
输出:
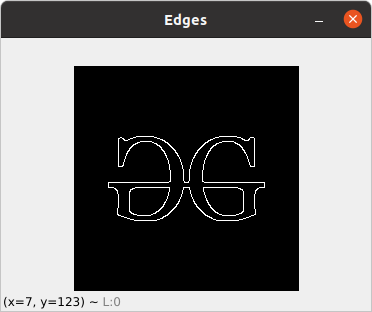
边缘检测
图像检测的过程包括检测图像中的锐利边缘。这种边缘检测在图像识别或对象定位/检测的上下文中是必不可少的。由于其广泛的适用性,有几种用于检测边缘的算法。我们将使用一种称为 Canny Edge Detection 的算法。
示例: Python OpenCV Canny 边缘检测
Python3
import cv2

FILE_NAME = 'geeks.png'

# Read image from disk.
img = cv2.imread(FILE_NAME)

# Canny edge detection.
edges = cv2.Canny(img, 100, 200)

# Write image back to disk.
cv2.imshow('Edges', edges)
cv2.waitKey(0)
cv2.destroyAllWindows()
输出:
有关Python OpenCV 的更多信息,请参阅我们的Python OpenCV 教程。