Pug是一个模板引擎。模板引擎用于消除我们的服务器代码与HTML的混乱情况,将字符串疯狂地连接到现有的HTML模板。 Pug是一个非常强大的模板引擎,具有多种功能,例如过滤器,包含,继承,插值等。在这方面有很多基础。
要将Pug与Koa一起使用,我们需要使用以下命令进行安装。
$ npm install --save pug koa-pug
一旦安装了pug,请将其设置为您的应用程序的模板引擎。将以下代码添加到您的app.js文件中。
var koa = require('koa');
var router = require('koa-router');
var app = koa();

var Pug = require('koa-pug');
var pug = new Pug({
   viewPath: './views',
   basedir: './views',
   app: app //Equivalent to app.use(pug)
});

var _ = router(); //Instantiate the router

app.use(_.routes()); //Use the routes defined using the router
app.listen(3000);
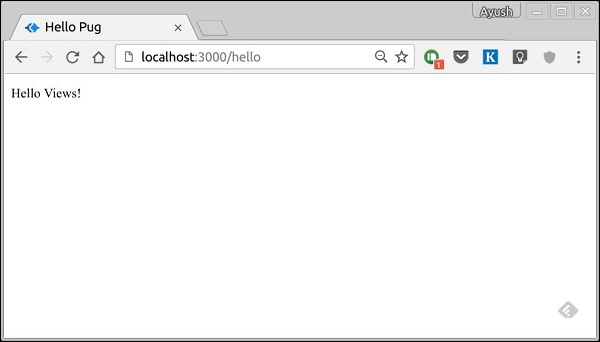
现在,创建一个名为views的新目录。在目录内,创建一个名为first_view.pug的文件,然后在其中输入以下数据。
doctype html
html
   head
      title = "Hello Pug"
   body
      p.greetings#people Hello Views!
要运行此页面,请将以下路线添加到您的应用。
_.get('/hello', getMessage); // Define routes

function *getMessage(){
   this.render('first_view');
};
您将收到的输出为-
Pug所做的是,它将这个非常简单的标记转换为html。我们不需要跟踪关闭标签,也不需要使用class和id关键字,而只需使用’。和“#”来定义它们。上面的代码首先被转换为
Pug除了简化HTML标记外,还可以做更多的事情。让我们探索Pug的一些功能。
简单标签
标签根据其缩进进行嵌套。像上面的示例一样, </b>在<b><head></b>标记内缩进,因此位于其中。但是, <b><body></b>标签在同一缩进上,因此它是<b><head></b>标签的同级。</p>
<p>我们不需要关闭标签。当Pug在相同或外部压痕级别上遇到下一个标签时,它将为我们关闭该标签。</p>
<p>有三种方法可以将文本放入标签中-</p>
<ul class="list">
<li>空格分隔-</li>
</ul>
<div class="hcb_wrap">
<pre class="prism line-numbers lang-java" data-lang="java"><code class="language-markup">h1 Welcome to Pug
</code></pre>
</div>
<ul class="list">
<li>管道文字-</li>
</ul>
<div class="hcb_wrap">
<pre class="prism line-numbers lang-java" data-lang="java"><code class="language-markup">div
| To insert multiline text,
| You can use the pipe operator.
</code></pre>
</div>
<ul class="list">
<li>文本块-</li>
</ul>
<div class="hcb_wrap">
<pre class="prism line-numbers lang-java" data-lang="java"><code class="language-markup">div.
But that gets tedious if you have a lot of text.
You can use "." at the end of tag to denote block of text.
To put tags inside this block, simply enter tag in a new line and
indent it accordingly.
</code></pre>
</div>
<h2>评论</h2>
<p>Pug使用与JavaScript(//)相同的语法来创建注释。这些注释将转换为html注释(<!-comment->)。例如,</p>
<div class="hcb_wrap">
<pre class="prism line-numbers lang-java" data-lang="java"><code class="language-markup">//This is a Pug comment
</code></pre>
</div>
<p>此评论转换为-</p>
<div class="hcb_wrap">
<pre class="prism line-numbers lang-java" data-lang="java"><code class="language-markup"><!--This is a Pug comment-->
</code></pre>
</div>
<h2>属性</h2>
<p>为了定义属性,我们在括号中使用逗号分隔的属性列表。类和ID属性具有特殊的表示形式。以下代码行涵盖了为给定html标记定义属性,类和ID。</p>
<div class="hcb_wrap">
<pre class="prism line-numbers lang-java" data-lang="java"><code class="language-markup">div.container.column.main#division(width = "100",height = "100")
</code></pre>
</div>
<p>这行代码转换为-</p>
<div class="hcb_wrap">
<pre class="prism line-numbers lang-java" data-lang="java"><code class="language-markup"><div class="container column main" id="division" width="100" height="100"></div>
</code></pre>
</div>
<h2>将值传递给模板</h2>
<p>渲染Pug模板时,实际上可以从路由处理程序中为其传递值,然后可以在模板中使用它。使用以下代码创建一个新的路由处理程序。</p>
<div class="hcb_wrap">
<pre class="prism line-numbers lang-java" data-lang="java"><code class="language-markup">var koa = require('koa');
var router = require('koa-router');
var app = koa();
var Pug = require('koa-pug');
var pug = new Pug({
viewPath: './views',
basedir: './views',
app: app // equals to pug.use(app) and app.use(pug.middleware)
});
var _ = router(); //Instantiate the router
_.get('//dynamic_view', dynamicMessage); // Define routes
function *dynamicMessage(){
this.render('dynamic', {
name: "TutorialsPoint",
url:"https://www.tutorialspoint.com"
});
};
app.use(_.routes()); //Use the routes defined using the router
app.listen(3000);
</code></pre>
</div>
<p>然后,使用以下代码在views目录中创建一个名为dynamic.pug的新视图文件。</p>
<div class="hcb_wrap">
<pre class="prism line-numbers lang-java" data-lang="java"><code class="language-markup">html
head
title = name
body
h1 = name
a(href = url) URL
</code></pre>
</div>
<p>在浏览器中打开<b>localhost:3000 / dynamic</b> ,然后应该是输出。 –</p>
<p><img alt="模板变量" class="img-fluid" src="https://mangdo-1254073825.cos.ap-chengdu.myqcloud.com//front_eng_imgs/programiz/368b624e53edd8d999f16c812b398040af044010a10ad9e5fea37b36_15.jpg"/></p>
<p>我们还可以在文本中使用这些传递的变量。为了在标签的文本之间插入传递的变量,我们使用#{variableName}语法。例如,在上面的示例中,如果要从TutorialsPoint插入Greetings,则必须使用以下代码。</p>
<div class="hcb_wrap">
<pre class="prism line-numbers lang-java" data-lang="java"><code class="language-markup">html
head
title = name
body
h1 Greetings from #{name}
a(href = url) URL
</code></pre>
</div>
<p>这种使用值的方法称为插值。</p>
<h2>有条件的</h2>
<p>我们也可以使用条件语句和循环结构。考虑这个实际示例,如果用户已登录,我们希望显示“ Hi,User”,否则,我们希望向他显示“ Login / Sign Up”链接。为此,我们可以定义一个简单的模板,例如-</p>
<div class="hcb_wrap">
<pre class="prism line-numbers lang-java" data-lang="java"><code class="language-markup">html
head
title Simple template
body
if(user)
h1 Hi, #{user.name}
else
a(href = "/sign_up") Sign Up
</code></pre>
</div>
<p>当我们使用我们的路线渲染它,并且如果我们传递一个像-</p>
<div class="hcb_wrap">
<pre class="prism line-numbers lang-java" data-lang="java"><code class="language-markup">this.render('/dynamic',{user:
{name: "Ayush", age: "20"}
});
</code></pre>
</div>
<p>它将显示一条消息,显示嗨,Ayush。但是,如果我们不传递任何对象或传递没有用户密钥的对象,那么我们将获得一个注册链接。</p>
<h2>包含和组件</h2>
<p>Pug提供了一种非常直观的方式来创建网页组件。例如,如果您看到新闻网站,则带有徽标和类别的标题始终是固定的。除了将其复制到每个视图之外,我们还可以使用一个include。以下示例显示了我们如何使用包含-</p>
<p>使用以下代码创建三个视图-</p>
<h3> header.pug</h3>
<div class="hcb_wrap">
<pre class="prism line-numbers lang-java" data-lang="java"><code class="language-markup">div.header.
I'm the header for this website.
</code></pre>
</div>
<h3>content.pug</h3>
<div class="hcb_wrap">
<pre class="prism line-numbers lang-java" data-lang="java"><code class="language-markup">html
head
title Simple template
body
include ./header.pug
h3 I'm the main content
include ./footer.pug
</code></pre>
</div>
<h3>页脚</h3>
<div class="hcb_wrap">
<pre class="prism line-numbers lang-java" data-lang="java"><code class="language-markup">div.footer.
I'm the footer for this website.
</code></pre>
</div>
<p>为此创建一条路由,如下所示。</p>
<div class="hcb_wrap">
<pre class="prism line-numbers lang-java" data-lang="java"><code class="language-markup">var koa = require('koa');
var router = require('koa-router');
var app = koa();
var Pug = require('koa-pug');
var pug = new Pug({
viewPath: './views',
basedir: './views',
app: app //Equivalent to app.use(pug)
});
var _ = router(); //Instantiate the router
_.get('/components', getComponents);
function *getComponents(){
this.render('content.pug');
}
app.use(_.routes()); //Use the routes defined using the router
app.listen(3000);
</code></pre>
</div>
<p>转到<b>localhost:3000 / components</b> ,您应该获得以下输出。</p>
<p><img alt="模板组件" class="img-fluid" src="https://mangdo-1254073825.cos.ap-chengdu.myqcloud.com//front_eng_imgs/programiz/368b624e53edd8d999f16c812b398040af044010a10ad9e5fea37b36_16.jpg"/></p>
<p> <b><i>include</i></b>也可以用来包含纯文本,CSS和JavaScript。</p>
<p>哈巴狗还有许多其他功能。但是,这些超出了本教程的范围。您可以在<a href="http://jade-lang.com" rel="nofollow noopener noreferrer" target="_blank">Pug</a>进一步探索<a href="http://jade-lang.com" rel="nofollow noopener noreferrer" target="_blank">Pug</a> 。</p>
</div>
</div>
</div>
</div>
</div>
</div>
<footer>
<div class="bg-white text-center pb-1">
<p class="text-body-tertiary pt-3 lh-lg text-opacity-50" id="footer-text">Copyright © 2020 - 2024 版权所有
<br>
<a href="https://beian.miit.gov.cn/" target="_blank"
class="text-opacity-50 text-body-tertiary mt-1 mb-1">蜀ICP备20006366号-1</a>
<br>
Made with ❤️ in Chengdu
</p>
</div>
</footer>
<!-- 引入Bootstrap JavaScript库 -->
<script src="https://unpkg.com/bootstrap@5.3.0-alpha1/dist/js/bootstrap.bundle.min.js"
crossorigin="anonymous"></script>
<!-- 引入Meilisearch搜索相关的JavaScript库 -->
<script
src="https://cdn.jsdelivr.net/npm/@meilisearch/instant-meilisearch/dist/instant-meilisearch.umd.min.js"></script>
<script src="https://cdn.jsdelivr.net/npm/instantsearch.js@4"></script>
<script src="https://www.imangodoc.com/static/javascript/meili_custom.js"></script>
<!-- 引入prismjs代码高亮相关的JavaScript库 -->
<script src="https://cdn.jsdelivr.net/npm/prismjs@1.29.0/components/prism-core.min.js"></script>
<script src="https://cdn.jsdelivr.net/npm/prismjs@1.29.0/plugins/toolbar/prism-toolbar.min.js"></script>
<script src="https://cdn.jsdelivr.net/npm/prismjs@1.29.0/plugins/autoloader/prism-autoloader.min.js"></script>
<script
src="https://cdn.jsdelivr.net/npm/prismjs@1.29.0/plugins/copy-to-clipboard/prism-copy-to-clipboard.min.js"></script>
</body>
</html>