📅 最后修改于: 2020-10-16 07:08:14 🧑 作者: Mango
模块是具有自己的模型,视图,控制器以及可能的其他模块的实体。实际上,它是应用程序内部的一个应用程序。
步骤1-在项目根目录内创建一个名为模块的文件夹。在modules文件夹内,创建一个名为hello的文件夹。这将是我们的Hello模块的基本文件夹。
步骤2-在hello文件夹中,使用以下代码创建文件Hello.php 。
我们刚刚创建了一个模块类。它应该位于模块的基本路径下。每次访问模块时,都会创建对应的模块类的实例。 init()函数用于初始化模块的属性。
步骤3-现在,在hello文件夹中添加另外两个目录-控制器和视图。将CustomController.php文件添加到控制器的文件夹中。
render('greet');
      }
   }
?>
创建模块时,惯例是将控制器类放入模块基本路径的控制器目录中。我们刚刚定义了actionGreet函数,该函数只返回一个问候视图。
模块中的视图应放在模块基本路径的views文件夹中。如果视图是由控制器呈现的,则它们应位于与controllerID对应的文件夹中。将自定义文件夹添加到views文件夹。
步骤4-在自定义目录中,使用以下代码创建一个名为greet.php的文件。
Hello world from custom module!
我们刚刚为actionGreet创建了一个View 。要使用这个新创建的模块,我们应该配置应用程序。我们应该将模块添加到应用程序的modules属性。
第5步-修改config / web.php文件。
 'basic',
      'basePath' => dirname(__DIR__),
      'bootstrap' => ['log'],
      'components' => [
         'request' => [
            // !!! insert a secret key in the following (if it is empty) - this is
               //required by cookie validation
            'cookieValidationKey' => 'ymoaYrebZHa8gURuolioHGlK8fLXCKjO',
         ],
         'cache' => [
            'class' => 'yii\caching\FileCache',
         ],
         'user' => [
            'identityClass' => 'app\models\User',
            'enableAutoLogin' => true,
         ],
         'errorHandler' => [
            'errorAction' => 'site/error',
         ],
         'mailer' => [
            'class' => 'yii\swiftmailer\Mailer',
            // send all mails to a file by default. You have to set
            // 'useFileTransport' to false and configure a transport
            // for the mailer to send real emails.
            'useFileTransport' => true,
         ],
         'log' => [
            'traceLevel' => YII_DEBUG ? 3 : 0,
            'targets' => [
               [
                  'class' => 'yii\log\FileTarget',
                  'levels' => ['error', 'warning'],
               ],
            ],
         ],
         'db' => require(__DIR__ . '/db.php'),
      ],
      'modules' => [
         'hello' => [
            'class' => 'app\modules\hello\Hello',
         ],
      ],
      'params' => $params,
   ];
   if (YII_ENV_DEV) {
      // configuration adjustments for 'dev' environment
      $config['bootstrap'][] = 'debug';
      $config['modules']['debug'] = [
         'class' => 'yii\debug\Module',
      ];
      $config['bootstrap'][] = 'gii';
      $config['modules']['gii'] = [
         'class' => 'yii\gii\Module',
      ];
   }
   return $config;
?>
模块控制器的路由必须以模块ID开头,后跟控制器ID和操作ID。
步骤6-要在我们的应用程序中运行actionGreet ,我们应使用以下路由。
hello/custom/greet
其中hello是模块ID,custom是控制器ID ,greet是操作ID 。
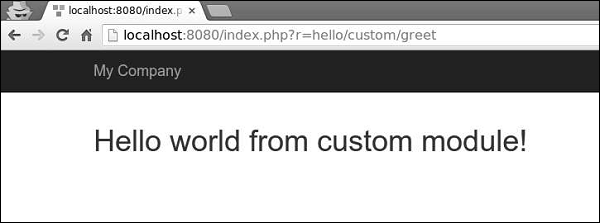
步骤7-现在,键入http:// localhost:8080 / index.php?r = hello / custom / greet ,您将看到以下输出。
重要事项
模块应该-
-
可用于大型应用。您应该将其功能分为几个组。每个功能组都可以开发为一个模块。
-
可重用。可以将一些常用功能(例如SEO管理或博客管理)开发为模块,以便您可以轻松地在将来的项目中重用它们。